An Apple a Day…

 “An apple a day keeps the doctor away”.  Believe it or not the Welsh first came up with this well known saying in 1866. I’ve decided to check this saying out…is it true?

If apples are so good for you then why not enjoy a terrifically good apple pudding too?
” Pudding is important for our wellbeing, our soul. You see, pudding is not a treat but a necessity. It is there to heal and comfort, to cosset and hug. Pudding is not food, it is medicine”. 


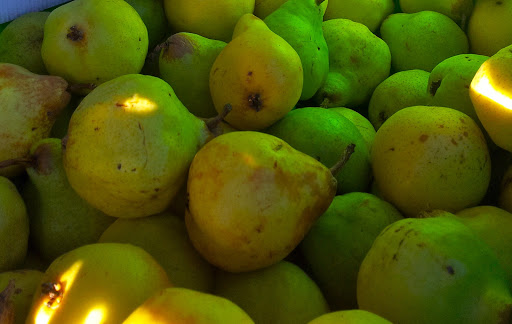
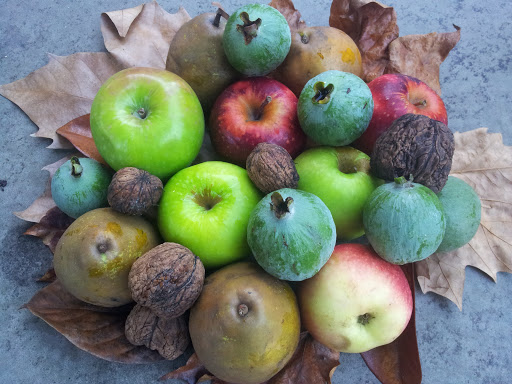
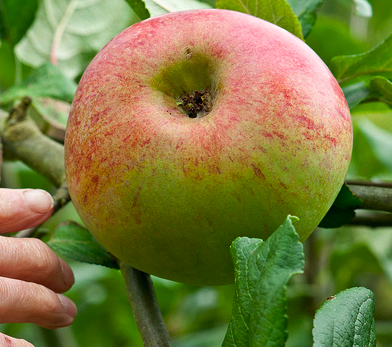
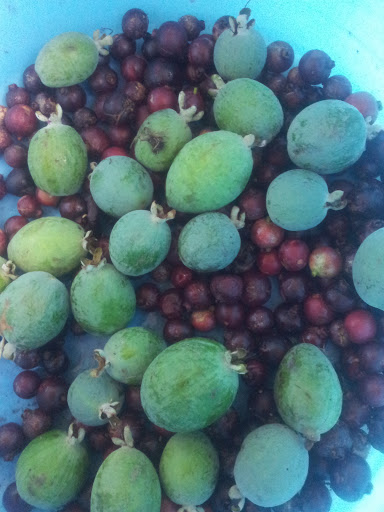
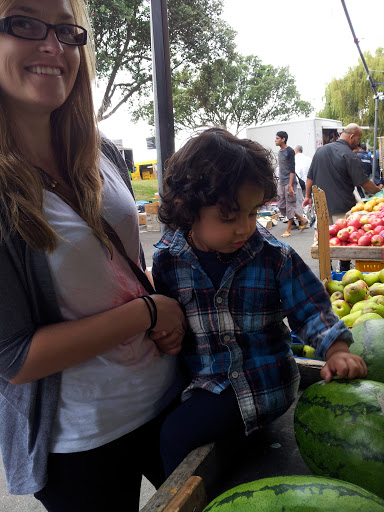
Beau loves apples and dinosaurs.  These Pigeonette apples are from 
Auckland’s Parnell French Market where I have found several unusual apple varieties.

Pigeonette apples originated in France in 1755 and are delicious. They have dense flesh and are not quite as sharp as a Granny Smith.  The Pigeonette is a little more like the Sturmer Pippin.  Beau our “apple eater” certainly approves of them. I used these apples to make a delicious pudding.
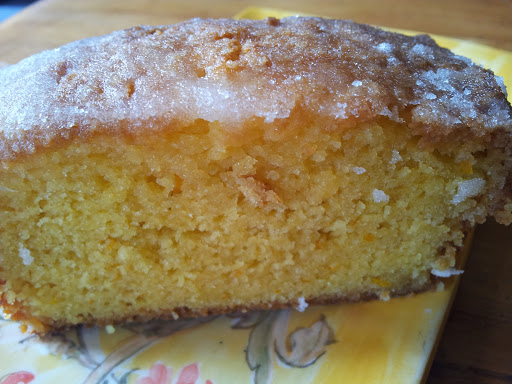
Eve’s Pudding

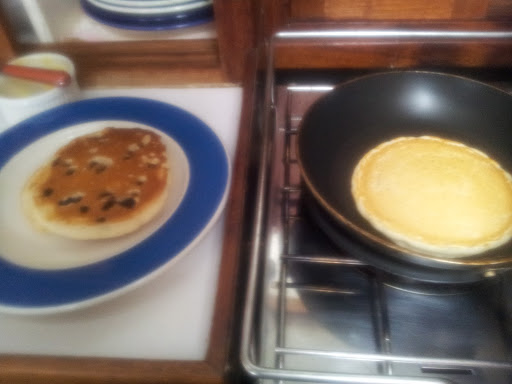
Eve’s Pudding comes from England, the land of comforting puddings.  It’s so called because it’s a pudding that Eve would find difficult to resist.  It’s a perfect marriage between a Victoria sponge and lots of apple.   The cake mix and the apple cook together – no pre-cooking of the apple is required.

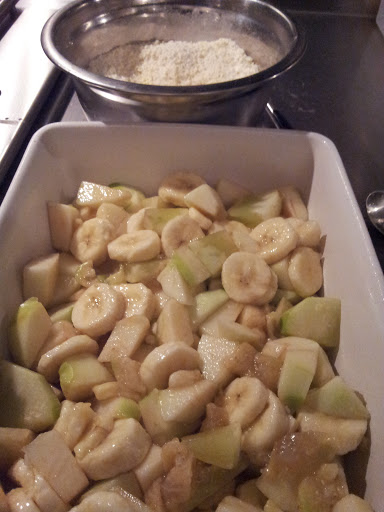
In this version of an Eve’s Pudding
 I decided not to peel the apples.

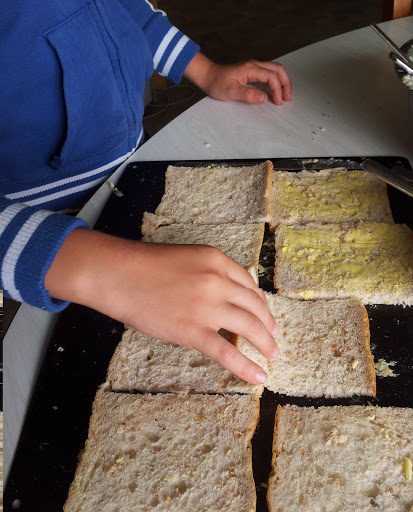
I hear Beau call, “Can I help?”  He loves to pull a chair up to help with the cooking.

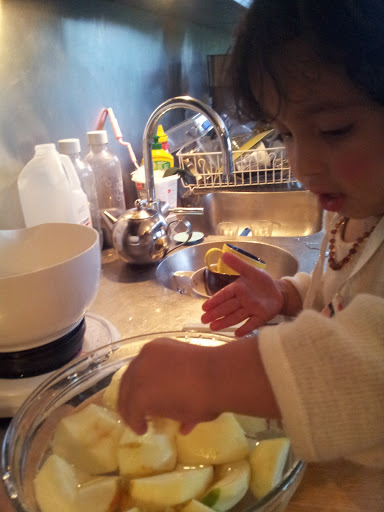
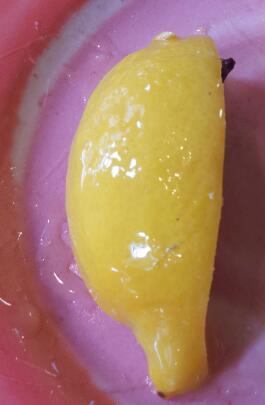
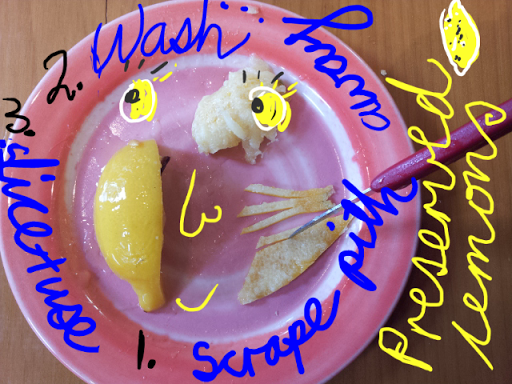
Beau is squeezing lemon juice into the bowl of water
to stop the apples turning brown while we prepare the cake

It’s not a difficult pudding to make but it does help and save you time if you have a cake mixer.

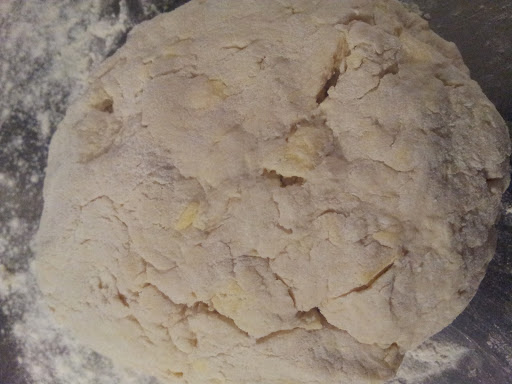
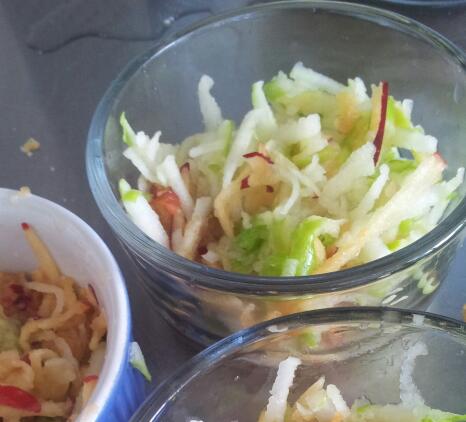
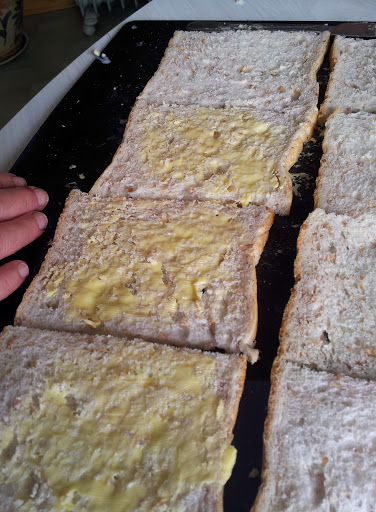
First of all slice up the apples – here I peeled them (for a reason you will see later). Also try the recipe not peeling the apples.  Like many fruits and vegetables the skin contains the most goodness, but you have to make sure the apples are not waxed. Definitely peel them if they are.

For a big family sized Eve’s Pudding to serve around 8 you will need 6-8 apples and will need to double the cake recipe below. You can create an apple mix using different varieties.  I usually chop up enough apples to half fill the baking dish and this recipe will use 3-4 apples, all depends on the size of apples.

Beau hates the noise our old Kenwood makes while
creaming the butter and sugar so sensibly insists on wearing
earmuffs.

For the cake topping:
100g of butter
100g of caster sugar
100g of self raising flour
 2 large eggs
1 tsp Vanilla essence

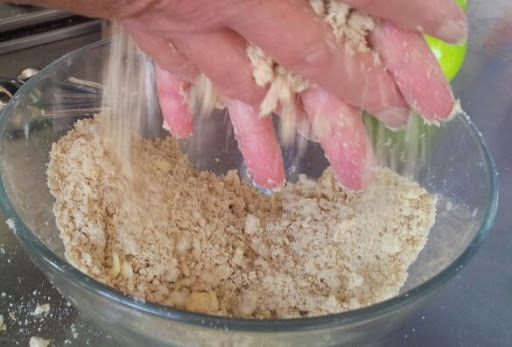
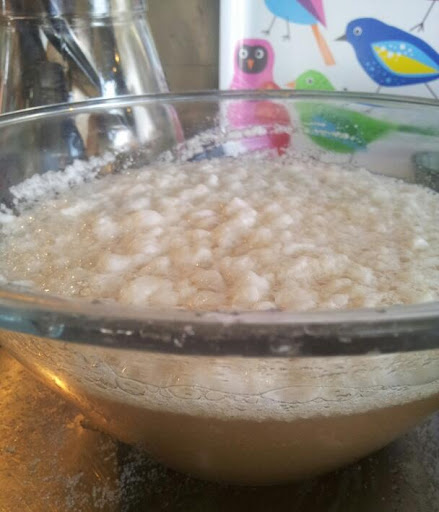
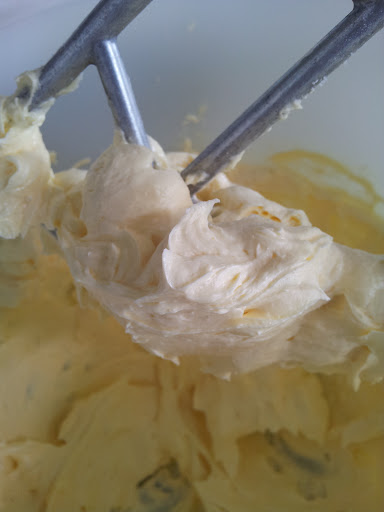
The secret to a good sponge cake is to beat the butter and sugar until pale and fluffy. You can do this by hand but a cake mixer makes the job a whole lot easier.

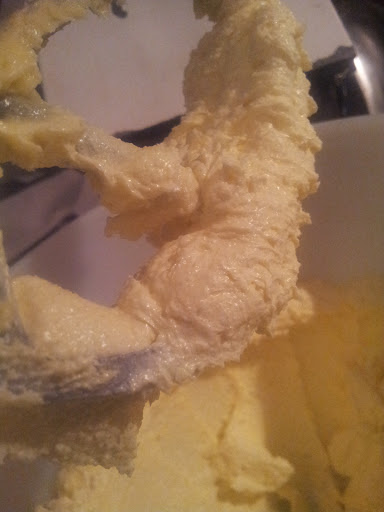
You want to make sure all the sugar has been dissolved
into the butter – this whipping gives the cake air

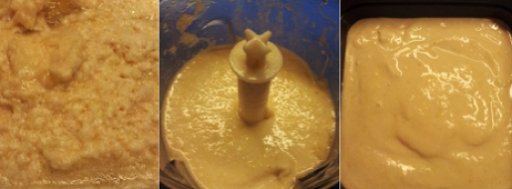
Next add the eggs one at a time, beating after each addition.   If it looks like the mix will curdle don’t worry once you add the flour it will even out.   You can also add a tbsp of flour after each egg and this often stops the curdling, as does using eggs at room temperature.   Once you have beaten in the eggs, add the sifted flour.  Fold in until the flour is just mixed.  Don’t stir if you want to keep the cake light.

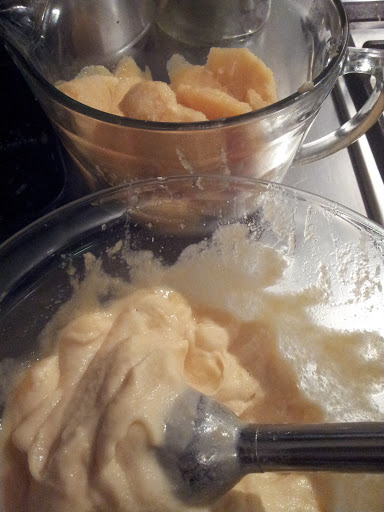
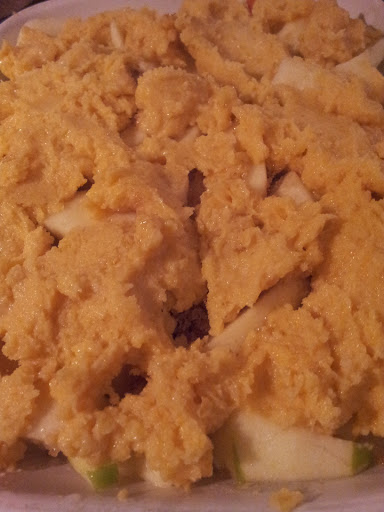
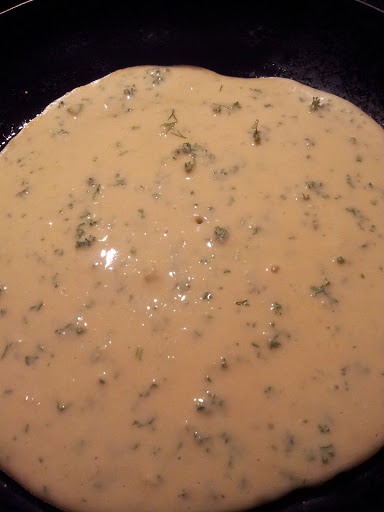
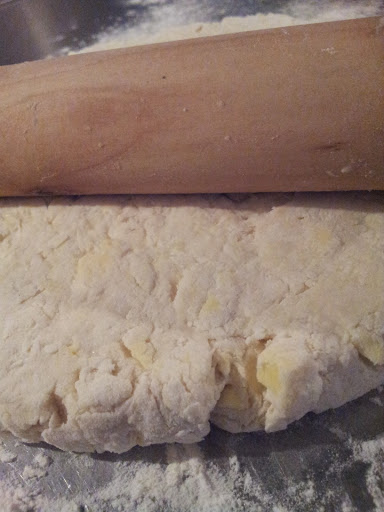
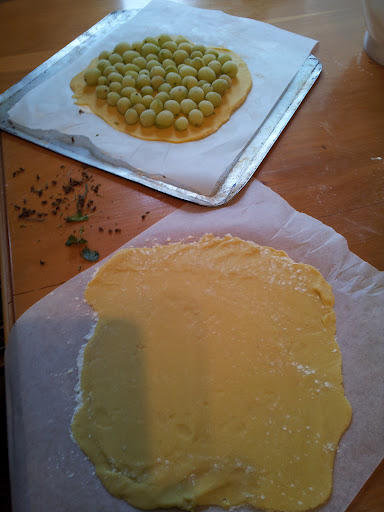
I thought I may have chosen too large a dish as the mix
didn’t completely cover the apples – but as it rises, it covers the fruit.

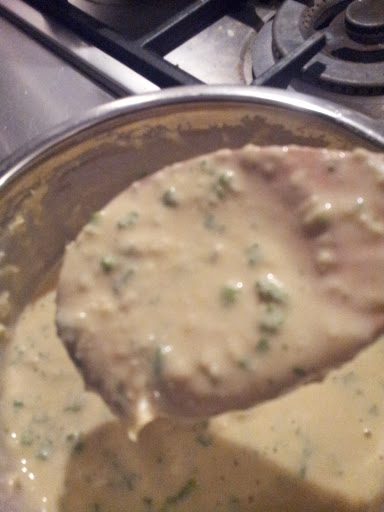
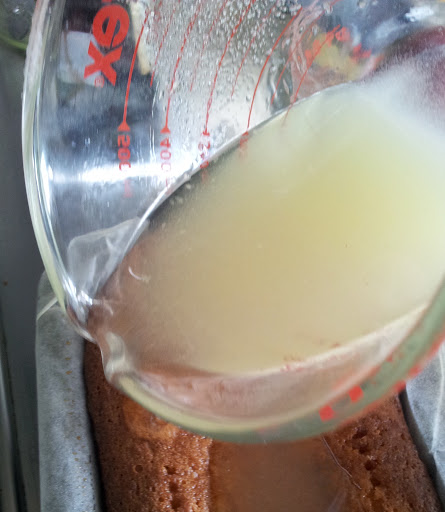
Now spread out the apples in your chosen baking dish.   If using cooking apples, you could sprinkle a couple of tbsp of brown sugar and about 1/4 cup of water over the fruit .   I decided to use a cup of apple stock (mentioned below) instead to ensure the apples would remain juicy.  If you think the mix is a little too thick to spread then add 1 spoon of boiling water and fold through the cake mix- this will soften the mix and allow it to spread more easily.

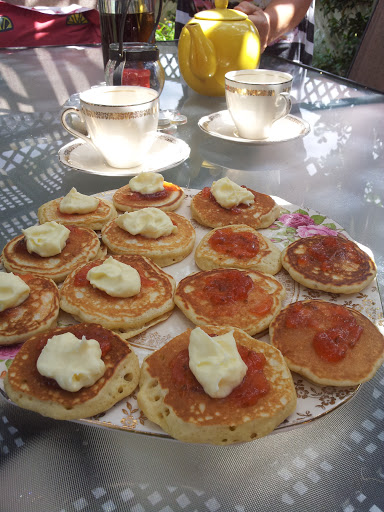
Cook in an oven for 25-35 minutes at 180C.

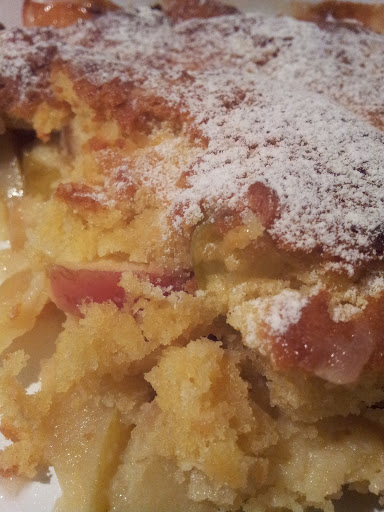
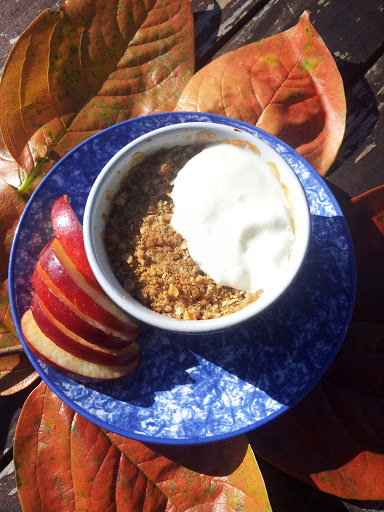
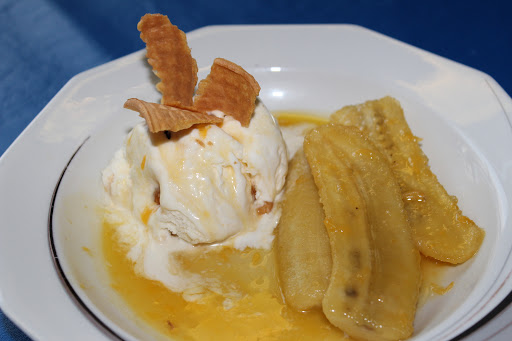
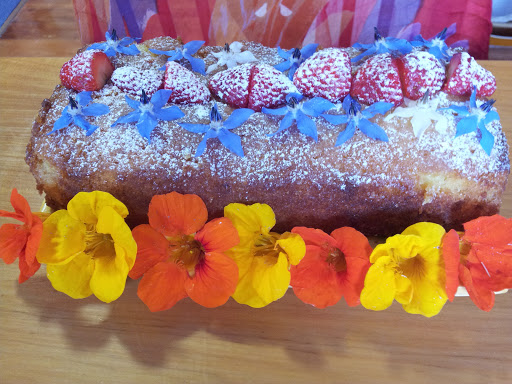
Dust with icing sugar and serve with cream or ice cream.
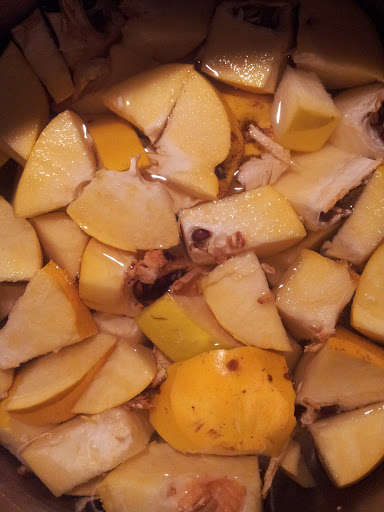
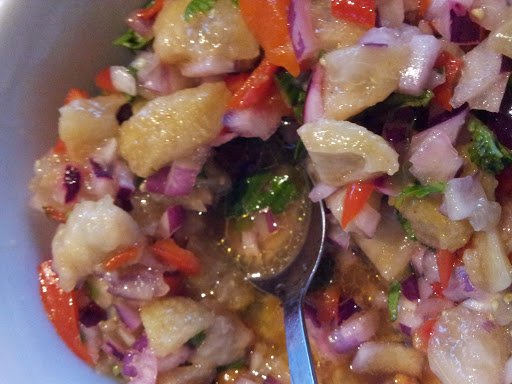
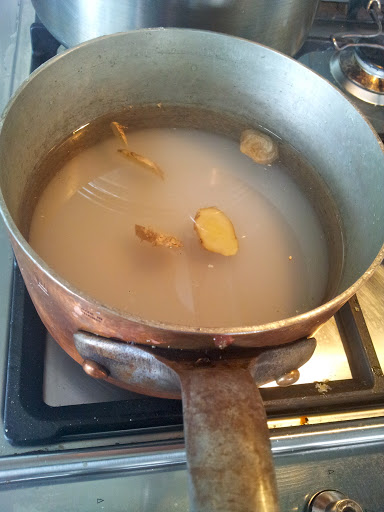
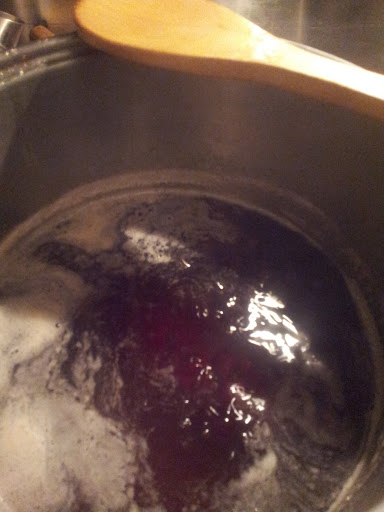
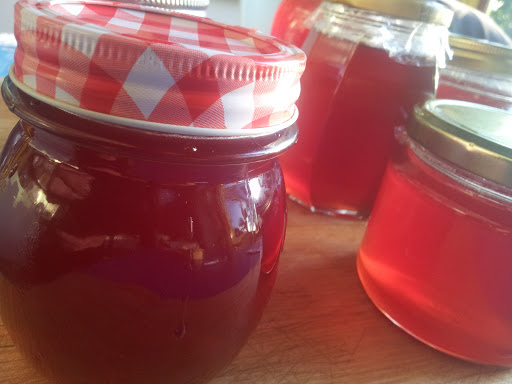
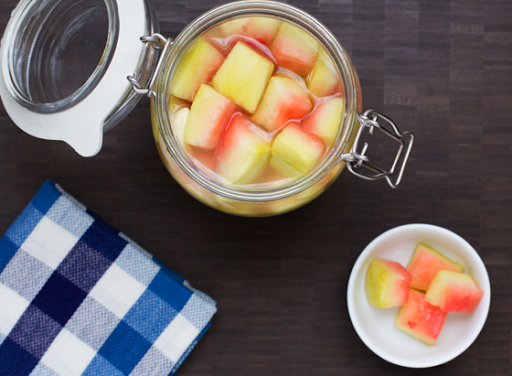
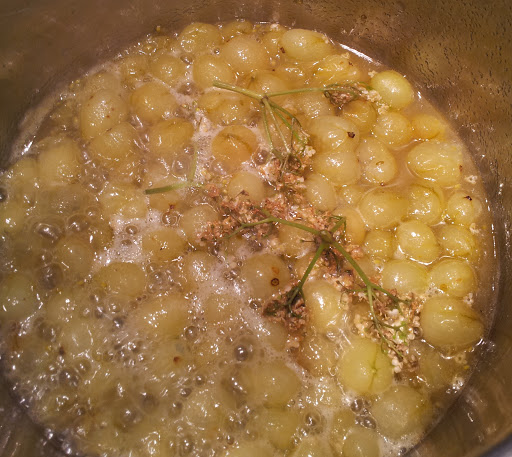
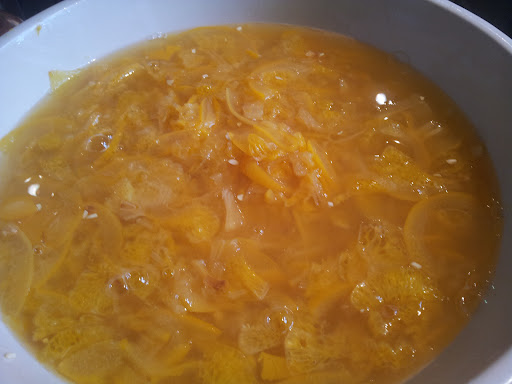
Apple Stock

My chef son Gus let me into the secret of making apple stock from the peelings and cores of apples.  Just boil them up with a little added sugar to preserve the liquid.  He uses the stock to cover prepared cooked apple that can be quickly used for apple desserts.  The stock helps apples to keep for longer.  
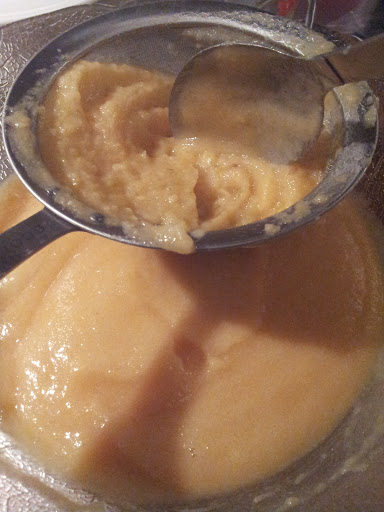
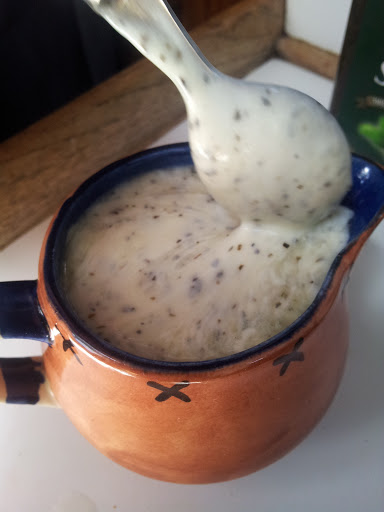
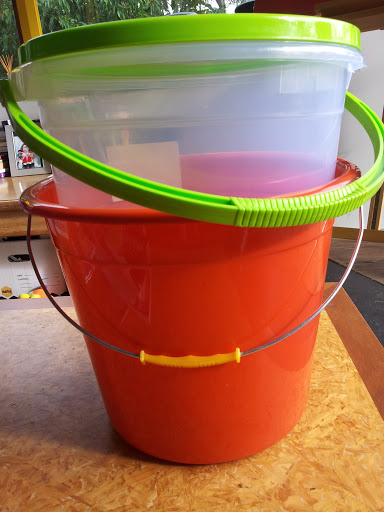
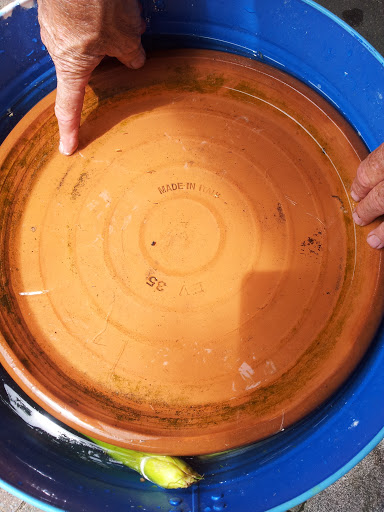
For this stock I also added a little lemon peel and a
couple of tablespoons of sugar
I like to avoid waste in the kitchen and after reading about the goodies in apple peel, I have found other uses for apple stock in the kitchen.
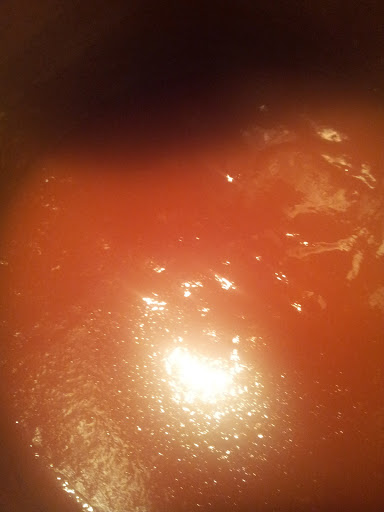
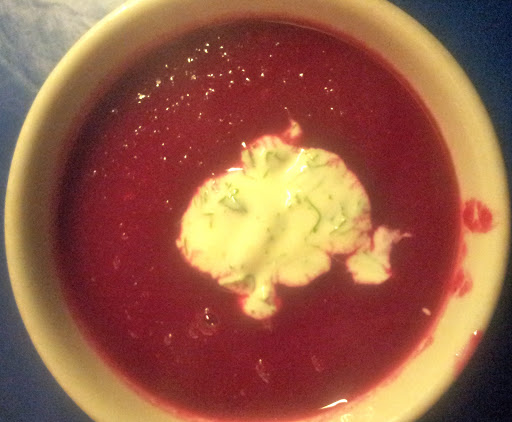
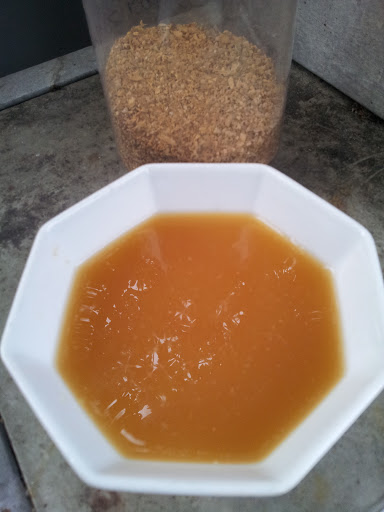
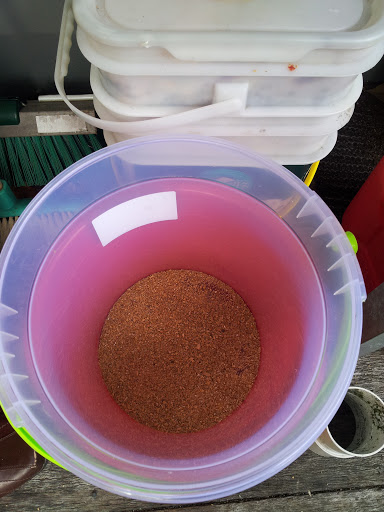
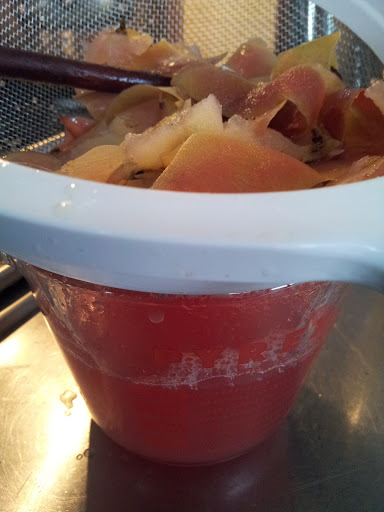
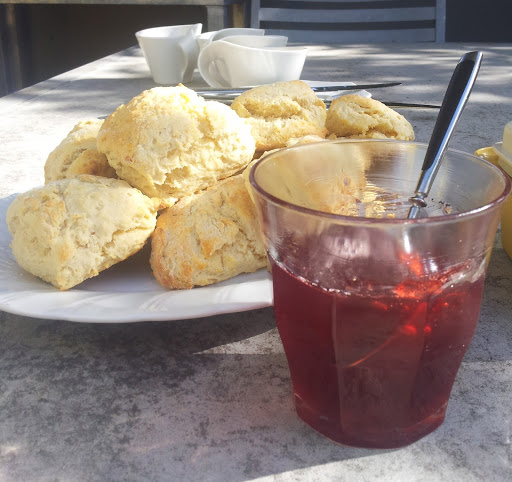
This apple stock has been coloured pink by the addition
of a cinnamon stick I was cooking with blackcurrants
I use it as a base to cook another batch of apple – an apple compote if you want to give it a flash name.    I also have soaked porridge oats overnight in the stock to either cook up as porridge or as the key ingredient in oat pancakes.

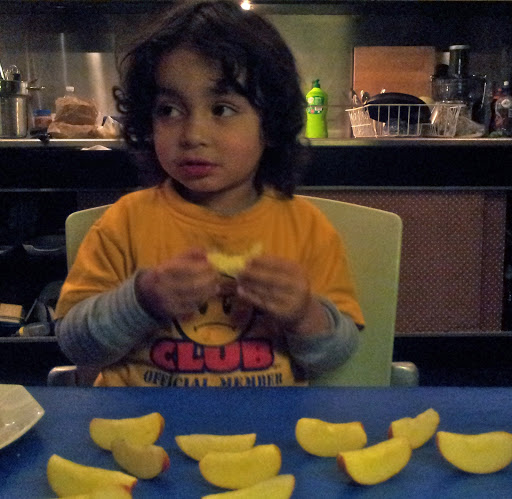
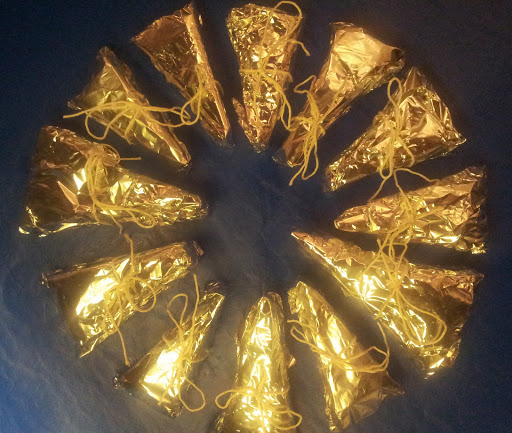
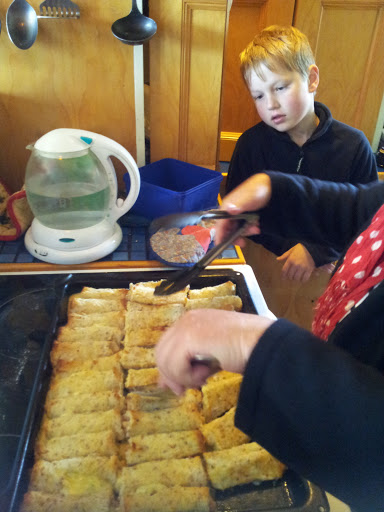
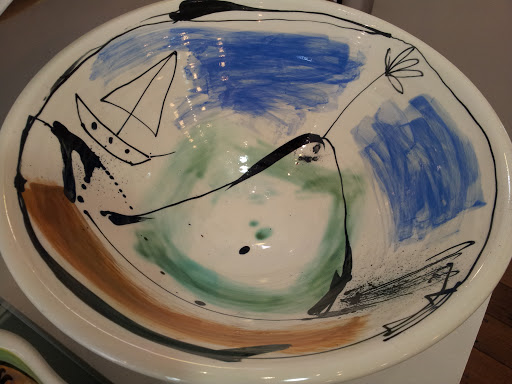
Peter has made eating an apple fun by making a flotilla of apple boats –
Beau thinks it’s good fun eating up the boats.

Beau isn’t too keen on Eve’s pudding.  He prefers his apples raw. I am really pleased because that way, he receives maximum goodness from the apple.

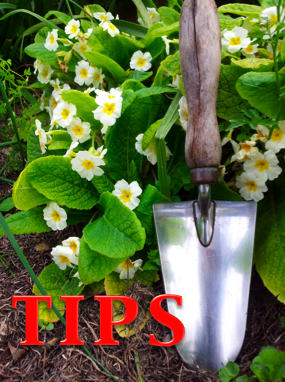
Twelve good reasons to eat an apple a day:

1.  The apple’s abundance of pectin is an aid in reducing high cholesterol as well as blood sugar.  It’s a wonder food for people with coronary artery disease and diabetes. Pectin is a type of soluble fiber that works to maintain a healthy digestive system.  (The apple stock would be a good source of pectin.)

2.  A nutrient in apples called boron can promote bone strength and brain health.
3.  You must chew an apple and since chewing takes time, your body can register that is it full, without the need to fill up on empty calories.  It’s natural sweeteners enter the bloodstream gradually, ensuring your blood sugar and insulin levels remain constant and steady. You feel full for longer.  

4.  Apples enhance memory and keep your brain sharp by boosting levels of acetylcholine, a chemical that transmits messages between nerve cells. An animal study conducted at University of Massachusetts at Lowell, suggests an apple a day can lessen the odds of being stricken with Alzheimer’s disease

5.  Children whose mothers consumed an apple or more a day while pregnant were less likely to develop asthma or wheeze by the age of five years according to a study conducted in the UK

6.  Steamed apples sweetened with honey are beneficial for a dry cough and may help to remove mucous from the lungs


7. The flavonoid quercetin present in apples has the potential to prevent many different types of cancer, ranging from breast cancer to lung cancer

8. Because of their high water content, apples are cooling and moistening and aid in reducing fever. Simply grate them and serve them to feverish patients.

9. Easy on the digestion, apples contain malic and tartaric acids that inhibit fermentation in the intestines.

10.  Malic acid (the acid that makes an apple tart or sour) will cleanse the mouth of bacteria and the mouthwash and toothpaste industry use this acid in their products for that very reason.   

11. Apples contain polyphenols, powerful antioxidants that reduce artery clogging plague. However, the key is in the peel. Apple peel contains two to six times the polyphenols as the flesh.

12. The vitamin C in apples assists in protecting the immune system, and make your body more resistant to a variety of diseases. It’s also effective in preventing skin wrinkling…now that’s an incentive!

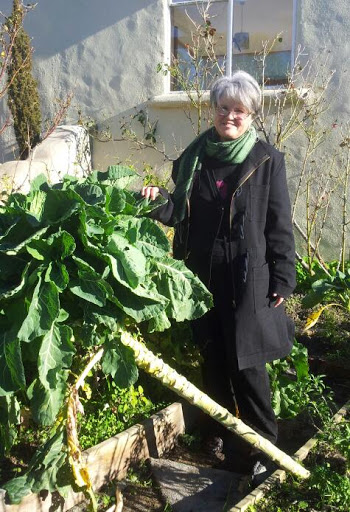
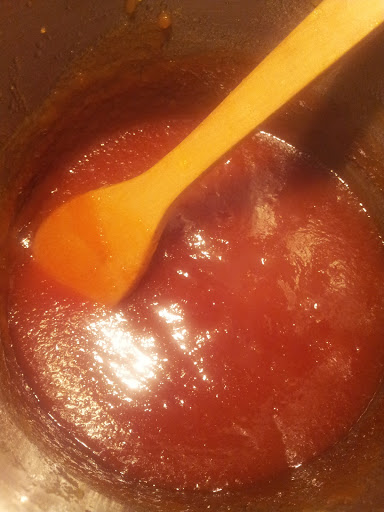
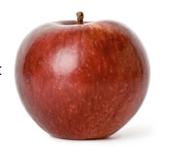
Marilyn and the Cox’s Orange . The Cox’s Orange is both tart and sweet and an
old fashioned favourite.  Using the skin to make stock
gave me a beautiful pale pink liquid.
Eating an apple a day in winter is a pleasure, but later in the year when they are not so crunchy then grate them into your cereal or cook them and keep them in the apple stock in the fridge.   The apple is one fruit that does need to be kept chilled or it will mush up very quickly.

To find out what else you can do with apples revisit my posting “Southern Apple Meets Northland Quince”.

Apples are just one of the every day available foods that make up Nature’s medicine chest.
A longer version of the wise Welsh saying is:  “Eat an apple upon going to bed, and you’ll keep the doctor from earning his bread”.  
So what do you say…are you keen to try it?  We have been greatly encouraged to eat apples ourselves  by the youngest member of the household, 3 year old Beau.

Southern Flavours: Smoked Sausage, Oysters and Coffee Liqueur

“Lovely flavours” our friend Ken would exclaim.  I’m sure Ken doesn’t realise that his compliments to the cook has encouraged me to seek, understand and experiment with flavours.

Returning to Dunedin last weekend I was looking forward to some good southern hospitality and an opportunity to bring a taste of the south back to Auckland.

Havoc Pork from South Canterbury has been raised
free range with a healthy diet of locally grown grain and added
goodies such as garlic and cider vinegar to keep the pigs happy and healthy.

A visit to the Otago Farmer’s Market on Saturday gave me just too many choices. This market is one of the best in the country not only for the range of produce on sale but for the southern warmth and openess of the stall holders. I enjoy taking time to talk to those growing or making the products because it’s an opportunity to learn something new.

I had to be sensible. I couldn’t take my usual market haul back home on the plane but the Southern Sausage from Havoc Pork was a “must have”.  This delicious spicy smoked sausage is more like a salami than a sausage. I have been known to allow it to take part in four different meals so it’s really good value for money.

This hard necked garlic is grown by Wairuna Organics and travel up to
Dunedin from South Otago (nearly in Southland)

“Hard necked garlic” is reputed to be the original garlic.  Through the process of selection the thick stem was replaced with the more popular soft stem variety that can be plaited and better suited to warmer climates. Wairuna Organics say this garlic has a stronger flavour than other varieties.  It has fewer but larger and more even sized cloves. I am keen to try growing it up in Auckland to see how it dries up here where humidity reins.

I am always on the lookout for a different variety of apple or pear to try.  My favourite organic fruit supplier will take the time to talk flavours of the fruit he sells.  He told us that the above pears were grown on pear stock and that most pears are grown on quince stock.  Why?  Because pears take longer to grow than a quince… so I couldn’t resist a small bag of what he calls Choral Pears.

I regret that I did not bring back a swede.  It would have been guaranteed a southern frost to make it sweet. I feared the swede may have tipped the scales at Air New Zealand so alas it didn’t come north.

Cabbage Galette with Southern Sausage

Market Chef, Alison Lambert, demonstrates how to create delicious, no fuss ways of using the produce at the market.  Alison has amazing energy and passion about regional and fresh food. I managed to have a brief exchange with her and sampled a delicious way of using cabbage in a novel way – inside a galette.

Galette is a French word that means “a flat freeform crusty cake” 

The crust is made by a batter similar to a Yorkshire pudding.  It has all the comfort of a pie, with less effort and no butter or oil – just a little cheese.  I took Alison’s recipe and added my own touches to the filling to show how easy it is to use whatever you have in your fridge.  If you want to see the original recipe go the Otago Farmers Market website.

To achieve the best results you really need a caste iron pan that can go into a hot oven. I don’t have my  iron pans up here but I do have an excellent thick steel pan about 23cm so I slightly modified the recipe to deal with this. You can use ceramic or metal dishes but to get an excellent crust you really need the heat retention that caste iron delivers.

First of all turn on the oven to 180 to 200C and place your pan in the oven to heat up. Then start preparing the greens. I saute or sweat an onion and/or a leek until soft but don’t allow to colour.

Add sliced up cabbage, kale, brussel sprouts, silverbeet or any other green vegetable like broccoli or beans. I added a fennel bulb from my garden and I used some of the feathery greenery as added flavouring.  I had half a dozen small mushrooms left over and I could have added some celery. I found some fresh tumeric the other day so grated about a teaspoon of tumeric into the cabbage mix which adds colour and its unique health properties.  You need 4-5 cups of cooked greens and Alison suggests 400-500g of savoy cabbage.  Cook until softened.  This only takes a couple of minutes.  Season with salt and pepper to taste.

You can enjoy this as a vegetarian dish but I took the opportunity to add some of my Havoc Southern Sausage.  Alternatively add some curd cheese (sold at the market by Evansdale Cheese) or feta cheese.

Now its time to prepare the batter. Beat 3 eggs, add 300 ml of milk and 2 cups of plain flour.
Beat until smooth.  Add a generous handful of chopped parsley,  3 cloves of garlic finely chopped and 50g of grated cheddar or parmesan cheese.  Salt and pepper to taste.

If the mix is too thick add a little more milk.  It needs to be
the consistency of pancakes – thin enough to spread but thick enough
to stick to the cabbage.

Take out your very hot pan, spray with oil and pour half the mix to cover the base of the pan.  The steel pan I was using would quickly lose heat so I placed the pan on a low gas flame while preparing the galette.

See the small bubbles appearing like it does for a pancake.

Pile the cabbage filling on top of the batter base and then pour over the other half of the batter to cover the cabbage.  

This stage looks most unattractive but magic happens over the next 30 minutes.

Return to the hot oven for about 30 minutes or until the surface is firm and a golden brown.

I served this simply with halved beefsteak tomatoes baked in the oven with a drizzle of olive oil and seasoned with salt and pepper.  They are perfect flavour companions.

Talking of cabbage… Peta who is looking after our garden at Broad Bay asked me what this giant brassica was. I had no idea where it came from. It could be a cross between a cabbage and a brussel sprout from the neighbours.  She is keen to let it flower and gather the seeds as it would be a great forage plant for her hens.

This rogue cabbage would be nearly my height – if it wasn’t on a
lean from  recent storms..it  tastes just like green cabbage.

While a lot of the trees in Dunedin at midwinter are bare, my sister Kerry adds a little culinary colour to brighten her small trees in pots.

I was lucky enough to spend a couple of nights with Kerry.  We decided dinner had to be simple as we didn’t want to waste any talking time.  She had a good selection of winter vegies in the fridge and some lamb chops from our brother’s farm in Southland.  We decided on oven roasted vegetables and grilled lamb.

The enamel baking dish was our Mum’s and
these enamel dishes are once again trendy. It’s best
to find one of these old originals as they are twice the weight of
the new ones (but avoid enamel that is chipped)

I put the enamel baking dish into a hot oven 180-200 to heat while I cut up potatoes in wedges, a parsnip cut in finger sized batons as it would take the longest to cook, an onion cut into wedges, and a wedge of pumpkin cut into chunks.  The prepared vegetables went into a bowl and mixed through by hand with a slurp of oil, salt, pepper and some rosemary (about 2 tsp) chopped up to release the oils.  I then spread out the vegetables onto the sizzling hot oven dish and put back in the oven as quickly as possible.   Heating the dish allows the vegetables to cook quickly and ensures the potatoes have a crispy skin.  Oiling the food rather than the dish avoids the oil burning. Cook for 20-30 minutes.  Kerry gave our vegies an Italian touch by adding halved tomatoes and olives in the last 10 minutes and sprinkling chopped basil before they were brought to the table.

The lamb chops were put under the grill at a high temperature and turned over as soon as they browned.  This allows them to remain pink in the middle but crispy brown on the outside.
Simple but oh so delicious!

 We travelled to Dunedin for two launch events of Peter and Rod’s book “An Extraordinary Land”  The first event took place in Portobello Hall where the classic giant teapots were put into action for  supper.

I roped our niece Lauren and friend Alan to help
with serving the tea

It’s difficult to get the tea just right in such massive teapots.  Too few or too many tea bags can mean the difference between a good cup of tea and an unsatisfactory one.  I just couldn’t resist this photo opportunity.

It’s not often you see the males of our family taking over the kitchen, except when there is the promise of Bluff oysters.  I loved that moment of concentration I caught on camera.

Far Right: My brother Jamie dipping the oysters in egg and then breadcrumbs, Centre nephew Nick was
put in charge of cooking them, and Peter stepped up to make sure he wasn’t overcooking them

Perfectly “just” cooked oysters served with a squeese of lemon juice

Bluff oysters must be the ultimate and perhaps best known flavour of the south.

A new flavour has appeared at the Farmer’s market though.  Creator of Quick Brown Fox, Arjun Haszard, can be found there most Saturday’s giving out taste samples of his Coffee Liqueurs. It’s the most devine tipple for those of us who love coffee and cinnamon…even at 10 in the morning!  We admired the artwork on the bottles and Arjun told us he opted to employ an artist rather than a graphic designer to do his labels. 

I first heard about Quick Brown Fox and Arjun through a video made as part of Insiders Dunedin.  It’s a beautifully crafted short film that will show you Arjun at work and talking about how he likes to do business.  

Arjun has set me a challenge – to come up with a recipe using QBF.  If he likes it he will add it to his blog. So armed with my latest favourite book “The Flavour Thesaurus” by Niki Segnit, I am going to create something special using local foods to complement that deep rich coffee and cinnamon flavour.

And while experimenting I will be thinking “What would Ken think of this flavour?.  I hope you too have had a Ken in your life encouraging you to be creative with food.

The Otago Peninsula and How to Make the Perfect Scone

It’s been a very special week at our house with Peter and our friend Rod Morris launching their book “An Extraordinary Land”.  We are heading down to Dunedin for two events to launch the book in the south.  It’s most fitting that this week I give you a taste of our other home, where our family grew up, the Otago Peninsula

Top left: An Albatross’s stretching its wings at the Royal Albatross Centre
(wingspan equals length of a mini), Top right and bottom left: yellow eyed penguins are
shy of people and the best close up view is at Penguin Place; bottom left furseal pup at
Natures Wonders  Photos courtesy of Tourism Dunedin

The Otago Peninsula is a perfect eco-tourism travel destination and has enabled Dunedin to be called “The Wildlife Capital of NZ”.   Unlike us;  the seals, yellow-eyed penguins, little blue penguins, fur seals and sealions enjoy a good cold day. An albatross requires wind for lift off.  

To enjoy being in touch with nature on the Peninsula you should come prepared for some vigourous weather.

Don’t let that put you off…there are lots of spectacular clear sunny days too! 
From the road coming into Broad Bay taken July 2012 

One resident, not connected with wildlife, but firmly connected to the history of the Peninsula undertook a massive challenge.  Had Margaret Barker not driven up to Larnach Castle in a combi van in the 1960’s, and saw it was for sale it may not be here today.  Rumour has it another bidder had plans to pull it down.  Margaret and her family have over the years transformed the rundown mansion into one of NZ’s top tourist attractions.

Larnach Castle for tea

This great photo by Andris Apse is courtesy of Tourism Dunedin. It shows
the wonderful vantage point Larnach Castle has of the Otago Peninsula.
I love to visit the castle for its garden;  recognised as a “Garden of International Significance”.  It’s a great credit to the vision and years of work by Margaret and the green fingers of her head gardener Fiona Eadie. I am a fan of Fiona’s garden philosophy.  I first heard her in an interview on Radio NZ National .
Stay all day for a garden entry price of $12.50, and if you visit Dunedin regularly it pays to purchase a  Garden Pass for $20 per anum so that you can enjoy the garden’s stunning seasonal changes.
With garden entry you can access the ballroom where the cafe is situated. 
Larnach Ballroom chandelier
It’s not often you get to sit in an elegant ballroom beside a warming open fire, beneath a massive chandelier, while sipping tea and eating scones with jam and cream… you can at Larnach Castle.
Until you get the opportunity to come south…why don’t you try your hand at making scones for friends and family?

My Favourite Scone Recipe

My first memories of scones was Mum filling a giant basket of halved scones topped with homemade raspberry jam to take down to the woolshed for the shearers 10 o’clock smoko.
My sister Kerry sent me this after our visit to
Larnach Castle grounds and cafe
I have heard baristas need to make 1000 coffees before they make the perfect cup.   It doesn’t take that long to make the perfect scone but it does take practice and just like making coffee there are some tricks to the ancient art of scone making.
I  came by this recipe from my Mum.  Its not her family recipe but she gave me the coffee mug that had Peta Mathius’s Dad’s scone recipe.   I tried it one day and found it to be good – a little more butter than Mum’s recipe (naughty but nice).   So here is Harvey’s Scone recipe:
 2 cups plain flour, 4 tsp baking powder, 100g butter, and a little milk to mix.
400 F is around 200 C.
It seems like a lot of baking powder but you need to have this much to get the dough to rise quickly.

First secret – make sure the butter is cold as you do with pastry.  Chop into small cubes.  If time is short then you can cheat by using a food processor to mix butter and flour, but to get the best melt in the mouth scones mix the ingredients by hand.  The same rule applies to pastry. The result is that you end up with tiny butter pieces in the dough, which melt during cooking to create a special lightness.
My Mum used to make a pile with the flour on the bench and then finely cut in the butter with a knife.  A pastry cutter would do the job well too.   
Cut as you would finely cutting parsley
She would finish the job by rubbing the butter through her hands, squashing any lumps into the flour.
Scoop up the butter and flour mix, put into a bowl, add the baking powder – mix in well (by hand).
Next add the milk.  Start with 1/2 a cup of milk and add more as you need it.   It’s no good giving exact measurement for milk as it will depend on the flour as to how much liquid is needed to make a dough.
You can tell by eye.  If you have butter milk in the fridge, use it instead of regular milk and it will make an even better scone.
Mix in the liquid with a table knife and try to make the dough with as few strokes as you can.  Too much handling will make your scone tough. I best describe the action as first folding over with the blade of the knife and cut through to mix.  
A table knife tends to stop you stirring the dough
Sprinkle  flour onto your bench or large board.   Turn out the  dough.  It should be damper than you would prepare for pastry. It doesn’t matter if it’s rather sticky as you can roll it in flour to make it easier to handle.  Mould it gently into a flat ball shape with your hands.
Gently roll with not much pressure to say 3 cm or 1 inch depth.   Shape and cut into pieces.    
You can still see pieces of butter in the dough.
Flour a tray and brush the tops with milk.  They only take 10-12 minutes in a hot oven around 200C. 
I do the traditional thing of wrapping them in a tea towel while hot.  This kind of steams them.
Scones are best eaten with homemade preserves and for an extra treat some beaten cream.  Ideally still warm from the oven.   Your guests will love them!
Scones straight from the oven served with Feijoa and Guava jelly.

Probably 80% of the time I use a food processor to mix scone flour and butter, and that’s because scones are something you can make really quickly if visitors drop in unexpectedly.  However, the”taste panel” here really loved the scones I made the old fashioned way. If you have time, I think hand rubbing flour and butter is the way to make the perfect scone.

Peninsula Wildlife

In the 1930’s scones would have been a regular part of morning or afternoon tea.  Agnes Richdale, wife of ornithologist Dr Lance Richdale, would have been hard pressed to find the time for scone making. Agnes was his research assistant in the field but also typed up pages and pages of his research notes on the Royal Albatross and Yellow Eyed Penguins on the Otago Peninsula.

Royal Albatross had never successfully bred at Taiaroa Head, until Dr Richdale pressured city leaders to protect the colony from vandals. Lance and Agnes worked tirelessly to ensure that albatross could succesfully raise chicks.  In 1938 they were rewarded with the first born chick at Taiaroa Head taking off on 3 metre wings to begin its life in the Southern Ocean.
This is a frame from an 8mm film that Lance Richdale made in 1939 that can be
watched at the Albatross Colony.
Agnes Richdale is weighing the albatross chick dressed rather elegantly for the task 
Seventy years later, in 2007, the Royal Albatross Centre celebrated the 500th chick born at the colony.  The best time to visit is between December and February when there is an adult on the nest with the chick. 

 Richdale also did pioneering research on the yellow eyed penguin at a time when there were lots of breeding pairs on the Peninsula.


In the mid 1980’s it was a different story. Breeding pairs were decreasing in numbers.  This decline was noticed by sheep farmer Howard McGrouther. Being a practical farming man Howard decided to give the penguins a helping hand.

A yellow eyed penguin with its chick and A-frame shelter at Penguin Place

He constructed A-frame houses for the penguins to nest in so they only had to defend predators on one front.  He had given the penguins on his property a good fighting chance against stoats and cats.  

The late Howard McGrouther feeding a penguin some
fish at the penguin hospital he set up for penguins that were
underweight and needing building up to survive out at sea.
(Photo: Craig Baxter)

To fund this conservation work, he created  Penguin Place.  Guided tours take you really close to the secretive penguins through a series of trenches (an idea of Howards to keep people down at penguin height). 
Next to the Albatross Centre lives another farmer Perry Reid.  Perry is passionate about conserving the wildlife on his property for future generations.  He has fenced off a large area of the farm, is doing predator control work and replanting native vegetation.  All this work is to protect local wildlife including the yellow eyed penguin, little blue penguin and a seal breeding colony.

At the photo vantage point  – that’s me at the back on the left
and Perry Reid right.
When you visit Natures Wonders – a fun-filled tour over his farm in an all-terrain vehicle, you can see the great results of his vision and his labour. Visiting the seal colony was a highlight for me as the pups are so darn cute. On a clear day there are spectacular views along the coastline and up the harbour to the city. 

I am grateful that Dr Lance and Agnes Richdale, Howard McGrouther, Perry Reid and Margaret Barker made bold and brave decisions for the benefit of all those living and visiting the Otago Peninsula (wildlife and people).

Allans Beach

One of my favourite things to do is to walk the length of Allan’s Beach to where Hoopers Inlet meets the sea.  It’s a revitalising thing to do and it’s absolutely free.   It’s the only Peninsula beach where people can take their dogs.  There’s a good chance you’ll meet sealions sleeping on the sand.  You can see penguin tracks sometimes but you seldom if ever see them.

You just have to remember the rule – don’t get between large sealions and the sea.  Keep your distance.  They do look flabby and slow but they can move deceptively fast.

Photos I have taken at Allens Beach: top left
a sealion posing; top right, the end of the beach
where the inlet meets the sea; and my lovely
niece Jessie enjoying the fresh sea breeze.

I take snapshots but Rod Morris takes photos….

Tui getting nectar from a kowhai flower from “An Extraordinary Land”
featuring 12 essays on New Zealand’s unique natural stories by Peter Hayden
and over 250 photographs from wildlife photographer and naturalist Rod Morris.

 This is my favourite photo in Rod and Peter’s book  and the tui is perhaps my favourite bird.  When we first settled on the Peninsula in the early 1980s you would never see a tui. Now I see them quite often in the garden.  It’s a good sign for this Extraordinary Land. 

Missing Midwinter in Dunedin

Tonight marks Midwinter Solstice, the shortest day of the year in the southern hemisphere.  In a more temperate Auckland midwinter passes by without too much fuss; but down south, midwinter is celebrated in style. Down south, there is something invigorating about a true winter’s day… and the weather is always the first topic of conversation.

June also marks 6 months since we left Dunedin for Auckland, so it’s timely that I reflect on the things I miss about Dunedin.  Here is a tour of my Dunedin favourites:

Jack Frost on stilts – a great and warm viewing place is up
in Bacchus Wine Bar & Restaurant – excellent food
and a wonderful selection of Central Otago wines
(Dunedin’s first wine bar) Photo: Alan Dove Photography – Facebook  
The Midwinter Carnival held on the Saturday nearest to the shortest day has a  procession with hundreds of lanterns, many made by children, stilt walkers and performers in the city’s centre…if the weather permits!

 Lighted Lanterns are a feature of the Midwinter Carnival in the Octagon,
St Paul’s Cathedral in the background.  Photo: courtesy of Dunedin Tourism


It will be no surprise that my tour of Dunedin city is focused on food.  My choices have been influenced by my interest in the Victorian and Edwardian architecture of the city. 

Left Wedgewood tiles adorn the interior of the Railway Station;
centre; First Church  and right; Robbie Burns with St Pauls Cathedral in the Octagon.
Photos courtesy of Tourism Dunedin

Scotia Bar and Bistro

In a city that looks, sounds (busking bagpipers) and feels like Scotland (a wee bit chilly) it’s most fitting that there is a restaurant called Scotia Bar and Bistro.
Victorian Terrace Houses built for the country landlords as
town houses.  Photo courtesy of Tourism Dunedin

I like the ambience and cosy feel as well as the good food. Enter this Victorian terrace house and you come to a bar with a wall of whisky and a warming fire.  You can choose to have a pre-dinner drink beside the warm fire.   The food by chef Andy Aitken has a touch of Scotland in the menu choice.  You can choose Haggis as an entree, which is surprisingly tasty and I had the best cooked Bluff oysters there.  Smaller, cheaper meals are on offer, which are ideal before going just up the road to the The Fortune – Otago and Southlands Professional Theatre.


Taste Nature – Organic shop and kitchen

Taste Nature or as known in Dunedin as The Organic Shop is situated in lower High Street opposite the Southern Cross Hotel.   Taste Nature ticks three boxes for me –
First it’s got a large range of organically grown fruit and vegies, organic meats and a large selection of flours, grains, oils, dried goods, garden seeds, herbal products and spices.  I must say it’s one of the best organic supply shops around.

I suggest going down to the back of the shop where large glass jars contain different dried fruits and find the crystallised ginger short sticks from the US, fill a small bag and enjoy the sugar coated punch of ginger.  I haven’t found that ginger anywhere else.    Ginger is great eaten with dark chocolate and almonds…yum.
Photos from Taste Nature
Second, the kitchen that used to only do takeaway lunches now has seating so you can choose to have your lunch on site.   I love the casual atmosphere here, where you help yourself to a warming soup from a slow cooker for around $6 and another $1 for a thick slice of fresh baked bread, and pay later at the shop counter.
 The soup is made from ingredients from the shop and Mark the owner’s garden at Waitati.  It’s great soup, the best value in town with probably the best food values as well – and believe me soups are very desirable midwinter in Dunedin.

Thirdly, the building has a wonderful history dating back to the 1800’s when Dunedin was a boom town. You can still see along the top of the building Bing Harris.  They were importers of the materials that supplied the many clothing manufacturers in the city. The new property developers have used old features really well, preserving the integrity of the old city for modern use.

Around the corner on Princes Street another lovely old building houses Nectar Espresso Cafe where you can get an excellent coffee.  It’s fitted out in a modern style, with the good bones of the old building very much in evidence (and their pinwheel scones are yum but you have to be there before 11 because they usually sell out fast).

Hair Raiser Tours & City Walks

You always remember a city by the characters you meet.   Both Athol Parks of City Walks and Andrew Smith of Hair Raiser Ghost Tours certainly fit that bill.   Athol has a quiet manner and conveys insights into Dunedin’s Victorian and Edwardian architecture with passion and knowledge.  Athol is usually dressed for the Dunedin climate in a weather proof jacket while the flamboyant Andrew wears a top hat and cape for his ghost stories and yarns about the mysterious characters of early Dunedin. 
Athol left and Andrew right; here they are celebrating the life of
a famous Dunedin walker Joe Scott with a walking race around
the Octagon during the Rugby World Cup 2011.
Andrew’s Hair Raising tours operate every day and the ghost tour every night over winter at 6pm -a good way to work up an appetite before dinner.  Athol’s tours run only by request over the winter but keep him in mind if you are in Dunedin from October on.

Everyday Gourmet

Everything I have ever eaten at Everyday Gourmet has been delicious.  The Supreme coffee is excellent and the service friendly.  Having been in business for 18 years it is a Dunedin institution.  Longevity in a cafe speaks of consistency and quality.   For under $10 you can get a tasty and seasonal salad and coffee. 

It is also a fabulous ‘deli’. I have met many small producers at Farmer’s markets and when asked if they have an outlet in Dunedin often the reply would be, “Yes, Everyday Gourmet sells our product”.
Tempting edibles under those glass domes, and a wall that
runs the entire length of the shop is loaded with gourmet products
from  New Zealand and overseas.
 Everyday Gourmet can be found at the north end of George Street near Knox Church…its worth the walk.

Quadrant Gallery in The Quarter, Moray Place

Quadrant Gallery features contemporary jewellery, some made by owner David McLeod as well as stunning glass sculptures and ceramics.  I love the whimsical work of potter Peter Henderson.     I particularly like his coffee cups with animals.  The glaze is top quality and can take a beating in the dishwasher for years.  I worked in Quadrant for a short time and thought I had landed in paradise amongst so many lovely pieces of jewellery.  
A couple of examples of Peter Henderson’s bowls
 The building where Quadrant is situated,  Bracken Court,  is owned by Ted Daniels. Ted an accomplished jeweller himself and loves buildings with character. When a recent fire destroyed this building, instead of pulling it down and replacing it with a modern one, he kept the stone facade and made a sympathetically designed modern building behind.  Next door to Quadrant is Cilantro Cafe where you can enjoy a coffee and admire lovely objects through the internal glass walls.
Quadrant is just one of many galleries and interesting shops in this ‘quarter’ of the old city.

Otago Farmers Market at the Railway Station

The farmers market has been operating for 12 years and is a regular Saturday morning routine for Dunedin foodies.  It’s not only fresh produce on sale, its an opportunity to talk to producers directly, try new things and catch up with friends.

To find the Farmers Market you only have to spot the Railway
Station at the end of Stuart Street – the market is at the north end
of the station (left of picture) Photo: Tourism Dunedin

The highlight of my visit is catching up with Alison Lambert in the mobile kitchen.   Alison demonstrates easy ways of cooking with produce on sale at the market.  She is inspirational in the way she can produce something delicious out of a caravan with just a gas hob and small oven, sometimes in a southerly gale.  This means every recipe she makes is simple and anyone can make her recipes.  

You can watch Alison cook and have tastings every Saturday morning at the
market and if you are quick enough, grab a printed recipe sheet.  Its not only the recipes – its all the handy
tips that are so helpful.   Photo courtesy of Otago Farmers Market

From Otago Farmers Market Recipes I have chosen one especially for my brother Jamie whom I introduced  Cavolo Nero recently.  It is also known as Italian Kale or Black Cabbage. Jamie loves silverbeet and grows lots of it, but after tasting Cavolo Nero, the silverbeet may end up in the back row of his garden.

Like growing cabbage you need to give Cavolo Nero
plenty to eat and it will reward you with greens all winter

Caldo Verde – Portuguese Soup – a recipe from Alison Lambert

Alison’s Caldo Verde uses a combination of greens including cabbage. To get a richer green colour and flavour, add some Cavolo Nero or silverbeet.  Remember, the darker the green, the better for you.

Serves 4

Ingredients
2 fat onions, finely chopped
4 cloves garlic, crushed
60ml olive oil
1 chorizo sausage or chilli salami (basecamp)
6 large potatoes
1.5 litres good vegetable or chicken stock
salt and freshly ground black pepper, to taste
2 bay leaves
large bunch of greens or cabbage

Method
Gently fry the onions and garlic in the olive oil until softened and translucent.
Chop the chorizo or chilli salami into small chunks and add to the pan with the onion.
Fry the onions and sausage for a few more minutes and then add the diced potatoes. They will absorb all the flavour from the sausage.
Add the stock, seasoning and bay leaves, and cook until the potatoes are soft.
Meanwhile, very finely chop the cabbage
When the potatoes are ready, mash them into the broth to make a thick base, add the greens/ cabbage to the simmering broth.
Add as much cabbage as the broth will support – if you want heavy soup add loads of greens, if lighter, add less.
Simmer for a few minutes. The soup will go the colour of jade.
Serve drizzle with extra virgin olive oil.
………….

You can buy some great sausages at the market to go into this perfect soup for a midwinter’s weekend.  

So Dunedin, here’s wishing you a clear fine evening for the Midwinter Carnival – wish I was there.

… oh and I haven’t forgotten the Otago Peninsula.  I think that needs a posting all to itself. Next posting I will be mixing it with penguins and seals and having tea at a castle.  


"Make cheese", said the Quince

In Spain manchego cheese, a hard salty sheep milk cheese is eaten with dulce de membrillo – a sweet red conserve, which we know as quince paste – sounds perfect doesn’t it?   In Spain dulce de membrillo is sold in large blocks and slices cut off as you would cheese.  So with my Northland quince I will give a nod to Spain and make Quince Cheese to share with friends.

I have made quince jelly before but never quince cheese (or paste) – cheese in the world of preserves simply means a solid sliceable preserve.   With my large golden quinces on hand I searched through my recipe books and came across quince cheese in “River Cottage Handbook No.2 – Preserves by Pam Corbin”.   This seems exactly like the Spanish recipes I found with the exception that they sometimes add a cinnamon stick …I decided to keep it plain this first time.

Wash the quince and roughly chop the fruit but don’t peel or core them.   Place in a large pan and barely cover with water.

 Bring to a simmer and cook until soft and pulpy, adding a little more water if necessary.   Leave to stand for several hours.

I took the pulp out of my metal pot and poured the into a large glass bowl for the
waiting period of several hours.  I left it overnight and made the quince cheese the next night.

Rub the contents through a sieve or mouli and then weigh the pulp and return to a heavy bottomed clean pan, adding an equal weight of sugar.  I don’t have scales at the moment, so I measured cup for cup like you do for jelly.  Gently bring to the boil stirring until all the sugar has dissolved. Now it becomes a waiting game.

The quince goes through a transformation from a golden fruit to a rich red over long slow cooking.

You have to stir frequently so that it doesnt stick and burn.   This can take an hour and a bit, so be prepared and have something else to do in the kitchen while watching over the quince.

Starts off yellow
Then begins to turn orange
After an hour it finally starts turning red, thick and glossy.

You have to be diligent in the stirring as it begins to thicken.  It get’s very thick and glossy and be careful as it may bubble and splatter like a mud pool or a pot of porridge.   Keep cooking until you can scrape a spoon through it and see the base of the pan for a couple of seconds before the mixture oozes together again.

I decided to make mine like a cheese round to share with friends.  Keep cool, preferably in the fridge, but allow it sit at room temperature before using, so you can enjoy the maximum fruity flavour.

I used a cake tin lined with baking paper and let it set for a day before cutting.  If you have small bowls or ramakins that you can use as a mould, then brush them with a little glycerine to allow the cheeses to be easily released.

The attractively shaped quince cheese from the River Cottage Preserves recipe book and
a small ramakin that could be used as a mould.

Ideally this cheese should be kept for a month before eating to give further depth of flavour…but who can resist?

A perfect set of Quince Cheese wedges ready to be wrapped first
in baking paperand then in foil 

The melon shaped golden quince I got from Northland is probably Pineapple Quince, a tart variety used mainly for preserves.   The Apple Quince I get down south looks more like a nobbly pear with sticky fluff over parts of the skin.  This quince is known to be sweeter.

  • Add a quince to any apple dessert, cake or compote for added texture, colour and flavour – just make sure you give the quince a head start and cook slowly for 20 minutes before adding the apple…or if time is a problem grate the quince
  • You can add sliced quince with meat in a tagine or slow cooker as it too enjoys a long slow cooking time
  • Instead of apple sauce with pork you could try quince sauce 
  • Any cores with pips and peel can be boiled up and strained, put into a plastic bottle and stored in the freezer as added pectin for fruit jellies or jams that have lower pectin than quince
  • In Chile a dessert favourite is Murta con Membrillo which combines the Ugni Molinae (Chilean guava or as we call it here the New Zealand Cranberry) with quince and sugar
  • Quince is lovely baked long and slow under foil so that it turns soft and red.  I do this in a little sugar syrup or just a little water and sprinkled with raw sugar (to your taste); and if you want add either a cinnamon stick or star anise
  • Poaching Quince with Vanilla.  I have included a blog by excellent food writer David Le Bovitz’s Rosy Poached Quince recipe and his view on quince. Cooked quince sitting in syrup will turn red over time in the fridge
  • I am keen to try Otago Farmers Market Baked Quince a recipe from chef Alison Lambert who creates delicious seasonal recipes from a caravan every Saturday at Otago Farmers Market.

Whether it’s enjoying quince preserved as dulce de membrillo with cheese in summer heat or using it seasonally poached or baked in the chill of winter, it’s a fruit that has been revered through the ages.

The ancient Greeks believed it to be a fruit of love, marriage and fertility and was often given as a wedding gift to the bride to sweeten her breath. In medieval England, imported Membrillo from Spain was prescribed by apothecaries to assist with digestion.

With this in mind, what a lovely gift to give to a bride to be or to serve after a meal either as dessert or with cheese.

Otago Farmers Market

Southern Cooking Apples Meet Northland Quince

A real cooking apple is tart and will “fluff” into a puree when cooked.   Have you ever wondered what makes apples do that?

A tart or sour taste means there is a high level of malic acid in the apple and this acid breaks down the apple flesh when cooked.  Regrettably heritage cooking apples are difficult to find except perhaps at  Farmers Markets or from a friend’s home orchard.

Recently we escaped city life for Northland. It’s the first time I have visited Whangarei Heads in the East and the Hokianga Harbour in the West.  At Whangarei I met truly inspirational people involved with Backyard Kiwi.   They are working hard to ensure the kiwi will be safe in their part of New Zealand.  Kiwi are not only just surviving there, they are increasing in numbers.

From our friend Heather’s B&B at Omapere looking out to the entrance of the Hokianga Harbour.
You walk down her garden to the beach and perhaps you can just see Peter taking a swim centre frame.
Hokianga Haven
We  ventured over to the equally beautiful Hokianga Harbour where I couldn’t resist a bag of quince for $1.50 at a roadside stall.   Arriving home with my Northland produce I discovered a box had been delivered from Dunedin. My sister Kerry sent me four types of apples labelled in brown paper bags all grown in her home orchard.
From left to right; Gooseberry apple, Monty’s Surprise, Sturmer and Golden Delicious
These apples are precious and not to be wasted.  I have decided to find a good recipe for each sort of apple and the quince will also get a look in.

Serving it up raw…

After dinner Peter often slices up an apple and shares it around the table.  Our grandson Beau loves eating apples this communal way and somehow apples sliced for you taste better than biting into a whole apple. 
The Golden Delicious is an apple that was very popular when we were young because of it’s sweetness but has gone out of favour for the juicy red eating varieties on offer.  Being a romantic Kerry decided to plant a tree because of those childhood memories.  She knew we would enjoy the sweetness of this greeny-yellow eating apple as part of our regular apple eating routine after dinner. 
Baked Apples with Cider and Rosemary
 The baked apple will never win a beauty contest but they
are truly delicous especially served with custard.
I used to wait every year for Mum’s Peasgood Nonsuch massive apples that I would stuff and bake. This time I am using Kerry’s Monty’s Surprise apples for a different method of baking apples from “A Cook’s Year in a Welsh Farmhouse” by Elisabeth Luard.  I like this recipe because it unusually uses Rosemary and the apples are cooked in cider. 
4 large apples
2-3 tbsp walnut pieces
(As I didn’t have quite enough walnut I added some currants)
1 tsp finely chopped rosemary leaves
About 300 ml dry cider; plus extra to finish
3-4 tbsp honey plus extra to finish
Large nugget of butter plus extra to finish
Preheat the oven to 180C.  Core the apples without going right through at the stalk end (if you can – if not it doesnt really matter).  Arrange the apples in an ovenproof dish, in which they will just fit.  
Stuff the cores with walnuts, rosemary (and currants or any other dried fruit you desire).  Pour in the cider, trickle the honey over the stuffing and dot the apples with butter.  Cover with foil and bake for 20-30 minutes until the apples are perfectly soft.  You can also cook them long and slow.
If you are using a metal pan you can transfer the apples to a serving dish and cook the sauce on the stove top.  If, like me. you cook the apples in a ceramic dish, then add some fresh cider to the dish to clean out the remaining juice and scrape up all the little brown bits and add to a pot.  Add more honey to taste with a little more butter and cook until it bubbles and becomes the consistency of a sauce. 
Serve by spooning over sauce and offer with either whipped cream or yoghurt or custard.
I chose an English Cider because I find a lot of the New Zealand ones
are just not dry enough.  In England they use particular apples bred for cider production.

Research has indicated apples contain substances capable of reducing the risk of some cancers, cardiovascular disease, asthma and diabetes.

The NZ Tree Crops Assn has tested up to 250 apple varieties and discovered the heritage variety Monty’s Surprise had several times greater quantities of those beneficial compounds than that of commercially available  apples. 

The Central Tree Crops Research Trust, in conjunction with the Central Districts Branch of the Tree Crops Association have been acting as New Zealand’s “Johnny Appleseed” distributing apple trees first in the Wanganui district in 2006 and steadily spreading out to other areas of New Zealand and Australia.  Good on them for sharing, so that Monty’s Surprise with its health properties can be available to us all. 

The Gooseberry apple is green like a gooseberry and yellows
with age 

The Gooseberry apple may be new to me but it was first recorded back in 1831 in Kent, England, where it became a popular apple in the London markets.  Its claim to fame (as the name suggests) is that it’s one of the most acid apples around, so it will produce a good tart puree. 


I will use this tart apple in combination with beetroot as a warming and healthy winter soup that I discovered on The Guardian website by Allegra McEvedy.

Beetroot and Apple Soup


its

Serves 4

 500g/4 medium raw beetroot, grated (preferably with a food processor as it’s a messy job) … 2 tbsp butter…1 tsp caraway or cumin seeds…2 medium onions, roughly chopped…2 Gooseberry apples, peeled and quartered (you can use Granny Smith or Braeburn)…1 litre stock, light chicken or vegetable…2 star anise…Greek yoghurt, a few chives chopped, salt and black pepper

Put a wide, heavy-based pan with a lid on a medium heat and melt the butter, then add the seeds. Sweat the onions with the spices, keeping the lid on and being careful not to let them colour.


Tip in the grated beetroot and stir well. Slice the core out of all the apple quarters, chuck the apple in too and put the lid back on.
Fry for about 10-15 minutes until the beetroot strands begin to soften.
Pour in the stock, turn the heat up, drop the star anise in with some seasoning and put the lid back on. Once it has come to the boil, turn down the heat and simmer for 5 minutes.
Pick out the star anise and throw it away, then blitz the soup in a blender or Stick Mixer until pureed. Finish the soup with a splodge of Greek yoghurt and some chopped chives. (I didn’t have chives so I  chopped some fennel tops into the yoghurt),
The soup is a magical colour and the tart apple adds a bite almost like adding lemon does.

 Quince and Sturmer Apple Sorbet

It’s time to bring the Quince to the party.  I discovered a sorbet recipe in “River Cottage Everyday” cookbook from Hugh Fearnley-Whittingstall’s television series…yes another sorbet!  Well, it gives me  an instant dessert in the freezer if we have people around at short notice.   Besides, the colour in Hugh’s book looked so enticing. The Bramley apple appears to be a favourite English cooking apple but I thought I would use Sturmer Pippen apples to add bite to the fragrant quince.
Large golden quinces will perfume a room by just being there; Sturmer apples centre and
right the two combined and cooked up in a sugar syrup for Sturmer and Quince Sorbet.

Ingredients: (makes enough to nearly fill a 2 litre ice cream container)
350g caster sugar
600g quince, peeled, cored and chopped
400g apples (preferably cooking apples), peeled, cored and chopped
Lemon juice to taste
You could reduce the sugar if you add some alcohol as both assist in keeping the sorbet soft and not icy.
In a large pan that will take all your fruit, put in the sugar with 500 ml of water and heat gently, stirring to dissolve.   Add the quince, bring to a simmer and cook at a gentle bubble for 20 minutes, stirring occasionally.
Add the apples and cook for a further 10 minutes or until all the fruit is very soft.  Blend to a puree using a stick blender in the pan or in a jug, then add lemon juice to taste – about 2 tablespoons should do. Pass through a fine sieve and allow to cool.

Pushing the puree through a sieve with a wooden spoon is the most labour intensive part of the recipe
 but it will take out a lot of the graininess in the quince. You can see the two different textures in this photo.  
If you have a mouli then I recommend using it to cut down the time.
Pour the puree into an icecream container and freeze overnight or for a day.   Now you put the frozen puree into a bowl or jug and the ideal instrument in the kitchen for this job is the stick blender attachment you use to puree soups.
In the background is the icy puree and in front is the icy puree being
whipped up into what looks like a creamy consistency.

I like to do this process a couple of times and if you are keeping it for a while then check that it doesnt need another cream up a day before using.
The sorbet has a real tang and  is smooth.  The tang goes really well with the sweet shortbread.
Ginger biscuits or a couple of brandy snaps are also excellent partners for the sorbet. 
I served the sorbet with some shortbread kiwi to celebrate the great work our friends are doing in Northland to bring the kiwi back for all of us.  By the way this cookie cutter and the map of NZ cookie cutter is made by an enterprising Dunedin company.   I also added a slice of the quince cheese I made from the Northland quince but that I will keep for another day.  

Time for the humble Crumble

A fruit crumble is a comfortable and straight up pudding. Its simplicity is its magic.  Apple Crumble is the classic, but you can use any fruit for a crumble.  I’ve  discovered a combination that the home taste panel really like….Apple, Feijoa and Banana Crumble – an idea from Julie Biuso.

Autumn brings apples, pears, feijoas and walnuts to my pantry.    

A crumble is a perfect autumn pudding when apples, pears, and feijoas are in plentiful supply and the cooler weather creates an appetite for warming comfort food.

I served the crumble with yoghurt and some yummy Rewarewa
liquid honey from The Naked Honey Pot Co based in Hawkes Bay.

There are variations on the kind of crumble topping you can use to best show off your fruit. 

As this is a famous English pudding I decided to use a crumble recipe from a chef who is famous for promoting traditional British food, Hugh Fearnley-Whittingstall. His only alteration to the original is an option to replace one-third of the flour for ground almond meal.   Hugh doesn’t go for nuts or spices in his crumble as he feels they can upstage the pure flavour of the fruit.


Apple, Feijoa and Banana Crumble (with traditional crumble topping)

Crumble Ingredients:
180 g plain flour
120 g butter, chilled and cut into cubes
160 g brown sugar or caster sugar ( I cut this back to 4 Tbsp of brown sugar to reduce sugar)
(alternatively use 120 g of flour and 4 Tbsp of ground almonds to make the crumble richer and benefit from the added nutrition of almonds).
 Rub/mix the butter and flour together, either by hand or food processor, until it looks like course breadcrumbs.  Then add sugar and ground almonds.  The food processor tends to make a finer more even crumb.
Banana, apple and Feijoa – choose to use
more fruit if you want a deep crumble
Fruit Ingredients:

2 large cooking apples (or 3 Granny Smith apples)
2 – 4  Feijoas – flesh scooped out and cut up 
2 bananas
You don’t need to be so exact with measurements – ideally you fill your baking dish 2/3rd fruit, the other 1/4 to 1/3 being the topping. 
Add the juice of half a lemon and mix well through fruit to avoid fruit turning brown.

Add 1 Tbsp of sugar (if using tart cookers you may want a little extra sugar).  Remember bananas contain a lot of fruit sugar and it’s good to have a contrast of slightly tart fruit with the sweet topping.  


Add fruit to a greased baking dish.  The baking dish I used was 18 cm by 26 with a depth of 6 cm but you can use any shaped dish.

The food processor was used for this crumble topping and makes for
an even and fine textured topping.   I gently pat down the topping. 

Now spread over the crumble mix.  Hugh suggests using your fingers to scrunch together the crumble in places to form small peaks.  I didn’t do this but if you do then the peaks would be crunchy adding another layer of texture to the crumble.
Cook for 30-40 minutes at 180.  If the crumble starts to brown then cover with aluminium foil.  The fruit should be bubbling up  around the edges of the crumble.

Its the kind of pudding that tastes a whole lot
better than it looks and is made perfect by serving with ice cream ,
cream or yoghurt.
I refer to the crumble as humble because it is a simple dessert with few ingredients.  It was also born out of hard times, created during World War II when rationing meant that pies were not an option. Today we have plenty of flour and butter but we are short on time, so the humble crumble is once again gaining popularity.   A crumble takes only a few minutes to prepare for a no fuss bake in the oven. 


Since the 1940’s the crumble recipe has been exported and adopted by cooks in many countries.  I don’t know if it is due to our fondness for ANZAC biscuits but in New Zealand we like to add rolled oats to the crumble crust.  The presence of oats somehow makes it OK to eat the leftovers next morning for breakfast.

NZ Apple Crumble – by Alison Holst


You can use a food processor to prepare the crumble topping but if you have a few minutes to spare, want less washing up and a more rustic looking crumble, then try doing it the old fashioned way by “rubbing butter into flour”.

For a change you can make crumble in indvidual ramekins
and I served it with yoghurt and half a sliced apple. Thinly sliced

apple brings the flavours of the apple to life and is a contrast to the cooked version    

First prepare the crumble topping:
half a cup of flour
half a teaspoon cinnamon
half a teaspoon mixed spice
three quarters cup sugar (I used brown sugar)
75g butter
half a cup rolled oats
 

Rub the butter first into the flour and any added spices.
Then add the sugar – makes the task less gritty that way.


To “rub butter into flour” first cover the butter pieces with flour and gently push and spread the butter into the flour between your thumb and fingers.  

Then rub the crumb with your fingers interlocked like this until it
looks like coarse breadcrumbs

Then add sugar and rolled oats.  Now its time to prepare the fruit – 4 apples (depending on the size).

Alison recommends grating the apple skin and all.  This is a good idea if you haven’t got a true cooking apple that will break down quickly and fluff up like a souffle when cooked.  

For a change I used individual ramekins for cooking and serving
my version of Alison’s Apple Crumble.

I fill them 1/2 to 2/3rds full and then add the crumble topping.  Bake at 180C for 30 minutes (45 minutes if using a medium sized ovenware dish) 
My Mum used to make a crumble that had fresh bread crumbs included with the flour.  I couldn’t find any reference to using breadcrumbs in crumbles in my search for recipes.  I think this must have been a family recipe handed down from her Scottish grandmother.   It would make sense to use the stale bread and not waste it.  
Peasgood Non Such – a real favourite of mine.  One of the largest cooking apples
with an extraordinary name.  They fluff up beautifully and taste great.
I remember her crumble as being delicious.  I am keen to recreate this humble crumble family recipe probably using Alison’s recipe and replacing the oats with bread crumbs.  But to make a true recreation  I need to source some real cooking apples up here in Auckland.    

It’s raining Feijoa!

The drought in Auckland has broken.  Not only rain is falling in our suburban garden it’s also raining feijoa. What a treat for a southerner!

Feijoa is perfumed, sweet and a tart fruit all in one.

To ensure the fruit is at its maximum flavour you need to wait until they fall, but this does mean they only last for a precious few days once they hit the ground. Feijoa do bruise so you need to handle them as you would a peach.

The best way to eat a feijoa is raw, cut in half and scooped out with a spoon. The juicy sweet seed centre is a different texture to the outer part of the fruit.  The outer edge can be tart and usually has a grainy texture, especially when not at full ripeness.

You too may have this fruit in abundance or have been given a bagfull and are looking for fresh ideas on how to use them.

 Here are three of my feijoa favourites….

Feijoa Salsa

As the Feijoa originates from South America, Salsa is a most appropriate dish to start with. It makes a great starter with bread and crackers or to accompany a main.  It works well with chicken or fish.

This is something that I put together with what I have in the kitchen.  You can use any combination of fruit/vegetables for a salsa.  It usually has some heat from chillies, onions or garlic. Always taste as you go to see if it needs more acid, heat or sweetness.
Begin by finely chopping a small red onion or half a large one, a red pepper or a chilli pepper (depending on the heat you want to add to the salsa) and a clove of garlic finely diced.
Scoop out the flesh and chop about 6 Feijoas (you can use more or less).  
To give the salsa a tang, add the juice of a lime or lemon.  
Decide on the herb flavour you want to use or have on hand.   I used coriander.  It worked well with Feijoa but you could use basil, tarragon, parsley or mint.  The choice is yours. Season with salt and pepper.  
Add a good slurp of olive or avocado oil. 
If you feel it needs a little more sweetness add a tsp of honey.

Feijoa Sorbet with Ginger

The first time I made sorbet I was rather apprehensive because it seemed so exotic and surely must be difficult.   But let me tell you it’s so easy…just plan ahead a couple of days to allow for the freezing process.  You can even make sorbet easier by using an ice cream machine, but I don’t have one and did a perfectly good job with a stick mixer, a recycled ice cream container and the freezer. 
Feijoa Sorbet  has an ever so slight pink tinge and is an
excellent light dessert after a filling main course.

This is a mix of two recipes I found.  One using egg white and the other using ginger beer. In the Sorbet world there is a debate over whether you should add egg white or not, as some feel the egg white can flatten the flavour of the fruit. My home kitchen taste panel voted the egg white version the best for Feijoa because it produced a sorbet more like a gelato ice cream.

Ingredients

  • 400g sugar (originally had caster sugar but I used ordinary)
  • 2 or 3 slices of ginger (or to taste)
  • 750 ml water
  • juice of ½-1 lemon (helps to stop feijoa puree turning brown and does cut the sweetness)
  • 250 ml feijoa puree that has been strained
  • 1 egg white beaten to soft peak

First bring the sugar, water and ginger to the boil for 3-4 minutes.  Turn off and allow to cool slightly.

While the syrup is cooking and cooling, puree the scooped Feijoa flesh.   To make 250 ml of pulp that is strained you will need to make about one quarter to a third more puree as the grainy flesh stays behind in the sieving process.

Take out the ginger and add the sieved puree to the syrup. I know its a lot of sugar but you do need sugar to keep it soft.   Alternatively if you add alcohol, then you can reduce the sugar.  If a sorbet is too soft it means you have too much sugar, not enough sugar and your sorbet will be ice. 
Next fold in stiffly beaten egg white… easier said than done!?

The first time I tried this recipe it was for a dinner party and I thought I had a disaster on my hands at this stage of the process. The egg white just floated. I tipped it into my ice cream container, put it in the freezer in the hope that when I got it out the next morning the egg white would behave.

Left is the rather ugly first night freeze of the sorbet, centre the kitchen stick blender in action
and right is the finished sorbet to go back in the freezer.
Next morning my fears vanished.  Once I whizzed up the frozen slush with a stick blender the egg white became part of the sorbet making it  light, smooth and even creamy. Ideally, you do this process at least one more time before serving. 
The sorbet was a big hit. I served it with halved Feijoa, limoncello and a basil leaf.
We kiwis have really taken the Feijoa to our hearts and our gardens since first introduced in the 1920’s.  Overseas you might see them called Pineapple Guava or Guavasteen.    
Feijoa are from the Myrtle family.  You can see
the family resemblance to our native Pohutakawa! 

You can use the flower stamens in salads and they taste cinnamon-like.  I am keen to try this next spring.

The Red Cherry Guava and Feijoa – both have a similar
shaped flower stalk

I don’t have particularly fond childhood memories of guavas.   Mum would buy tinned guavas as a treat from the tropics. The large pale pink seedy fruits were never very appealing.

But I was introduced to the Red Cherry Guava in our garden by friends Jules and Ruud, ex Aucklanders now living in Christchurch.   With nostalgia for the flavours of the north they pounced on the few that were ripe and we realised we had a treat ahead for us.


The Red Cherry Guava is the size of a marble or a small crab apple. It has a dull red thick skin and like Feijoa they are packed with vitamin C with most of the vitamin C being in the skin.  Guavas are related to the Feijoa and have that same perfumed sweet flavour.

Down south I would make crab apple or hawthorn and apple jelly.  I decided this year I would make a jelly more fitting for Auckland – Feijoa and Guava Jelly.  

I used about half a bucket of Feijoa and around 1 kilo
of Red Cherry Guava.
I cut the Feijoas in half to check that the fruit is not too old and to assist in the breakdown of the fruit.  I decided to add to the flavour with a cinnamon stick, to reflect the taste of the Feijoa flowers. Barely cover the fruit with water and cook until mushy.  Alison Holst advises for her pink Feijoa Jelly not to squash the fruit.  I decided to give the soft fruit a bit of a squash with a potato masher.
The one rule in jelly making is “don’t squeeze the bag” or your jelly will end up cloudy.   I thought mashing the fruit at the cooking stage may also cloud the jelly.. but then for Rosehip jelly you actually puree the cooked hips in a blender before cooking a second time before going through the jelly bag.  
To make your own jelly bag simply sew up a piece of cotton muslin
to the size of a pillowcase.   It’s something you will have for years.

 Once the fruit is soft it’s time to extract the liquid to make the jelly.  I sit the jelly bag inside a large bowl, pour in the contents of the pot, and slowly lift the bag and tie to a stick or broom handle that sits between to chairs.   Leave it hanging for 24 hrs and don’t let anyone squeeze the bag!

Notice that the jelly has a layer of scum.  This disapates with the addition
of a nob of butter and a stir after you take it off the heat.

Most jelly recipes say one cup of sugar to one cup of liquid.   I like my jelly to have a real tang and reducing the sugar even a little is a good thing.  I use the same formula as for marmalade.  3/4 cup of sugar to a cup of liquid plus an extra half cup.  So for my 11 cups of juice  I needed 8 1/4 cups of sugar. I rounded the measurement up to 9 cups of sugar to 11 cups of juice.  You do need sugar for preserving and setting so it is a balancing act.  

Heat the liquid and then add the sugar, stirring until all sugar is dissolved, to avoid sticking on the bottom.  Get the jelly up to a rolling boil and continue to boil until the jelly shows signs of setting.  

As I was unsure of the pectin content (pectin in fruit ensures the jelly or jam sets) in Feijoa and guava I was preparing myself for the jelly not setting.  It seemed like ages it was boiling and it wasn’t setting so I added the juice of a lemon.  Lemon assists in the setting because it is high in pectin.

To test the set I find the best way is to place saucers into the freezer prior to making the jelly and spoon a little onto the really cold plate.   If you blow on it and a skin wrinkles on the top or when you push with your finger and the liquid doesnt close up behind, then you have jelly.  

It’s not the end of the world if it doesn’t set first time. You just re-boil with added sugar. I wanted a soft set jelly with plenty of wobble.   It wasn’t setting in the saucer but it was starting to jelly on the wooden spoon so I took a risk and poured it into clean hot jars that I had sterilizing in the oven at 150 degrees.

Place the hot jars on a wooden board as the wood will avoid
 jars cracking that may occur with a contrast of heat on a metal surface.
Fill the jars with a small jug and seal.  I seal by first putting on a cellophane seal and then put on screw lids from recycled glass jars.   This will avoid evaporation that will occur with cellophane only.

I had to wait until the next morning to see if my jelly had set…and yes it had! A lovely rich red wobbly jelly. I made a batch of scones for the home taste panel and everyone who partook loved the jelly.

For those of you down south I imagine it will be too late now to make Hawthorn jelly but in Central Otago the rosehips will be ready to pick after a couple of frosts.  The frost increases the sweetness of the hips.  As collecting rosehips is a prickly and time consuming business I suggest adding apples to bulk out the fruit.

Rosehips growing along the Central Otago Rail trail
 I am going to share my Feijoa bounty and have packed up a small box with a jar of jelly for my sister Kerry in Dunedin.  I will also keep a jar of jelly for Jules and Ruud as a thank you for introducing me to the Red Cherry Guava.  
The joy about making jelly is sharing what you make with your friends.   The trouble is, you then have to make another brew because the cupboard is bare.  But its an inexpensive and well appreciated gift. 
To me there is nothing better than a reminder of summer or autumn fruit in the form of a jelly with a scone or crossiant on a winter weekend morning. 

Like a proper ‘nana?

Bananas are a marvellous fruit and, like me, you probably include a bunch in your shopping trolley.

But how many of us think about how they are grown?

One Kiwi business just down the road from where we live has not only thought about it but have been active in ensuring the farmers and plantation workers who grow their bananas receive a fair living wage and that toxic chemicals are not used in their cultivation.  All Good Bananas operate out of a suitably banana yellow corrugated iron shed in Grey Lynn.

All Good Banana Headquaters in Auckland and the distinctive wrap
 “Good for growers. Good for you”

All Good Bananas first grabbed my attention in the local community newspaper where I read they had become the first New Zealand business to be named amongst the World’s Most Ethical (WME) companies.  That is sure an achievement for a company that employs just ten staff, especailly when other companies recognised are commercial giants like Marks & Spencer in the UK and Wholefoods in the US.

All Good Bananas website convinced me that I should change my banana buying habits.  On the website you can search where their bananas are sold all over New Zealand.   To my friends in Dunedin, Taste Nature sells them.

On their website you can download a variety of posters

Bananas are versatile.   They make a smoothie rich and creamy, boost a winter breakfast when allowed to just warm through in a pot of hot porridge, and can be your pre packed lunch on the run.   When the skin turns brown and spotty, welcome them to the world of baking and muffins or banana cake.

My bunch of All Good Bananas were used to make a quick, easy and delicious dessert for our friends Julia and Graham.

Orange Flamed Bananas

Ingredients: 
1 banana per person…about 25 gms of butter…heaped Tbsp of honey (or to taste)…
brandy or any preferred liqueur (if you wish to flame the bananas)…1-2 oranges.
Heat about 25 grams of butter in pan add honey or raw cane sugar, stir and let it bubble,
Gently slide in Bananas cut in half lengthways. 
I used Waitaki Honey that perfumed the kitchen wonderfully while I cooked the bananas.
This honey was featured on my posting “Waitaki Honey with Plums and Basil”

Cook until the bananas begin to change colour

Then add the juice of 1 or 2 oranges 

I used Contreau liquer with complemented the orange flavours

Served with hokey-pokey icecream and some honey wafer shards

To buy All Good Bananas you usually pay $3.99 a kilo which is $1 more a kilo of non Fair Trade bananas.  The dollar difference ensures that growers know the price they will get and the premium they are paid has resulted in community projects, like building schools.

Angel Iniguez, a grower from Equador,  has a message for  banana consumers in New Zealand: 

The important thing is to keep helping us by buying our Fairtrade bananas. We are small producers and by buying our bananas, you are helping us and the workers on our farms to progress. If you don’t buy our fruit, we can’t look forward to better times and keep taking care of the environment!”

My friend Julia is an excellent baker and generous with it.  She’s always whipping up a cake for someone at work or a friend who is celebrating a birthday.  I thought of Julia when I wanted to find a different and good banana cake.

Alison Holst’s biography with Barbara Larsen
(who has a great eye for a story).  Alison a Dunedin gal first
appeared on our TV screens nearly 50 years ago for a series titled
“Here’s How” made in Dunedin  Dowling Street Studios. 

Julia suggested a recipe from home cook doyenne, Alison Holst who has written over 100 cookbooks. Alison has named it Crazy Cake – not sure why, but then Dame Alison has earned the right to call a recipe anything she wants.  It’s a chocolate banana batter cake.  Julia has successfully tripled the recipe and cooked it in a roasting dish as a celebratory cake for a large crowd.

I believe the best cakes are made by creaming butter and sugar with eggs, but I have to admit this cake was delicious, very easy and light.   I think it’s the combination of vinegar and baking soda that gives the batter the lift to make the cake light.   The addition of banana ensures a moist cake.

Crazy Banana Cake

Here are the dried ingredients in the bowl, and the water, oil
and vinegar ready to be added.  How simple is that!

Turn on the oven to 180 C.

Prepare the dry ingredients and sift:
1 1/2 cups flour
1 cup of sugar (I used 2/3 cup)
2 Tbsp cocoa
1 tsp baking soda
1 tsp salt

Add the wet ingredients:
2 Tbsp Malt Vinegar (I didnt have malt so I used Red Wine Vinegar)
1 tsp vanilla essence
3/4 cup water
1/2 cup of vegetable oil

Bake for up to 40 minutes (could be sooner).  If you start to smell cake -or if its starting to shrink from the side of the tin, that’s a sign that it could be ready .  Otherwise test with a skewer if you are unsure.   I used a 20 cm ring tin, and daughter Tansy iced it with a delicious icing that included melted chocolate, Dutch cocoa and a dash of cream.

As this was Peter’s birthday cake I did use the best ingredients I had – cold pressed sunflower oil, red wine vinegar and Dutch cocoa that I couldn’t resist purchasing at the Parnell French market.   The man selling the cocoa advised me to use less oil or butter when baking with the Dutch cocoa because it is so high in cocoa fats compared to what we usually buy here.   So for this recipe I took the oil down to 1/3 cup.

It may have been Peter’s birthday but 2 year old Beau also wanted
the birthday moment of blowing out the candle.

  • Per capita New Zealanders eat more bananas than any other country 
  • Bananas combat depression, make you smarter, cure hangovers, relieve morning sickness, protect against kidney cancer, diabetes, osteoporosis and blindness 
  • Rub the inside part of a banana skin on a mosquito bite and it is said to relieve an itch (I’m going to try that!)
  • Inside banana skin can also be used to put a great shine on your shoes 
  • Bananas help overcome depression due high levels of tryptophan, which is converted into serotonin – the happy-mood brain neurotransmitter

25 Powerful reasons to eat bananas

  
I never knew that bananas could lift your spirits.

By buying bananas grown without exploitation of the environment or the people growing them, then you will feel doubly good.

I’ve decided that I will pay the extra and buy All Good Bananas from now on – even if it means a few less bananas – quality not quantity.

All Good Bananas have 4% of the domestic market share.  Remember, their website lists who stocks them.

Go on… find yourself a proper ‘nana!

The Big Easy and harvest time in Hawkes Bay

The Big Easy – I liked the sound of that as a sports event – cycling from Church Road vineyard in Taradale to Black Barn vineyard near Havelock North via a number of eateries. I heard the words vineyard to vineyard very clearly, but failed to think too much about how I was going to accomplish the 43 kilometre ride.

The offer of free Hawkes Bay Gala apples along the way certainly kept me going.

My photo of apples at Te Koha Organics
We had warnings of possible hazards…..
But I think that was a bit of an exaggeration

You see so much when you cycle.  From the tracks I got an opportunity to see orchards, vineyards and farms up close.   Here I was in Hawkes Bay at harvest time.

Cycling past at first glance I thought this was a paddock of
stones but on a closer look…
It was a field of pumpkins ready for harvest

But to digress… to the Hastings Farmers Market.   

Many varieties of squash for sale at the
Hastings Farmers Market every Sunday.

In warmer weather all the vendors, like wagon trains in a western, form a circle inside the showgrounds under the shelter of large trees. In winter they ply their trade under the grandstand and in a nearby building.  

I went to the market to find inspiration for an easy autumn produce dinner. So many delicious products to choose from!  I couldn’t go past the locally produced artisan dried pasta from Pasta Love and I chose a Pappardelle made with Rosemary picked from the pasta maker’s garden.

Pappardelle is a flat broad pasta usually 2-3 cm wide.

Next I was attracted by the vivid colours of Orcona Chilli ‘n Peppers.   Their site has some good information on the health properties of chillis.

I especially like the orange peppers and this one shaped with my initial.

And to keep with the autumn harvest theme what better choice than mushrooms from The Te Mata Mushroom Company 

The Te Mata Mushroom company website has some good information
on vitamin D and mushrooms

While cutting up the vegetables get ready a pot of boiling
water to cook the pasta (this is the longest part of the process)

With the addition of spring onions and basil from Monica’s home garden I was ready to start the Pappardelle.  Slice up 4 small spring onions, and two orange peppers, a good handful of basil and as slice as many mushrooms as you like.   This was enough for three of us.   
I don’t usually peel mushrooms – just wipe their surface with a damp paper towel – but if the mushrooms were a little older then I would peel them.
While chopping up the vegetables, put on a large pot of water and bring to the boil, add about 1 Tbsp of salt once the water is boiling.
 

I was lucky enough to find in Monica’s pantry Al Brown’s Orange Chilli Oil,
but you can use any oil

First of all heat from cold a couple of cloves of garlic in olive oil.  Once the garlic begins to sizzle, add the spring onion and then the sliced peppers. 

The pasta takes about 9 minutes to cook so now would be a good time to add the pasta to the boiling water (ideally feeding it into the water so that the water doesnt stop boiling).


Now add the sliced mushrooms and cook until juicy and soft.   If you think the mix needs some more liquid then add a half cup of water from the pasta water.   Pasta water is good because the flour gives the water a light thickening quality.   When the pasta is cooked, keep aside some pasta water to add to the sauce.   Just before serving add the basil and about 1/4 cup of grated parmesan to the sauce.  The cheese gives a creamy-ness without adding cream.   

I prefer to keep the mushroom flavour rich and not diluted by cream but you could add a dollop of cream, sour cream or creme fraiche if you like a creamy sauce.


Pappardelle is derived from the verb “pappare” which means to gobble up.  The three of us certainly gobbled up this light and tasty sauce on top of the really good pasta. 

Back on track with the Big Easy

The day before on The Big Easy bike ride after the 30 km mark, we were looking for time off the saddle and for an opportunity to gobble something more substantial than the free apples offered on the trail.      

These grapes had just been uncovered from their
netting protection ready for harvest at The Bivvy vineyard

Biking along the stopbank with river on one side and vineyards and orchards on the other we came upon a foodie’s oasis at The Bivvy Vineyard.  

The food truck in the background, long tressle tables
and a shade cloth for customers
How special it is to buy wine from the winemaker and to be in among the vines, with a food truck serving up fresh food.  We enjoyed a glass of 2010 Bivvy Voignier and a salmon and salad wrap or a late summer salad with melon, salmon and feta.

Looking up from The Bivvy to the cycle track

All credit to the organisers of The Big Easy.   Somehow they managed to get this event up and running in 6 short weeks. It attracted 700 riders, a mix of locals and visitors, for the inaugural  Cycle the Big Easy. How fortunate are the people of Hawkes Bay to have local councils with the vision to provide a network of purpose made cycle/walking pathways away from vehicle traffic. These pathways are comparable to those you find in cycle orientated countries like the Netherlands.

43 kms was about 13 kms too far for me – I was exhausted.

On completion of the trail we got free entry to a concert at the Black Barn vineyard starring The Beat Girls and enjoyed excellent wood fired pizzas and Black Barn wine. Meanwhile our bikes were being wrapped in blankets and taken by Conroys moving trucks back to Church Road where our day began. After the concert we too were given a ride back to Taradale in a bus.   All this for $25 per person!  

Harvest time is a lovely time to visit The Bay. If the organisers decide to do The Big Easy Cycle trail again next Easter, I am sure this would attract bike riders from all over the country.

Waitaki Valley Honey with Plums and Basil

Easter break is an opportunity to visit family or to explore other parts of New Zealand over the long weekend.  Receiving a gift of honey and a box stone fruit from my friend Kate has prompted me to take you on a virtual journey to the Waitaki Valley, inland from Oamaru, South Island. 

In less than a month the Waitaki River will be showing its autumn colours
as in this photo courtesy of Tourism Waitaki
Kate White and Peter Irving live in the Waitaki Valley, just out of Kurow.  Peter is an apiarist operating 3,500 hives and Kate manages the business end of the Waitaki Honey Company.

Their honey is the most creamy, soft and delicate honey you could wish for. 


Peter working on the hives; Waitaki Honey export around 80% of
their honey to international markets as New Zealand honey is highly valued overseas.


The plums were the size of nectarines and a beautiful red.   I promised I would bring the dessert to a friend’s for dinner, but with little time to prepare, it had to be simple. I remembered a recipe from the New York Times site that suggested roasting peaches with basil.

I would try basil with the plums instead and use the honey to produce a Waitaki Valley inspired dessert.

Roasted Plums with Honey and Basil  

I cut and stoned the plums and placed them on my blue oven proof plate from an appropriately South Canterbury institution, Temuka Pottery.

The dip in the fruit where the stone had been, I filled with honey and spread a little over the cut surface.  I sprinkled the plums very lightly with cinnamon and some sliced fresh basil.  (I used a good handful for the plate).

I wanted the fruit to caramelise a little, so I put a light dusting of raw sugar over the top.  It’s up to you as to whether you want to add sugar at all.

I didn’t have time to cook the fruit, so I just took the plate and a carton of ice cream, and we cooked at our friends for about 10-15 minutes at around 180C.   The cream of the vanilla icecream with the hot, sweet yet tangy plums worked a treat.  And the basil – well it looked great, and it produced a subtle aniseed flavour.

Basically you can do this with any type of stone fruit.  Roasting brings out the flavours beautifully and it’s so simple.  

Honey when cooked gives the kitchen a wonderful fragrance.  New Zealand honey is widely sought after because of its single floral flavours.
The wild areas where Peter puts his hives allows the bees to flavour his honey with clover, thistle and vipers buglos.  Honey made from vipers buglos is often called Blue Borage but its not the herb borage that we grow in the garden.

This image of vipers buglos was captured by landscape photographer
Gilbert van Reenan.   This is how you see it in areas of central South Island
and Marlborough, especially in dry areas.

Vipers Buglos produces a brown tinted honey with a light herbal bouquet.  It is sought after because it is high in fructose and as such is an excellent sweetener for drinks.  It is supposed to be excellent in coffee as it adds another flavour dimension.

Waitaki Honey is harvested from hives dotted over the remote
high country of the Waitaki and Hakataramea valleys and from the
lake shores and meadows throughout the MacKenzie Country
 

Honey, unlike sugar, is more than just a sweetener.  It has antioxidants and healing properties. 

The stonefruit Kate sent me came from Waitaki Orchard on Highway 83 just 4km east of Kurow. It’s truly a family run operation. Justin and Julie Watt and their 8 amazing children aged 8 to 18 all work on the orchard.
 
Kate is an excellent horse woman and took my Peter
for a ride along the back roads near Kurow to show
the growth of vineyards in this newest wine region in NZ
 
Mt Cook Alpine Salmon, Hot Tubs at Omarama, Benmore Dam
and Lake Ohau
 
 The Waitaki River is sourced from the Southern Alps and is the lifeblood for all the communities that have grown up along its banks.  Waitaki Valley is a gateway to the Southern Alps and the MacKenzie Country.
 
Here are some things you can do if you travel to the Valley following the River from the alps to the ocean (with a foodie focus).
  • Cycle the whole valley by doing The Alps2Ocean cycle trail. It’s the longest continuous ride in New Zealand (300 km)from our highest mountain Aoraki Mt Cook finishing in Oamaru. There are still large sections of the trail that are on-road.  Alps 2 Ocean Cycle Trail
  • Near Lake Pukaki eco-sustainable salmon are farmed in the swift cold currents of snow fed hydro-electricity canals.   The salmon having to work hard against the current produce flesh with more omega 3 and less inter-muscular fat than other ocean bred salmon. Mt Cook Alpine Salmon 
  • High above Lake Ohau is Ohau Snowfield and only 20 minutes away is Ohau Lodge. Many have told me Ohau Lodge is a real retreat at any time of the year and that the food is good. Lake Ohau Lodge and Snowfield  
  •  Hot Tubs Oamarama a good place to soak weary muscles be it from skiing or cycling.Hot Tubs Omarama
  • The Waitaki Valley is New Zealand’s newest wine growing region.  The limestone and mineral rich soils, as well as a long cool growing climate produces aromatic wines such as Pinot Noir, Pinot Gris and Reisling. One wine label I have tried and really enjoyed is Waitaki Braid’s Reisling and Pinot Noir.  International chef Peter Gordon recognised the potential of this area and is a part owner of Waitaki Braids. Waitaki Braids Vineyard
  • Duntroon is centre for fossils, rock drawings and nearby at Elephant Rocks incredible limestone formations that look quite out of this world. Visit Vanished World and get a Vanished World Trail Map.  Before you take off exploring you might like to stop for a coffee at The Flying Pig Cafe – reviews are good and its a memorable pink.
  • Near to the mouth of the broad-braided Waitaki is the famous Riverstone River Cafe where chef Bevan Smith and his team produce fresh regional food, much of it from Riverstone’s own kitchen garden.
  • Thanks to Tourism Waitaki for providing me with images to use. 


Elephant Rocks, The Flying Pig Cafe, Ohau Snowfield, and
Riverstone Cafe

An early morning view Peter often sees in the MacKenzie Country on the way to his hives

“Paradise found…heavenly nectar”, the opening lines to Waitaki Honey Company website – couldn’t agree more, about the place and the honey.


Now what can I do with all those courgettes…or are they zucchini?

My sister Kerry in Dunedin has a problem.  She has a glut of courgettes or zucchini.  Now that’s a problem I envy. Our late in the season courgette in a bucket has not thrived at all. Kerry’s plants keep on producing, sometimes from flower to fruit in a day. These abundant fruits are fast losing their novelty appeal and she has requested I give her some new ideas for using them.  

Ribbon cut courgette with Portobello mushrooms and cherry tomatos
 threaded on  kebabs sticks and cooked on a ceramic bbq plate

My latest kitchen addition is this lovely red Emile Henry ceramic bbq plate that can also be used in the oven.  It comes with 8 stainless kebab spears that fit into grooves along the sides of the plate.   The plate has small ridges and is ideal for roasting anything in the oven – vegetables, fish or meat.  This plate will also avoid your vegetarian option being flavoured with meat which is important if you are catering for a vegetarian.

Emile Henry Ceramic plate can be used on bbq or
 oven but not on a naked gas flame.

Courgette Kebabs

 I first make a simple marinade to avoid the cut courgette discolouring and to add extra flavour.   I crush a clove of garlic with a little salt, adding a good slurp of olive oil, and half a juicy lemon or one whole lemon (to your taste), and pepper.  

I slice ribbon lengths of courgette using a vegetable peeler.   You can also use a mandolin but this is something you have to really concentrate on when using as they can be lethal on fingers.   I find for courgettes that cut easily that the vegetable peeler does a good job.   The slices have to be thin so that they will bend and thread easily.  I used about three courgettes.

Next I cut up  2-3 Portobello mushrooms – cutting into 6ths or 8ths (depending on size of mushroom).  You could also use button mushrooms but I find Portobello has a bigger flavour.  I sprinkle a little oil, salt and pepper over them, but this is optional.  

I also used a punnet of cherry tomatoes to add flavour, colour and juiciness to the combinaton. 

Now simply thread the courgettes through the sticks…it’s a bit like tacking stitch if you sew.   (If using bamboo sticks then remember to soak them in water for at least half an hour before using – this avoids them burning.)  Follow with a piece of mushroom, more courgette and then a cherry tomato and repeat until the stick is filled.

The kebabs are quickly cooked especially if the plate is preheated and the
tomatoes are usually the best indicator that the kebabs are ready.

Cook at 180 C for around 10 minutes.  This is a delicious and fun way to prepare vegetables.

If you want a more punchy marinade use this Greek marinade I discovered in Adrian Richardson’s “The Good Life” cookbook.


Greek Marinade
2 Tbsp chopped thyme
1 Tbsp chopped sage leaves
2 Tbsp oregano
1 Tbsp ground black pepper
1 Tbsp fennel seeds, ground (I grind them in a coffee grinder I keep esp for spices)
1 garlic clove crushed
Grated zest of 1/2 lemon and juice of whole lemon
180 ml olive oil
Whisk all ingredients together and if not using immediately it can be kept in the fridge for a month.
Use this marinade for all cuts of lamb or for brushing onto vegetables that are cooked on the bbq or in the oven.

This is easy to make if you grow your own fresh herbs, and the fennel seeds that you can get from any Indian spice shop or collect your own fennel seeds.

You can harvest your own fennel seeds by collecting seed heads from fennel plants
and letting them dry.   If you forage for these then do make sure that the fennel hasn’t been sprayed.

This marinade is excellent to use to flavour cubes of haloumi cheese for at least one hour and ideally overnight before wrapping the outside edge of the cheese with a courgette ribbon.   This is a good dish to serve as a tasty vegetarian option.
I just added one of these courgette wrapped cubes in amongst the courgette, mushroom and cherry tomatoes simply to make the expensive haloumi cheese go further.  Adrian’s recipe featured the cubes alone and was served with a tomato and capsicum sauce.  I think you could use creamy feta or firm tofu instead.
Barbecued Haloumi Wrapped in Zucchini with Tomato and Capsicum Sauce
– a photo fromAdrian Richardson’s “The Good Life”

The courgette, zucchini and the marrow

Have you ever wondered what is the difference between a zucchini and a courgette?

Absolutely nothing!   
They are both from the family of summer squash. Italians call them zucchini and the French call them courgette.  Then the eccentric English like to let them grow into giants and call them marrows. Growing up we only had marrows – a courgette or zucchini unheard of in our house in the 60’s.   I was never that fussed on the marrow.   If only we had known then that we could have harvested the baby marrow like we do for courgettes and let others grow into the monster marrows.   
In New Zealand we tend to follow the French tradition and call them courgette, but we are also using the two names to differentiate size.   Courgette for smaller cigar sized fruit and zucchini for larger fruit.
Zucchini Cocozelle from Kings Seeds
I grew a Kings Seed Italian variety of zucchini very successfully in Dunedin.   It’s a vigorous, large growing plant that has quite prickly stems.  It produces a delicious green stripped and ribbed zucchini, and it is recommended as a variety that grows well into a marrow.  

One of my favourite soups features zucchini.   This recipe is from Lois Daish’s “Good Food” cookbook.   I would usually make this soup as the evenings start to cool down in the South. In Auckland I felt it was too darn hot to bother with soup but I had to make it for the blog.  I was surprised how light and refreshing it was with its tang of lemon.  Good news is that it doesn’t take long to make.

 Egyptian Zucchini Soup

(Serves 4)
1.5 litres chicken stock
2 celery stalks 
2 small leeks or onions
3 zucchini
2-3 cloves garlic
2 lemons
1 cup cooked rice
Salt and Pepper
Chicken stock boiling with onions added – I am so lucky to be able to use
our friend Chris’s copper and tin pots that he bought in France 30 years ago.
They keep the heat and look so good you could take the pot to the table.
Bring the chicken stock to the boil.  Slice celery, leeks or onions and zucchini very thinly.   Crush the garlic.  Add the celery and leeks or onions to the boiling broth.  Simmer for 15 minutes. Add the zucchini and garlic and simmer another 5 minutes.  Season with salt and pepper.   Squeeze the lemons.  Add the juice little by little to the soup, tasting as you go.  There should be a distinctly lemony tang.  Place a spoonful of cooked rice in each person”s bowl.  Ladle the soup on top.
I didn’t have celery but as I used homemade chicken stock that was well flavoured with celery I left it out.  I will do a posting in the winter that will feature making your own chicken stock.  
You could also use a stalk of the herb Lovage as a celery replacement but I would tend to just put the leaf in and simmer taking it out before serving, as you would use a bay leaf.
Lovage is easy to grow, prefers a damp location, looks and smells like celery and dies down
in the winter.   In the spring until autumn it can be used as
a celery alternative esp in soups.   The flavour is strong so use with caution.

The good thing about not having a shelf full of cookbooks is that I now go to the library to get my recipe inspirations.   I have got out many good books but sometimes you get out one that is exceptional.
“The Good Life” is a book that immediately draws you to it because of it’s presentation from the soft padded hard cover to the gingham ribbon page marker. The photos by John Laurie and the layout are gorgeous. The masterclass sections teach you to salt cod, make salami, focaccia bread (that I have made and was delicious) and the book offers plenty of vinegars, spice rubs, marinade recipes clearly and simply. Adrian Richardson has been a television chef, runs his own restaurant in Melbourne and believes in cooking from the garden.  The book is laid out in seasons.   It’s an inspirational book making you want to grow more of your own and like Adrian give the next generation “The Good Life” skills.

It’s good to find different ways of cooking courgettes because they are extremely good for you. The skins have a supply of dietary fibre which aids digestion, prevents constipation, maintains low blood sugar and curbs overeating.  Vitamin A and C in courgettes are powerful antioxidants and are effective anti-inflammatory agents deterring disorders like asthma, osteoarthritis and rheumatoid arthritis.   They are also beneficial for men for the prostate gland. High in Manganese means eating lots of courgettes will reward you with good skin and fast wound repair.
If you want to read more about how great courgettes and zucchini are go to this page:
Make sure you select fresh courgettes if you want to reward yourself with all these nutrients.
Like in the photo above they should be firm and shiny skinned.   They can have small blemishes from mixing with the crowd but shouldn’t have pock marked skin.  A limp courgette will not deliver all those promised good things.  It is recommended you store them in a plastic bag in the vegetable conditioning drawer of the refrigerator and use them in 3-4 days.  

That is one really good reason to grow these little beauties next summer and, if you are lucky, just like Kerry you will be picking fresh vital courgettes nearly everyday. 

Watermelon Feast and The Blues Bokashi Bucket

Grandson Beau (2) loves eating watermelon – simply sliced
(Photo: Jessie Mackay)

Watermelon – a real summer treat and we are eating lots of it up here in Auckland.   Put in the fridge before slicing and you have Nature’s sorbet – cold and refreshing, juicy and sweet.  Beau with my niece Jessie picked out this watermelon at the Wesley Community market on Sandringham Road.

Jessie teaching Beau how to tap a watermelon to check that it is ready
 – it should sound hollow

A couple of weeks ago I prepared a dinner for 12 friends and served a watermelon salad after the main.   I treated the salad as you would a sorbet, to cleanse the palate after a full flavoured main. If you serve a salad with the main event, so often it gets lost and unappreciated. By serving it on its own it turned out to be one of the star turns of the evening.

Watermelon Salad
(photo: Jessie Mackay)

Watermelon Salad

Cutting up the watermelon and taking out as many seeds as you can is what takes the time with this salad.   You could let people sort out the seeds for themselves but for our dinner we went that extra step to take them out.
I decided to contrast the pink of melon with an edging of oranges and red peppers and a touch of green with rocket leaves.
Next pile in the centre the watermelon.
Photo: Jessie Mackay
Follow this by adding feta.  I ignored my rule of trying to keep regional and for that special night used a sheep’s feta that came from Bulgaria.  It was truly delicious, affordable and just perfect with the watermelon.

The dressing I wanted to keep light and with a hint of sweetness.   As my friend Kate got us all together for the dinner I wanted to use some of her gorgeous Waitaki Valley honey in the dressing.   (I had to leave a lot of treats behind in Dunedin but I did find room in the car for Kate and Pete’s creamy honey).

Waitaki Organic Honey and my favouite oil
for dressings Avocado infused with lime

The Salad Dressing

1/4 cup of avocado oil (lime infused)
half a squeezed lemon (to taste)
Salt and Pepper
Heaped tsp of honey
Mix all together to melt the honey and taste to see if the balance is right.   
I dipped in a piece of watermelon to test the taste.
Me preparing the salad outside
(photo: Jessie Mackay)
Alternatively mix the feta through the dressing before placing onto the watermelon and then dribble over the dressing.  The avocado oil makes the dressing a rich green. 
Finish off the salad with torn pieces of basil or thinly slice mint and sprinkle over the top.
For that special dinner I had half a pomegranate so I picked out the seeds and added them to the salad, then squeezed out the pomegranate juices over the watermelon.   The sharp zing of the pomegranate seeds with the sweet melon are a heavenly combination.

Watermelon is listed as one of the top aphrodisiac foods – even claimed to have Viagra-like effects on the body.   Scientists have found watermelon contains large amounts of a plant nutrient called citrulline, which is known to have beneficial effects on the cardiovasular and immune systems.  The chemical can relax blood vessels and improve blood flow.   But researchers say it isnt organ specific like Viagra and most of the citrulline is found in the rind of the fruit.
(ref: Health.US News)
For those interested in pursuing this beneficial nutrient citrulline,
 I discovered a blog that offers a method of pickling the rind of watermelon.   

 Pickled Watermelon Rinds: The Domestic Man Blog

Pickled Watermelon Rind has the best Citrulline content.
(Photo  Russ Crandall, The Domestic Man Blogger )

Real men may eat watermelon but also consume lots of whey protein as Peter discovered while being diligent about his orange peel, placing it in a bin outside the Auckland Blues High Performance Centre while at Unitech.   Being a tidy Kiwi paid off when he discovered two large plastic buckets with lids discarded in the bin.

These buckets are perfect – a good fitting lid and
previously used for food so should be safe for composting

Everyone in the family was on high alert to find suitable buckets for our number 3 Bokashi Bucket composting system.   For this composting queen, Peter’s gift of the buckets was just as appreciated as a bunch of flowers.

Beau loves being involved and finds the drill most entertaining

 
To make the Bokashi bucket drill holes in the bottom of one of the buckets and use the second bucket as the draining bucket.

The holes should be big enough and plentiful to easily let the liquid escape,

Having buckets the same size has meant that it’s easier to pull the buckets apart when pouring off the juice every second day.

I have discovered by involving everyone in the family in the Bokashi composting process, it has been easy to get it right as we all know not to put in liquids and to push down the scraps after each daily addition to get rid of trapped air.  

If you want to know more about the Bokashi system then read my previous posting.

Last Friday night Peter was lucky enough to get to see the Auckland Blues play at Eden Park.  He says the protein must have worked because they easily beat the usually unbeatable Crusaders.

You could say we now have “celebrity” composting buckets which are rapidly being filled with all those watermelon rinds.   Perhaps I should try to pickle them.

Galley Cooking on the Shenandoah

Our really good friends Ralph and Maerushia invited us to enjoy the magnificent Hauraki Gulf on their cruising yacht.  We couldn’t have had a better introduction to Auckland – the city of sails.   This was my first experience of living on board a yacht.   Would I make a good sailor?  So with a Lemon Tipple Cake in hand and a little trepidation I boarded Shenandoah.

Ralph hoisting the sail
As we left we saw Prada coming in from a training exercise
Ralph and Maerushia tell us they will be returning home to Dunedin any year now, but while living here they enjoy what is truly great about Auckland – its harbour and the Hauraki Gulf.  Instead of a house they invested in a home on the water.

Peter at the wheel with Maerushia keeping a  close eye on where
he is taking her Shenandoah.  Maerushia was brought up around boats and
has a healthy respect for the sea so will not take risks with their home on the water. 
Ralph was born an inlander in Central Otago but you would never know it when you see him so
 relaxed and happy on the coastal waters.   Here he wears a momento from home, a
 Jimmy’s pie t-shirt from Roxburgh.  Ralph says Jimmy’s make the best pies in the South.

Being a “boatie” is like being part of a big seafaring family and I was amazed at the friendliness of people on the water. There is a fair amount of sailing jargon and etiquette you have to learn like calling, “permission to come aboard” when boarding a vessel and having a back of the boat bucket bath after swimming to avoid the salt from your skin attracting moisture to the upholstery.  

The galley looks larger in this photo than it actually is.
And then there’s cooking in a confined space with food storage and water being limited.  I learnt a few tricks from Maerushia on how to make a lovely meal using minimum dishes.    Maerushia is of European decent and both the presentation and act of dining is an important part of the day.   
Our lunch was going to be a new recipe that Maerushia found in a magazine while she was at her hairdresser…as you do!   This recipe can be made up in one bowl and a yoghurt dressing in another.   I am not that keen on the idea of minced chicken but I have to admit this was a very tasty lunch offering and easy to make.

Chicken Rissoles with Mint Yoghurt Dressing

Rissole Ingredients

800 grams chicken mince
1-3 cloves of garlic finely diced (whatever your preference)
1 cup stale breadcrumbs (60 grams)
Salt and Pepper
Lemon zest and juice of a lemon
1 Tbsp ground cumin
1/4 cup of finely chopped mint leaves
1 Tbsp extra virgin olive oil
1/2 cup Greek style natural yoghurt
1/4 cup of thick mint sauce

In a bowl mix the chicken with breadcrumbs, add garlic, and egg.

Add grated lemon zest, salt and pepper and cumin.

Add mint leaves. Mix really well to evenly distribute the flavours.
The rissoles are now ready to cook.

To prepare the Yoghurt Dressing, first measure yoghurt into jug, add mint sauce (this one is Delmaine Thick Mint Sauce), lemon juice and mix in the jug…how easy is that?

The Yoghurt Dressing

Cook rissoles until brown on both sides  (approx 5 minutes per side).   I was in charge of cooking the rissoles and made sure that the temperature wasn’t too high to avoid having them brown on the outside but raw inside.

Meanwhile Maerushia prepared a fresh salad of lettuce, tomatoes, radishes and peppers to accompany the chicken rissoles.    Ralph set up the table on the deck that cunningly fits around the compass and wheel.   Peter had bought a blast from the past to have with our lunch – Mateus Rose`from Portugal.   Some of you may remember those distinctive shaped bottles that in the 70’s were often used as candleholders.  We were surprised how good it was.

I don’t know how many yachts carry candelabra but Maerushia insists that Shenandoah must have an abundance of style.

Lemon Tipple Cake by candlelight

And that evening we enjoyed my Lemon Tipple Cake (see my previous posting for the recipe) made all the more special by candlelight.

I wondered why she was called Shenandoah – the name of a popular American song.   I have discovered the song was actually a shanty sung by sailors during lengthy tasks like weighing anchor, hoisting sails and winding the line around the large capstan.  These type of shanties are slow-paced and often have nostalgic lyrics because the sailors were either preparing to go home or docking somewhere far from home.  It’s a perfect name!   
Our perfect breakfast view – Kawau Island looking out at Governor Grey’s Mansion 

 There was no need for a sea shanty as we gently chugged into the bay on Kawau Island and anchored with ease in a spot where we had the perfect view while we ate our breakfast.  

With a nod to Shenandoah’s American connection we prepared pancakes for breakfast.  I do make a particularly good oat hotcake or pancake but it does use two bowls, has quite a few ingredients and requires an egg beater.    All too time consuming and difficult on a boat.

Here is Maerushia’s easy pancakes (well they are a cross between a crepe and a pancake really).

Well… yes you could say this is cheating using Edmonds Shaker Pancakes.   Sometimes convenience food has its place and with Maerushia’s additions they were a delicious start to our day.  You shake the contents,  add water and shake again like mad.    First up I didn’t add enough water so my pancakes were too thick for what Maerushia wanted to do with them.

These are the pancakes that are the more “cakey” American style

I added more water than was suggested so that the batter would pour easily and make a thinner pancake that could be rolled.

The magic touch is the addition of currants once you pour the mix.

Once a number of bubbles appear then burst it’s usually time to flip them.

To serve you sprinkle with sugar and a squeeze of lemon juice and roll them up.

We later landed on Kawau island to visit Grey’s mansion and to walk around the pine covered island thinking about what it would have been like in Governor Grey’s time with all the exotic animals he imported.   Only the wombats survive.    The highlight was the giant American Redwood tree.  Peter showed us how to tell a redwood from a pine by knocking on the bark – its bark is softer than pine.

Giant American Redwood tree on Kawau Island
I learnt a lot over the weekend about living on board a boat in close quarters. There are a lot of procedures you follow for safety reasons, like keeping everything tidy so that you know where things are should you need them in a hurry.  I now know my port from my starboard.   It was a little scary to a landlubber like me when we experienced rough patches, but we also experienced an idyllic few hours with just the sails and no motor noise.   
This coiled rope on deck is not for decoration but for safety
to avoid tripping on rope and easily unwound when needed.  
Peter and I became part of the Shenandoah crew and we each spent  time at the wheel.

Shenandoah is an Indian word that comes from a legend and roughly translates as “daughter of the stars”.    Our sleeping quarters were in the bow and we kept the hatch open so that we could look up at the stars on those perfect starry nights on the Gulf.

Thank you Ralph and Maerushia for sharing your Shenandoah with us.

Me a midships gazing to starboard!

Lemon Tipple Cake and Urban Composting

 Lemons…yes I am going to post again about lemons!  I’m going to let you into the secret of the best lemon cake ever according to all those that have tasted it – the Lemon Tipple Cake.

Lemon Tipple Cake dressed up for a birthday celebration
decorated with strawberries and icing sugar, borage and nasturtium flowers

It’s a mix of two recipes from two of my favourite cooks; Hugh Fearnley-Whittingstall’s Lemon Trickle Cake and Lois Daish’s Lemon Pound Cake with Gin Syrup.  From Hugh I use the cake recipe as it’s a light Victorian sponge and I use Lois’s Gin Syrup as the topping because this little tipple makes the cake so delightful.  I have taken the liberty of naming the cake the Lemon Tipple Cake.

Lemon Tipple Cake

This recipe is made in a loaf tin and the lightness of the cake will depend on the quality and quantity of beating.   You can do it by hand but for this cake I prefer to let Ken Wood do the hard work.   Use Ken at full speed to whip the butter and sugar, then add the eggs one at a time.   To avoid curdling add 1 Tbsp of the measured flour after the addition of each egg..and it helps if the eggs are at room temperature.
The butter, sugar and eggs should be beaten until light in colour  as above.  
This  is what makes the cake light.

175 g unsalted butter softened (I don’t always have unsalted butter)
175 g caster sugar
finely grated zest of 3 lemons
3 medium eggs
175g self-rising flour
pinch slat
A splash of milk (optional)
Grease and line a 1 litre capacity loaf tin with baking paper.
Cream butter and sugar until very pale and fluffy (at least 5 or up to10 minutes if you can manage it). 
Add the grated lemon zest and then beat in the eggs one at time, adding a spoonful of the measured flour to avoid curdling.  
Sift the remaining flour and salt into the mixture and fold in lightly using a large metal spoon.   Add a little milk if necessary, to achieve a good dropping consistency – i.e. the mix should drop fairly easily off a spoon when you tap it on the side of the bowl.
Spoon mix into tin, smooth the top gently and put in preheated 170 degrees C oven. 
Bake 45-50 mins or until skewer comes out clean.
With the skewer make holes all over the cake going quite deep but not hitting the bottom.
Gin Syrup – it also works using Tequila or Cointreau – try your own combination

Lois’s Gin Syrup: 

juice of 2 juicy lemons
150g caster sugar
2 T gin
(make this syrup while the cake is cooking – just stir to dissolve the sugar no cooking necessary)
Spoon or slowly pour over the hot lemon cake so that the holes can fill up.

The surface of the cake once the syrup has soaked in.

It’s a moist yet a light cake.  Does it keep?  Well in my experience it’s the sort of cake that doesn’t get the chance to hang around. I have had the fortune of having a piece the next day and it was still as good as the day before.

Hugh’s original Trickle cake has a runny lemon icing/sauce
of 200g icing sugar and 75ml lemon juice 

Bokashi to the Rescue!

…On the other hand, compost usually does need to hang around for months before it can be used in the garden, but not with the system I have rediscovered.

Living in urban Auckland, space is limited for processing compost, but I still want to make compost for the benefit of my plants in my newly established raised bed.

Our raised bed garden 1 week old – everyone helping out;
daughter Tansy planting out Rocket seedlings and grandson Beau
at the ready with gardening gloves.

Auckland’s daily summer temperatures of around 25 degrees give me an incentive to find ways of dealing with food scraps quickly, so as to avoid them mouldering away in smelly bins.

Luckily I had packed my Bokashi bucket when I left Dunedin. Bokashi comes into its own up here.   It’s a system of composting that originated in Japan and means “fermentation”. One of the best things is after fermenting for 10 days you can give it a shallow burial in the garden and in summer after another 10 days you can begin planting in that soil. 

Not one of my more attractive pictures!
But I wanted to show you what it looks like after being filled over 3 weeks.  
It will be covered  for 2 weeks and then buried in the garden
The environment in the bucket has to be anaerobic (the food is squashed down to squeeze out any air) which usually means in composting terms that it should smell really bad.  But it has an almost sweet fermentation smell about it, rather like it’s being pickled.

The juice adds nutrients and good micro-organisms to your garden.  It must be diluted 100:1 (i.e. 2 Tbsp to 5 litres of water) to apply to bare soil.  For foliage dilute to between 1:500 to 1:1000 (1-2 tsp) to 5 litres of water and spray over foliage to form a film over the leaves.  

Juice that gathers in the bottom bucket should be used every 2 days.   The juice  indicates how successful your fermentation is.   It should be a light brown, not smell too pungent and could have a light white mould on top as above.

The fermentation happens because the sweet smelling bran called Zing has been impregnated with good bacteria.  Add a good handful (more in summer or if you have larger quantities of protein to break down) each time you add food scraps.  It’s best to collect the scraps into a container and add when full – a 2 litre ice cream container is ideal.  Cut up the material to fit more in the bucket and to hasten the composting process.  Once filled up you leave the bucket closed for two weeks.

I thought I would let The Guardian’s columnist Alys Fowler tell you about the next stage….

“What happens in those two weeks is fascinating. Your waste is zombified. It looks pretty much the same, apart from perhaps a little white mould and the whiff of fermentation, but something has happened internally: the good bacteria in the bran have got to work. Much like the undead, it may look similar on the outside, but inside decomposition is well under way.”

Here are two other sites with some more information on the Bokashi system: 

The only no no is to put liquids into the buckets and its important to press down the food after each addition to squeeze out the air.
This is something I am keen to try as I intend on growing things in containers.

Zing Bokashi – Using fermented compost in Container Gardening

To set yourself up with a Bokashi bucket and zing it costs around $50-$55.    I now need a second bucket while my other one is fermenting.   I want to see if there is a cheaper way of doing it.

My first homemade attempt at making my own Bokashi Bucket.
Ideally the buckets should be the same size.  Mine aren’t but I do like the colours!

I have managed with one bucket with a good fitting lid and drilled holes in the bottom and put it together with a cheaper bucket for holding the juice.   They seem to be working.

When first using the bucket put a good handful of Zing in the bottom.
The original  ZingBokashi bucket is in the background.

But I could do better and am on the look out for some buckets that are larger and stronger and I have a lead… kitchens have lots of buckets with lids and the best thing about this lead is that the plastic will be safe for food.   As Ponsonby Road has lots of kitchens, I will be doing the rounds!

In my previous posting I talked about preserving lemons.   I found my lemons and squeezed as many as I could into this lovely French glass jar I got for free from a second hand store.  I am now prepared for when lemons become scarce.

Preserved lemons with bay leaves and cinnamon sticks

Next weekend I am lucky enough to be invited by friends to go sailing on the Hauraki Gulf.   I will be taking a Lemon Tipple Cake because I imagine any cooking on board will be difficult because of limited space…or will it?

Lemon lipped of Ponsonby

I thought coming to Auckland I would be in the land of lemons.  Lemons I consider an essential in the pantry but I am surprised to find out that if I regularly consume lemon water I could also become more shapely – now that is good news!

A particularly healthy lemon tree in my niece Francie’s backyard in Hawkes Bay

Here in Ponsonby people don’t seem to have the citrus trees they do in Hawkes Bay.  But it’s early days here and I will do more walks and keep peaking over fences.

The view overlooking part of the extensive garden at Waiheke – look at the colour of that sea! 
I wasn’t surprised to find a delightful edible garden when we went for lunch at Cathy and Jens on Waiheke Island.   A garden that I would long for in Dunedin with peaches, nectarines, limes, lemons, fejoias, figs, loads of tomatoes and basil growing outside!   The few remaining lemons are treasured because they too love lemons.

We enjoyed some slices of a delicious Japanese fruit called Yuzu.   I think it tastes a little like a cross between a sweet grapefruit and a lemon.  Its bumpy skin is similar to someone suffering from an acne attack.  If you want to learn more about how the Yuzu is used in Japanese and Korean cuisine click here:
Wikipedia on Yuzu

To keep up a supply of lemons throughout the year then you have to either preserve them or freeze them.   My friend Christine gave me some valuable advice when it comes to freezing. I will no longer painstakingly juice lemons and freeze into ice blocks.  I will simply throw them in a bag in the freezer.  You can grate the whole frozen lemon into dishes or squeeze the juice out when thawed.   But there is something extra delicious about the preserved lemon in salt that is worth the effort.

Preserved Lemons

A preserved lemon is usually ready to eat after
2 months in the jar

Preserving lemons is easy and to buy them is costly. They look good in the kitchen as well as being a wonderful addition to dishes.  Anna Gare who is a household name in Australia from her series “Quickies in the Kitchen” has one of the best recipes. She explains everything you need to know…about preserving lemons.  I liked the way she stuffs the “nearly” quartered lemons with rock salt.  Click on this link below:

When I did my first preserved lemons I was a little unsure how to use them. My son Gus came to the rescue and showed me. My sister Kerry during a break while helping me clean up my Dunedin pantry turned the process into an artwork.

1. scrape away fruit and pith scraping as much of the white pith off as you can,
2. wash to get rid of the extreme saltiness,  3. slice or use as you like.

See more of Kerry’s work on her Facebook page: http://www.facebook.com /theartdept.dunedin

Using just the skin seems a dreadful waste at first but consider that the skin is supposed to have 5-10 times the vitamins of the juice.   By making that skin delicious you not only have lemons on hand all year but you are using the most beneficial part of the lemon.

Oven Baked New Potatoes with Lemon and Garlic

New potatoes are magic but it can be tiring having them the same old way. I have a way of cooking them with lemon and garlic in the oven that dinner guests have enjoyed this summer.   One of my friends pointed out how delicious the roasted lemon was to eat. I had prior to that thought of the lemon as just a flavouring agent.  I now also eat the roasted lemon and its delicious (thank you Leanne).
Potatoes ready to go into the oven a mix of  Swift and Red potatoes 
Fill an oven roasting dish with new potatoes scrubbed but not scraped.  Pour a slurp of olive or avocado oil over potatoes and mix up with your hands.  Sprinkle about 1tsp of paprika, salt and pepper.  Cut up a lemon into 8 slices and place amongst potatoes. I also add new season garlic with the skin still on, place 4-5 fresh bay leaves if you have them, and some sprigs of mint.  Cover with lid or foil to keep in moisture.  Put into an oven at 180C and cook for about an hour.   
The good thing is that these potatoes don’t have to be so watched so carefully as those that you boil. Sometimes they can be quite browned but inside still a soft new potato.

Delicious Lemon Pickle

Our friend Robyn van Reenan is an excellent quilter and runs Christofer Robyn Quilts from her home just out of Wanaka.  Each year she organises the Wanaka Autumn Art School.  People can over a few days learn new skills from specialist tutors from all over New Zealand and Australia and at the same time enjoy Wanaka’s autumn colours.

 Robyn gave me a jar of her Delicious Lemon Pickle.   The recipe came from “The Second Black Dog Cottage Cookbook” by Adie McClelland who will be a tutor at this years Wanaka Autumn Art School. Unfortunately Adie’s class is full but look out for the 2014 programme for next year’s cooking tutor.  If you are interested in other artistic pursuits take a look at the programme on  www.autumnartschool.net.nz


DELICIOUS LEMON PICKLE

2 whole lemons, chopped and pips removed
5 large onions, roughly chopped
5-6 cloves garlic, crushed
2 cups white wine vinegar
1 cup lemon juice
3t salt
3c sugar
1t turmeric
1 heaped t prepared horseradish
Finely grated rind of two lemons
2t ground ginger
½ packet jam-setting mix (optional) – I didn’t use.
In a food processor add the lemons, onions and garlic. Process on the pulse button until you have a chunky mixture left. Do not over process or the onions will ‘let go’ of their liquid and you end up with a watery mess.
Place in a large pot with all other ingredients (excluding jam-setting mix) and bring to the boil.
Reduce heat and simmer for about 40 minutes.
Add jam-setting mix if you feel you need it. Cook for another 5 minutes.
Bottle while hot in sterilised jars.


Adie’s receipes are Mediterranean and Asian inspired and you can find out more about the cookbooks and Adie on  www.blackdogcottage.co.nz

Lemon Water

If you take lemon, sweetened with a little honey in warm water morning and night :

– your skin will improve
– it will aid your digestion and eliminate waste products from your body easier
– helps promote your immune system
– it purifies the blood
– gargle it to help a sore throat and cure bad breath
– the high potassium will benefit those with high blood pressure
– it can work wonders on the shape of your body by working on the body’s accumulated fat.
– it’s a fabulous antiseptic bestowed on us by Mother Nature.
For more info go to this blog: The Top 10 Benefits of Lemon Juice

Francie picking lemons for me

Today I got lucky. I found a 1 litre French preserving jar with a glass lid and rubber seal in a junk shop on K Road.  The seal was stuck so I was given the jar for free.   This weekend I am off to one of the Auckland markets to see if I can find the last of the season’s lemons at a good price to preserve in my jar.

After reading up about the health benefits of the lemon, especially working wonders on the body shape, I truly cannot understand why everyone up here in the sunny north doesn’t have at least one lemon tree in their garden.  

Cooking Corn Waimarama Style

I was welcomed to Hawkes Bay by the waving green fields of sweetcorn.  During our stay in the Bay I discovered the very best way to cook corn from Peter’s old mate Fred Hardy.

I love the colours of the beehives near Waimarama, Hawkes Bay

We were invited to lunch on a perfect day at Fred and Chris’s bach at Waimarama Beach about  a 20 minute drive past vineyards and olive farms south of Havelock North.

View down to Waimarama Beach – a very dry season 
We sat under an umbrella around a magnificient round totara table and talked about the locally grown corn we were going to have for lunch.  Fred is a born communicator and wasn’t at all phased by the camera when I asked him if I could video the process. 
Chris has a real eye for colour and design.  She has made their
simple 1960’s bach look a picture with the use of colour and planting that
showy red Bougainvillea that we don’t have a hope of growing down south.
Chris is just as much a foodie as Fred. Here’s how she made this easy and delicious cream cheese spread that we put on crackers as a starter.
Chris’s cream cheese spread – easy to whip up for unexpected guests
 if you have a spare cream cheese in your fridge and you can use any pickle but the lime was perfect. 
Cut in half a cream cheese, sandwich the two halves with lime pickle (homemade by Chris – must get that recipe) and top with a good coating of a dukkah of your choice.  To keep the dukkah in place lightly pour olive oil on top and serve with your favourite cracker.   Chris served it with plain rice crackers and it was so tempting to have more than you should.
Now onto Fred’s method of cooking corn on the barbeque in a way that keeps all the flavour and the kernals plump and juicy.    It’s simple but you need to prepare ahead of time.
Step 1:   Cut off the silky end of the corn. Find a large bucket and hold a running hose over the end you have just cut.   You can feel the corn husk being filled with water.  Place the corn in bucket with water.
The hose has to be pushed hard against the trimmed top of  the corn and your hand
 makes a seal to ensure the corn husk is being plumped up with water
Step 2:  You need to soak the corn for at least an hour before cooking and to keep them submerged put a weight on top.
This terracotta saucer is ideal but you can also just use a couple of bricks
or pavers too to keep the corn submerged
Step 3:  The cooking of the corn.   Heat your barbeque until really hot and lay the soaking corn on either the plate or grate.   If you have a cover like Fred does then that will decrease the cooking time.   Turn regularly for about 20 minutes.   To watch and see how Fred does it click on the arrow…..

Fred’s Waimarama Style Corn Demonstration

If you cannot play the video from the blog then go to this link to see the video on You Tube.
Here is how the corn will look when cooked – sometimes the husks are blackened and
even flame up as they dry out
Step 4:  Cut the stalk end of the corn off and with heavy duty gloves, twist and squeeze the corn out of its husk onto a plate.   It should come out free of all the fibre and be a beautiful yellow.  It helps of course if the corn is as fresh as possible.
Fred’s Sweetcorn was particularly good accompanied by a sprinkling of Kelp Pepper
 to reflect the seaside location (and its so full of nutrients)
On the way home to Napier look what was in front of us…..
Beekeeper moving hives near Havelock North
In September 2012 one of my early postings was called “A Vintage Morning Tea – Nan’s Pikelets”.   Peter’s sister Monica was inspired to purchase a modern griddle plate that is caste iron ridged on one side and flat on the other.   It works really well for pikelets because the ridges underneath seem to make the heat disperse evenly – like a simmer pad.   I proudly made Nan’s daughters a vintage morning tea using her favourite pikelet recipe. (see earlier post for the recipe).

Nan’s Pikelets topped with Gooseberry Marmalade  and a mix of yoghurt and mascarpone  cheese with a touch of honey from The Naked Honey Pot (gorgeous liquid Hawkes Bay honey)

Pasta e Basta

Pasta e Basta is a restaurant situated in Amsterdam, in the old part of the city, and is perhaps the most unusual and entertaining restaurant I have been to. No its not the food you go to Pasta e Basta for  – its the waiters. Young students hopeful of a singing career from the Amsterdam Music Conservatorium wait on your table and every now and then break into song singing an Italian aria or a pop ballad.

Maybe it was the Italian arias or the romantic notion of being like an Italian mama making long threads of pasta from my kitchen that influenced my decision to purchase a pasta maker. Two years have passed and I haven’t managed to get it out of its box. I decided to gift the Italian pasta maker to my friend Jan.

Imagine my delight when we walked into Jan’s kitchen in Christchurch to witness the pasta making in progress and later enjoyed the fresh pasta full of the flavours of summer.


Jan serving up the summer pasta dish featuring shelled prawns tomatoes and basil

Jan had waited for our arrival to complete the pasta making so that she could show me just how easy it is to make pasta. The sauce Jan made is simple, quick and delicious and you can make it as a quick meal idea with commercial fresh or dried pasta.


The pasta has to be hung to set and to keep separated – Jan used a pole between two chairs

You can make pasta out of ordinary flour but to increase your chances of a successful pasta you need to use Italian flours.  Jan used 50/50 Semola (which has the same texture as fine corn meal) with 00 grade very fine Italian flour.

Pasta

For every 100g of flours add one egg – Jan used 200 g of Semola and 200g of 00 Italian flour with four eggs – no salt required as the pasta is cooked in salty water. You can mix the Italian way on a large board or benchtop by hand but Jan used the Kenwood mixer with the dough hook and this saves time and mess. The eggs should be enough for the flours to form a soft dough – if not no more than a flick of extra water is required. You need to sit the dough for at least an hour before rolling. Jan stored the dough in the fridge overnight.
Divide the dough into two and roll out like a thick short pastry

Next process is called booking – you fold over both ends of dough to centre – just like a book!

Set the roller dial at the highest number and wind the handle and roll oout of the dough

After each rolling turn the dial to a lower number 

When the dough is thin enough you can move to the next stage
Thread the rolled pasta through the cutting blade turning the handle and if the pasta sticks sprinkle with extra semola to keep the threads separate

Pasta now hangs on a stick to dry and set and is ready for cooking.  You can also use coat hangers to hang the pasta.

Cut up a packet of cherry tomatoes, add 1 Tbsp of chilli oil and 2 cloves of finely chopped garlic (if you don’t have chilli oil just use a chopped chilli or chilli concentrate) with the zest and juice of two lemons.

Set a large pot of water to boil for the pasta and heat another pan with olive oil

Add one pack of raw shelled prawns and stir
 
Add 1 tbsp of salt to boiling water and then gently add the pasta to ensure the water keeps to a rolling boil – the pasta only takes 2-3 minutes to cook. Strain and run over cold water to stop further cooking.

Add the tomato mix to the prawns

Cook a few minutes
 
Chop up a large handful of basil – this magnificent basil is growing in Jan’s glasshouse

Serve with layer of pasta, tomato mix and chopped basil.

If you are not fond of prawns you could replace with courgette or eggplant for a summer vegetarian pasta dish and a good finishing touch would be a grating of parmesan cheese.  The courgette and eggplant needs to be cooked longer at a lower temperature. You could also opt to use other fish instead of the prawns.
 
Making pasta does take time but the edible result is much better than what you can buy.  It’s an absorbing process to watch and could be part of a social gathering with friends.   Jan was shown how to make pasta and in turn showed me.  I am now passing this on to you in the hope that you might get that pasta machine out of the cupboard, or borrow a friend’s machine and give it a go.   I won’t be making pasta in the short term but I will certainly make the sauce again. 

Southern Sushi

I don’t know who first called the cheese roll “Southern Sushi” but the title works well because sushi and cheese rolls both take time and care in preparing and rolling.  Describing cheese rolls as “Southern Sushi” also makes locals laugh as they immediately connect with the imagery.   

It’s a hard job finding the perfect cheese roll but my Mum (affectionately known as CV) perfected the cheese roll and any major family event usually included ‘chomping’ cheese rolls.    My sister Kerry has inherited the role of cheese roll maker for Mackay clan gatherings and in turn is teaching our youngest nephew Alex the secret of the perfect cheese roll.

Alex serving some of the toasted cheese rolls (Southern Sushi)

The cheese roll is perfectly suited as a southern comfort food with a buttery crunch outside and a hot cheesy filling that oozes when bitten into.

Kerry has agreed to share the recipe and method with you all.   This time Kerry added grated Mozzarella cheese. Mum would make up to around 500g of grated tasty and a smaller pack of vintage tasty to give extra bite. Kerry has made it easy by buying the pre-grated bags of cheese.

CV’s Cheese Rolls

375 g packet of Vintage tasty grated cheese
Similar packet of grated Mozzarella cheese
1 tin of Carnation evaporated milk
1 packet of Maggi onion soup
Chopped parsley – as much or as little as you like 
Mix together and let sit overnight
2 loaves of sandwich cut bread – ideally, the bread is lightly grained which will roll easily.
Alex with the cheese roll mix watching Kerry do the spread of cheese
Next day cut the left and right sides of bread to assist with rolling.  The cheese mix should be the consistency of porridge – add fresh milk if the mix is too stiff.  Place on an oven tray and butter each slice.  (In winter to make the rolling easier place a roasting dish of boiling water under the tray- this warms and melts the butter into the bread and makes rolling easier).   
Left and right sides of bread trimmed and then buttered

Next turn over the buttered side to face down on tray surface.

Alex turning the buttered bread face down on oven tray

Now, spread the cheese mix onto the centre of bread making sure you leave space around the edges of the bread to allow for spread of mix once melted.
Spreading the cheese mix
The next step is to roll up and store back in bags.   I recorded the action….

(If you cannot view the movie on making cheese rolls, I have included a link to the video on You Tube.)

Cook in a fan oven at 200C turning once to make sure each side browns.

The final turn of the rolls

They take approx 20 minutes to cook.
Kerry made the cheese rolls the day before we ate them and stored them in plastic bags in the fridge overnight. She also made some small packs to leave in the freezer for Alex to enjoy another day.  They do freeze really well and can be cooked from frozen but that will take slightly longer.

Anthropologist, Professor Helen Leach, from Otago University has investigated the cheese roll and it’s place in history.  Helen and her colleague found an amazing 140 cheese roll recipe references in Southern community cookbooks dating from the 1930’s to the 1990’s. I discovered 3 different recipes in a St Peters College, Gore, recipe book from the 1970’s.  

I remember in the 60’s and 70’s every cafe in the South offered cheese rolls.  The original recipe was a pre-cooked cheese filling but the recipe we use is as Helen Leach calls it the “convenience food” recipe  where the cheese mix sits for a day and then spread onto the waiting bread.   This was the recipe I also followed when making hundreds of cheese rolls as a school fundraiser in the 90’s – there are still plenty of  southern parents making cheese rolls as a dependable fundraiser.

What separates the fundraiser cheese rolls from my Mum’s is the quality of cheese and the addition of some grain in the bread.   The real secret is to make sure the rolls are buttered before rolling rather than buttering after cooking.  

The cheese roll is only found in the South Island, and is held with affection by Southerners.   The cheese roll has never migrated north – I wonder why not?


Five Good Things With Gooseberries

Dieter & Sandra’s gooseberry bush with boutique hen house in the background
Friends Sandra and Dieter have generously offered me their gooseberries.    Harvesting gooseberries is usually a prickly chore but their property on the flank of Harbour Cone on the Otago Peninsula is a magic place to visit and I love this short season tart fruit.

To reach the gooseberries I feel a little like a kiwi Gretel walking through a charming pathway through manuka woods to arrive in a clearing where fruit trees and two lucky hens live in the cutest hen house.

These lucky hens have a sheltered spot with a wonderful view over to the back bays of the Peninsula.   I couldn’t believe one gooseberry bush could have so much fruit.   I got to work accompanied by the cluck of hens and the buzz from a nearby beehive.   What is even better – the gooseberry bush is on a slope so I could easily pick from underneath and avoid those mean prickles.

After gathering a large shopping bag of gooseberries, then its the mundane task of topping and tailing.   Alternatively you can just throw the gooseberries into a bag in the freezer as they freeze free flow and top and tail as you use them throughout the year.   The gooseberries have to be picked green for cooking purposes and for eating leave them to ripen (if the birds don’t beat you).   You can also buy red skinned varieties and these I think are the nicest ones to eat raw.

Gooseberries top and tailed

In my September posting I showed you my sister Kerry’s espaliered gooseberry with the fruits just forming.   Here is a follow up shot of them after one harvest.   This makes picking even easier and the branches were absolutely laden.   I think this is a great way to deal with the prickly gooseberry bush.

Kerry’s espalier gooseberry bush makes picking easy

The Versatile Gooseberry

Here are just some of the things you can make with your harvest:

1.    The Gooseberry Shortcake – this combines the sweetness of the shortcake with the tart bite of the gooseberry.   My Mum used to bribe us into harvesting the prickly gooseberries with the promise of Gooseberry Shortcake.   Mum’s secret tip for a perfect gooseberry cake is to avoid putting any sugar on the gooseberries.   The sugar makes a syrup and the cake goes all soggy. You can find this recipe on my posting September 2012 “Gooseberry Shortcake and Sweet Cicely”

Note:   I converted the imperial measurements Mum used to metric.  When I recently followed the metric recipe I found it did need a little extra flour.   Put in the measurement and then add enough flour to make the dough workable on a floured surface.  It should be a very soft dough but it can’t be that sticky that you find it difficult to gently roll out with the help of a sprinkling of flour.

Gooseberry Shortcake – a real Mackay family favourite
2. Gooseberries cooked with Elder flowers – Elder flower is the perfect partner to gooseberries, giving the gooseberries a subtle muscat flavour.  Gooseberries make a lot of juice when cooked, so use very little water and to give a creamy flavour cook in a knob of butter and no water.   Remember you can reduce the amount of sugar with the addition of the herb Sweet Cicely. To make this into a sweet sauce excellent for going over pancakes – just puree in either a food processor or that wonderful invention the stick mixer. 

Gooseberries cooked with Elder flower blossoms and Sweet Cicely to aid the sweetening

Gooseberries after cooking
3.  Gooseberry Chutney-   I have never used gooseberries as a chutney before so I searched the blogosphere for the best sounding recipe.   I found two that I decided to try.   One included vinegar and spices connected to Christmas, the other was an Indian chutney with no vinegar and Bengali spices.
Spiced Gooseberry Chutney by Chef Heidi Fink

Peter’s preferred chutney was the one with Bengali spices 

Gooseberry chutney with Bengali Spice by the Hungry Tigress

This chutney doesn’t have vinegar and not that much sugar so once open it will probably only last a week or two in the refrigerator.   To keep good until opened, I followed instructions and finished the jars off in the oven making sure there was a good seal.   The Gooseberry Chutney with Bengali Spice was the one chosen by my pickle connoisseur husband Peter as the better of the two.

Both these blogs have excellent ideas so I have supplied the links to the recipes to give you the opportunity to go exploring these blogs over the Christmas holidays.


4.  Gooseberry & Orange Jam – I shared some of my gooseberry bounty with my neighbour Rob and next thing he turns up at my door with a jar of Gooseberry and Orange jam.  He found the recipe in “The Times Cookery Book” by Katie Stewart, published forty years ago in 1972.

Rob’s Gooseberry & Orange Jam with The Times Cookery Book 


 Gooseberry and Orange Jam
Makes 2 kg 700g and takes 1 hour.
1 kg 350g green gooseberries
430 ml water
rind and juice of 2 oranges (Rob used tangelos which gives the jam more tang)
1 kg 600 g granulated sugar
Rinse the gooseberries, and top and tail them.   Place in a large saucepan or preserving pan, and add the water, finely grated orange rind and juice.   Bring slowly to boiling point and simmer gently, squashing the fruit occasionally with a wooden spoon.   When the fruit is quite tender (about 30 minutes) add the sugar.  Stir over low heat until sugar has dissolved.  Bring up to the boil and boil briskly for a set (takes about 10 minutes).   Draw off the heat, skim and then spoon into six clean warm jars.   Cover and seal while hot.


5. Gooseberry & Elder Flower Fool – This is a simple and most delicious way of enjoying the flavours of Gooseberry.    It can be made in a moment if you have already prepared the fruit.   You don’t want it to be too watery.   If you don’t have elder flowers to hand you can simply add some elder flower cordial.

I presented the Gooseberry Fool in a Temuka coffee cup with my New Zealand shortbread
and a sprig of elder flower

You can make a fool with all cream, or a mix of cream and thick yogurt, or with a mix of custard and cream.  Play around with the combination you like the best.   I used two-third cream and one-third yogurt because the fruit is quite tart.  If the fruit was sweeter I would have gone 50/50.
Simply beat up the cream until thick and doesn’t drop off the beater.   Next fold in the yogurt or custard and then the fruit puree.  You can use any fruit for this but tart fruit is best.  Blackcurrant or rhubarb fool is also good.  You need to allow it to chill well before serving.   It’s a lovely dessert to have on a hot summer’s evening.

Glossy, sweet Strawberries from Dieter’s Glasshouse

It’s now towards the end of the gooseberry season here.   The gooseberry is stepping aside for delicious strawberries, currants and raspberries.   Dieter has his strawberries growing in large black pots.   I think this is something I might try because many of my strawberries get eaten or rot if the ground is too wet.   Picking the strawberries hanging over the edge of the pot make for easy and perfect pickings….just like Kerry’s espaliered gooseberries. 

Southland Watermelon and Bottled Central Otago Apricots

It’s time for me to announce that this Southern cook and gardener is heading North. Peter and I are embarking on a new adventure in Auckland for at least a year. I am looking forward to having easy access to citrus, avocados, tamarillos, kiwifruit, and to grow tomatoes and basil outdoors!

There will be Southern fruit and vegetables that I will miss like Oamaru new potatoes, gooseberries, black and red currants, and Central Otago stone fruit, particularly apricots and cherries.

But there is one southern vegetable that is often overlooked or even disliked….the swede.  Much to Peter’s embarrassment, I have been known to pick up a swede from the trailer selling them at the airport to take up north as a gift.

I like swede and even though it’s not seasonal, I am going to feature it because I will miss it next winter and was reminded of it recently in a jewellery gallery.

Southern Watermelon, aka the Swede

Swede by David McLeod from 5+ a day series (Copper & Silver)

The swede, originally called the Swedish Turnip, and Rutabaga in the US, is actually a cross between a turnip and cabbage and is on the list of aphrodisiac foods (who would have believed that?)  

We down here jokingly call it “Southland watermelon”. You could never compare a supermarket swede to a watermelon.   But imagine it’s a winter morning in Southland, one of those mornings when you can see your breath.   A swede is plucked from the frost chilled soil, and deftly peeled by a farmer  skinning the swede of its earth and roots. You are handed a slice and may well be surprised by it’s sweet melon like quality.  If you ever have the opportunity, go on, give it a try.

The swede, if fresh, is lovely grated raw into a salad.  Make sure it’s late enough in the season to have had at least one good frost to concentrate the sugars. The swede stores well and if you manage to obtain some that haven’t had all their roots trimmed, you can pop them back into the garden soil to keep even longer in nature’s fridge.

David McLeod from Quadrant Gallery – Jewellery,
Glassware and Ceramics, Moray Place, Dunedin

I have a great Friday job working at Quadrant Gallery in Moray Place, Dunedin, with owner and jeweller David McLeod. Dave loves gardening. I bet there are not many jobs where your boss brings you lunch, and better still it’s substantially made from his garden produce. He has even made jewellery inspired by vegetables.

I have asked Dave to be a guest recipe blogger with a Swede recipe from his sister.  You can store it away until next winter.

Broccoli Tree from David McLeod’s Five+ a day series
Nana’s Big Tomato – by David McLeod from his Five+ a Day series – silver and garnet
(this piece was based on a drawing his daughter Islay did when she was 5)

Allannah’s Grated Swede

Framed Swede  – Five+ a Day series- Sterling silver
and Copper

Peel and cut into pieces that can easily be grated.
Finely chop an onion.
Melt a knob of butter in a pan, and saute the onion until golden.
Add 1 tsp of turmeric and caraway seeds (to taste -perhaps 1/2 tsp)
Then add the grated swede and cook until soft.

Dave suggests this is a great dish to serve with lamb and a salad.

I haven’t been able to try this recipe out yet but I like the idea of using turmeric and caraway to give a hint of the exotic to the humble swede.   I would also be tempted to try a little chili as well.
Grating the swede is inspired because it can take quite a while to cook in pieces.

Bottled Central Otago Apricots  

Gus’s preserved Sundrop organic apricots 

One thing I will definitely miss will be preserved apricots made by our son Gus. They taste like bottled Central Otago sunshine.

Gus put his preserving prowess to the test when he entered his apricots into the bottled fruits section of the Wanaka A&P Show this year.  He won first prize. Unfortunately they don’t run to ribbons these days and the $5 prize money isn’t quite the same thrill.    

The key to Gus’s success, as with most good food, is sourcing the best fruit he can. He has found an organic grower who grows the apricot    varieties Sundrop and Vulcan.

He produces around 100 jars of apricots each summer using the familiar Agee jars that my mother would have used (1 litre capacity).   All the apricots are processed in a commercial kitchen and he is set to do his 2013 bottling batch late January.

Gus is selling the 20 bottles he has left from his 2012 bottling.

If you would like to buy these prize winning apricots or make an order for the 2013 season you can contact Gus by email: Augustin_hayden@hotmail.com  They cost $22 each ($20 if you can offer a replacement Agee Utility jar.)


Apricots are an excellent source of vitamin A that doesn’t get destroyed through cooking. 
Perhaps I can convince Gus to do another guest blog featuring his preserving method late January.
Watch out for my next posting on the different things you can do with another of my favourite southern fruits, the gooseberry.

Aubergine/Eggplant – the king of vegetables

My friend Gill just can’t pass an aubergine in the supermarket .  Who could blame her?

That alluring smooth roundness with a rich chocolate-purple skin would tempt most of us to reach out and add one or two to our shopping trolley.   Gill’s first inclination is to make ratatouille but wants some new inspiration for aubergine or eggplant dishes.

Gus bakes fresh bread each day for the Whitehouse Restaurant

I knew just who to ask about aubergines.  My son Gus works as a chef at the Whitehouse Cafe in Wanaka and he uses aubergines a lot.   I am proud to introduce Gus as my first guest blogger.

 Gus’s Aubergine

Cut down the middle, score in a criss-cross pattern and salt – a good pinch per half.

Tap flesh side down on a bench to get out moisture, then pat dry with paper towel.

Brush halves with herb oil (Rosemary or thyme) that has had garlic blended with the oil.   Rub with sweet patrika and bake flesh down.   Make sure there is plenty of oil or they will stick and burn. Cook at 180-200 for 20-30 minutes until they don’t bounce back when poked with your finger (same test as for cooking a fish fillet).

Now top with whatever you like.   At the Whitehouse we use braised lamb and soft Peccareno cheese Return to the oven to heat through and melt cheese.

Thank you Gus.
   

Gus Hayden can be found cooking at the Whitehouse Cafe and Bar in Wanaka most evenings.  He was first introduced to cooking to finance his other passion, snowboarding.  Gus says he is lucky to be able to live and work in Wanaka.  He loves preserving like his grandmother did using the old Agee jars (and is becoming known in the Otago second hand shops as ‘the jar man’).  He produces beautiful bottled Central Otago apricots, cordials, curds, quince paste, chilli sauces and various pickles.  We are the lucky ones who get supplies each time he comes home to Dunedin.


Whitehouse Cafe & Bar, 33 Dunmore Street, opp
the Domain, Wanaka, Ph 03 4439595


So if you are travelling to Wanaka this summer call in and say hi to our Gus.


Aubergine has a taste and texture that is unique.   I have discovered that it not only looks good, but it is good for you.   It assists in getting rid of harmful cholesterol and provides antioxidants that help prevent cancer cells forming.    Some research has even pointed to Aubergine assisting you in losing weight (until you add that olive oil I guess!).  You can find out more nutritional information on this site:
Whole Foods – aubergine health properties

Aubergine is a sponge for flavours, so works very well in a curry with all those spices.  It’s also appropriate as the plant originated in the Indian sub-continent and is known in Asia as Bagan Brinjal.

I discovered a curry recipe from  My Darling Sweet Lemon Thyme.   This blog is written by Emma Galloway, formerly of Raglan now living in Perth.   Emma is a young mum who cooks gluten and dairy free food for her family with food allergies.  She has worked professionally in a kitchen and I must say her site is inspiring.

Eggplant Curry – a simple quick dish that even improves for the next day


Eggplant Curry from My Darling Lemon Thyme Blog  (Click here to get the Curry recipe)


The only alteration I made to this recipe was to finely cut up the garlic rather than crushing, doubled the tumeric because it’s a spice that’s so good for you, and used a can of tomatoes and half a can of water.   Emma was right it did taste even better the next day.
Eggplant curry served on rice, topped with onion and chopped coriander

How to Choose Your Aubergine

When picking your aubergine make sure it has a glossy skin with no spots or marks, the green top looks  fresh and if possible still has a stem.   To test if it is ripe push the flesh and if it bounces back it is ripe.  If the indent stays – its not yet ready for eating.   If it comes wrapped in plastic take that off as soon as possible.  They are so decorative that I usually don’t put them away in the fridge but that does keep them for longer.

To Salt or Not to Salt…..

Botanically Aubergine is actually a berry and the brown spots
are its seeds

The new varieties of aubergine doesnt tend to be as bitter as those in the past and won’t need “degorging” (salting, rinsing and patting dry).  If your aubergine has a lot of the dark seeds it will have a bitterness that comes from the nicotinoid alkaloids found in the brown seeds.   Yes there is nictotine in eggplant but you would have to eat 9 kg of eggplant to equal the nictotine of one cigarette. 

Salting will however soften the fruit and will lessen the amount of oil you will need to use to cook it.  


River Cottage veg everyday!

 Hugh Fearnley-Whittingstall‘s latest book Veg Everyday matches his recent series tv series when he gave up eating meat to explore the possibilities of vegetables.      We too have recently decided to make more meals vegetarian and this book has enticing vegetarian recipes.   It’s not that I am  against meat it’s just that the more I learn about the benefits of vegetables the more I want to use them.  I love the way Hugh lays out and describes the methods of cooking and gives suggested variations to a recipe.  I looked up aubergine and there were three recipes that I would like to try.  So one more ‘Hugh’ book has found a place on my recipe bookshelves.


A page out of Hugh Fearnley-Whittingstall’s – River Cottage veg everyday!


This is one of the recipes I would like to try from Veg Everyday.   It’s simple – just roast 2 cubed aubergines with potatoes in hot oil, adding chopped garlic in the final 10 minutes and just before serving add lemon juice, sweet paprika (like Gus did) and chopped herbs.   Hugh also suggests adding another eggplant and replacing the potatoes with chickpeas in the final ten minutes of cooking.
Looks delicious and I will definitely try this the next time I get an eggplant or aubergine.


Aubergine is also called Eggplant as the cultivars introduced to Britain were yellow or white and the size of a goose egg.  “Jew’s Apple” was another name in the 18th century, because of its great popularity amongst Jews who may have introduced it to Britain.   
Thank you Gill for encouraging me to look for fresh ideas for Aubergines/Eggplants.   The regal purple aubergine certainly deserves the title King of the Vegetables

I have had some feedback from friends who want to add a comment but cannot unless they are on gmail.   If you would like to add a comment just send me an email  jeanniehayden5@gmail.com (until I get this problem sorted).
  

Salad Series I – the salad can be the star!

I always want to give a salad the opportunity of being the “star” or at least the “co-star” on the table rather than an “extra” to the main course.

On Sunday I made a salad for the Fortune Theatre BBQ and get together for cast and crew of “Calendar Girls”.   It was a great evening that took place in a unique storybook house set high above Carey’s Bay.  As we live on the other side of the Otago Harbour, I knew my salad wouldn’t travel well, so I decided to take all the pre-washed ingredients and dressing in a chili bin and made the salad up just before we ate.   Everyone loved the freshness and flavours.

Three of the wonderful “Calendar Girls” Donogh Rees, Donna Akersten and Hilary Halba with my Calendar Girls Salad

Calendar Girls Salad

The salad consists of two varieties of cos lettuce riped into bite size pieces, rocket also ripped if larger leaves, some red orach ripped and 3 sorrel leaves cut into strips for that lemony zing.  
Then I add the herbs. I cut up parsley, pulled apart chervil, cut the strap-like garlic chives with scissors, a few sprigs of coriander ripped and a sprig of sweet Cicely stripped to add a touch of sweetness. 
Now I dress the greens and herbs in the bowl using a convenient spray vinaigrette “Damson Vinaigrette” from The Damson Collection.  Its a real favourite of mine.  Then a sprinkling of flaked sea salt and a good drizzle of extra virgin olive oil. Toss the greens. Its time for the decorative and tasty topping.  I use chive flowers plucked for a spicy heat, blue borage flowers gently separated from their hairy bases, the delicate white coriander flowers and the bold as brass peppery yellow and orange nasturtium flowers.   Luckily I have an abundance of wild small strawberries in the greenhouse which I add for sweetness.  Final touch a sprinkling of pickled nasturtium seeds made last summer.   The red, orange, yellow and blue on top of the green drew an appreciative audience to my Calendar Girls salad. 
Of course not everyone will have each of these ingredients on hand but you can use the principle of this salad to make your own colourful salad combinations.
– first pick, wash and spin dry your salad greens or simply a lettuce
– next add a selection or just one of the soft herbs such as fennel, parsley, mint, coriander, chervil, chives, basil and tarragon
– dress your green salad in the bowl and toss.  If you dress it once you have all the flowers and fruit the colour will disappear – this way you can have the enticing colour on top
– add fruit or sweeter vegetables like tomatoes, beetroot, carrot or bulb fennel
– final touch are some edible flowers for colour, texture and flavour punches
– you need to experiment with flavours and combinations of flavours – taste them in your garden and think what would contrast well with that flavour
Here are some of the chosen ingredients starring in my Calendar Girls Salad: 
Red Orach – a young seedling
 Red Orach (also aptly called Purple Passion Spinach) is something I was first introduced to in a friend’s garden.   I took some seeds and carefully grew some plants in the greenhouse.   Now all I have to do is to wait for them to pop up somewhere in the garden.  If it does settle somewhere I usually let it stay.   I love its velvety purple-red colour and spinach like texture with a hint of salt.    This photo is of  a baby seedling – eventually the plant will grow to around 60cm tall.   The leaves can also be added to sauted greens although be warned the purple colour bleeds.

Wild Strawberry – the size of your thumbnail

Wild or Alpine Strawberries are called Fraises des bois (fruit of the woods) in France.  As the name suggests these little strawberry fruits can grow in any part your woodland garden.  Quite often gardeners think of them just in oramental terms.   The fruits are sweet and fragrant but do not keep well – you have to use them the day you pick them.  In France they are used in fruit tarts but I have never managed to pick enough at one time to do that.   They are perfect little flavour capsules to add to a salad and look so pretty.  The plants readily self seed so once you find the best edible variety you will always have a sweet harvest from early summer until autumn.  Every 2 years I take out the old plants and replace with young seedlings – after all that fruiting they just get worn out.    I grow mine as an edging in my greenhouse so that I can pick a strawberry at any time while gardening.

I haven’t used these pom pom flowers of the chive in my salads until now.   I thought I would try them to see what they tasted like.  They are delicious – quite hot and onion like, as the chive is from the leek and onion family.   It would be too much to eat in one bite so I simply plucked the florets.


Here’s a site that quickly tells you of some other flowers you can use in your salads
Flowers you can eat
Bowls by Peter Henderson – Quadrant Gallery, Dunedin
The bowl the salad is presented in is also important if you want to make a big impression.        These fabulous bowls are made by Broad Bay potter Peter Henderson.  Could be a great gift for the salad maker in your family this Christmas.  I love his use of colour and drawings and you can find them at the Quadrant Gallery in Moray Place, Dunedin.    They are also practical – not too wide.   While salads look wonderful in large round bowls they do take up a lot of table space. 
Bowl of Peter Henderson – Quadrant Gallery, Dunedin

Dave McLeod has many New Zealand jewellery, ceramic and glass artists work for sale in Quadrant Gallery

Fortune’s Artistic Director Lara Macgregor  is also a talented baker
producing  themed buns (not cupcakes in Yorkshire)  for the Calendar Girls
on Sunday

 
This salad was more of a production than you would normally have time to do for dinner each night but for a special meal why not give it a try.

I have been experimenting with salads for years and have so many ideas to share with you all that I have decided to run a series on salads so we can cover all seasons and various types of salads.

The Fortune Theatre 2012 season is closing with a deservedly popular show. If you live in Dunedin you may still be able to get tickets for the two extra matinees they are putting on due to popular demand.

You Tube of Calendar Girls Trailer

Ken the Caterpillar and Fun Food for Kids

I am on “Nana Jean” duty in Auckland with 2 year old Beau while our daughter Tansy is acting in a play.   As we live at the other end of the country, it has taken time for Beau to get used to me, but I think I have cracked it – he likes interesting food!

On my first day Beau proudly showed me three Monarch pupae looking like pieces of jewellery with their glittering rings of gold.

I was curious.  What was the purpose of the gold?  Who better to ask than our Bugman friend, Ruud Kleinpaste.
Simple ornamentation.  They want to look good.  Just like you and I.  They are chemically protected so don’t need camouflage”, txt Ruud.
Ah that’s why the caterpillar chose a red sack barrow to hang out on rather than a plant.

Tansy has given Beau a very good introduction to science by simply planting swan plants in a pot and encouraging him to observe.    The Monarch butterfly did the rest by laying eggs the size of sesame seeds on the swan plant.

Two of the three pupae don’t have names, but one does.   A week ago one caterpillar caught Beau’s eye when it left the swan plant for the next stage of its life.   Tansy recorded the moment on her phone.

(As this is the first time I have tried attaching a video I am a little uncertain whether it will work.   If nothing happens when you click on the arrow or if there is no audio then just click on the following link.)    Beau and Ken the Caterpillar  or copy the following address into You Tube http://www.youtube.com/watch?v=P74MHJXV9jI&feature=plcp

Beau checks up on Ken every day.   One day soon we hope to witness the magic moment when  Ken transforms into a beautiful Monarch butterfly.

(If this video is not available when you click the arrow then just click on the following link) Life cycle of the Monarch Butterfly or enter the folllowing address on You Tube:  http://www.youtube.com/watch?v=7AUeM8MbaIk

You might like to see the whole process in this excellent time lapse video made by Duncan Scott for the Chicago Nature Museum.   It’s only four minutes long and shows the complete life cycle of the Monarch.

The Hungry Caterpillar Salad

I was inspired to create a salad for Beau that night with a caterpillar theme.   My only mistake was calling it “Ken the Caterpillar salad”… at first he wouldn’t eat Ken.  It’s a good way of making a green salad come to life for kids and perhaps may convince young non-salad eaters to give it a try.
Caterpillar Salad: green salad with cucumber and tomato caterpillar
heading towards the purple cauliflower trees

I first slice an iceberg lettuce, then add some chopped parsley and chives. 
I dress the green salad with a little lemon juice (or if you prefer vinegar), a little salt and more olive oil than vinegar, so that the greens have a slight shine but not sloppy.  
Next the fun part – to create the caterpillar using thin slices of cucumber, a tomato slice and for eyes a couple of raisins. For the legs green beans.  Alternatively you could use slices of coloured peppers or cut small pieces of dried seaweed for the legs.
The final touch, a bunch of purple cauliflower.   I used the cauliflower raw as it was so fresh, crunchy and sweet.  This is just a guide and what was on hand for me to use.

Cracker Man

Cracker Man a savoury alternative to a Gingerbread Man

I discovered a recipe for Snake Crackers that would involve Beau in the making but the mix ended up  too crumbly to roll into snakes. I had to quickly think what to do to keep his interest.  I decided to roll it out and let Beau use his gingerbread man cutter and called them Cracker Men. The cracker recipe is easily made and really tasty with the addition of  cumin seeds. Beau loves them.   

Cumin Crackers
1 cup of white flour
1 cup of wholemeal
1 1/2 tsp salt
1 tsp baking powder
1 tsp caster sugar
1/4 tsp cumin powder
1 1/2 tsp cumin seeds
1 egg
1/2 cup olive oil (I used 50/50 extra virgin olive oil with bran oil so that the flavour wouldn’t be too strong for Beau)

Mix all the dry ingredients except sugar.  In a separate bowl whip up egg, sugar and oil.   Add to the dry ingredients and an additional couple of tablespoons of hot water to mix into a dough that can be rolled.
To make it easier to handle, sit the dough for half an hour in a cool place before rolling.   If you haven’t the time just roll out immediately.  Cut into shapes of your choice. Place on baking paper, or a greased tray in a preheated oven at 180C for 20-25 minutes or until light brown and crisp.

Cracker Man and his tractor salad for Beau

These biscuits need not be an adult free zone.   Cut into squares or rounds to eat on their own or be topped with a topping of your choice. The crackers have the consistency of shortbread and are similar to oatcakes but hold together more easily.You could replace the cumin with finely chopped rosemaruy or thyme and add fennel seeds instead of cumin.

I got the recipe from the blog  Little Food Junction where there are lots of ideas for making exciting snack food for kids.  Unlike many other blogs about kids food, the ideas don’t tend to be loaded with sugar.  If you click on this link you will be taken to a post I thought most fitting -“The Hungry Caterpillar”.

Last week I was asked a question from a reader whether or not  kumara or sweet potatoes could be used instead of parsnips.  I cannot see a reason why not as both have a good level of starch. When Tansy requested that I make them the parsnip crusted pie I decided to test out the Kumara option. 

The colour with kumara is an inviting golden yellow (we used golden kumara).   It proved to be a good choice as it worked out just as well as the parsnip.   I also think pumpkin would be another good choice.   

For the recipe for the pie go to my posting “An Unusual Vegetable Pie Turns Carnivore”


The very best thing about this pastry is that it has less butter and consuming a small amount of vegetable without really knowing it. Again a winner for kids who try to avoid vegetables.

I have also tried this pastry using a gluten free option.   I used spelt flour.  Spelt can be a little dry in texture but with the mashed vegetables this wasn’t such a problem.

I have been here for a week and there is no sign of Ken emerging.   I really hope he will give us a great performance this weekend.  Perhaps like me he is waiting for the sun before we both take flight.


Hawthorn – an emblem of hope that summer is coming

“Ne’er cast a cloot til Mey’s oot” 

This old Scottish saying warns not to shed any cloots (clothes) before the may flowers (hawthorn blossoms) are in full bloom.   The Hawthorn tree (also known as May Tree, Mayflower, May-thorn, Quick-thorn, Mother-die, and Fairy-thorn) is in full bloom on the Otago Peninsula, smothered in white flowers with hints of pink.    The tree may be broadcasting that summer is coming but in Dunedin we are not able to shed our layers of clothing yet.    


The Hawthorn in New Zealand does not enjoy the favour it has in its English homeland.  It’s standing accused of being an invasive weed.    True it propagates all too easily here, but  I wish to speak up for the Hawthorn.   It’s truly a very useful tree.   It’s an important plant for traditional herbal medicine, a hot burning low smoke wood for fires, an effective hedging tree that will not only keep stock in but will keep them healthy, and an important habitat for insects and birds especially moths and butterflies.  And for my friends with horses, Hawthorn is reputed to help horses with arthritis.   Horses-with-arthritis


I have known the secret of delicious Hawthorn and Apple jelly made from the fruits called “haws” in autumn.   The spicy bite of the haws with the sweetness of the apples, with a rich purple-red colour  makes it a real winner.   I am happy to share this recipe if you are keen to try it in autumn.  

I first took the photo on one of my walks and decided to find out if I could eat the flowers or leaves.  I discovered that in days gone by in England it was called the bread and cheese tree.    Children were given Hawthorn leaf sandwiches because it was one of the earliest nutritional green in the hungry part of the year.   

I tried the leaves but it was a little late now that the flowers are out.  They were a little tough to chew but next year when the leaves first appear they will be a welcome addition to an early spring salad.  

The flowers are pretty and looking at them you can see why they belong to the rose family.  Some say the flowers impart an aroma of cherries but I couldn’t detect that.  


Hawthorn & Borage Flower Salad

Hawthorn and Borage flowers with a mixed green salad

Gather green salad leaves and herbs.   I used a mix of lettuce, miners lettuce, rocket, NZ spinach, parsley and coriander.   Dress the greens with your favourite dressing and then add the flowers. Pretty, different and nutritious.

Eating the flowers and leaves of Hawthorn is a good source of antioxidants but avoid collecting them from the roadside.
The flowers and leaves of Hawthorn are used in herbal teas and tinctures as a heart tonic, to improve circulation and to maintain a healthy blood pressure.  For more information on the properties of Hawthorn visit: US National Institute of Health – Alternative Medicines
Artemis produces a  Healthy Heart Tea and Hawthorn is one of the key ingredients. Artemis – Healthy Heart Tea
 Hawthorn is mentioned in the folklore of many countries and cultures; Celts believed it could heal a broken heart, ancient Greeks carried its branches in wedding processions, the Serbians and Croatians believed it to be deadly to vampires and was used for the stakes needed for vampire slaying, the Gaelic Scottish and Irish believed it marked the entrance to the other world and the fairies.  Its bad luck to cut its branches unless its in full flower and the flowers are still used today as a decoration for May Day celebrations.


Haw-Sin Sauce

I found this most intriguing recipe from Sarah Head of the UK Herb Society and is adapted from a Hugh Fearnly-Whittingstall River Cottage Autumn recipe.
The haws are not nice to eat raw, similar in texture to rosehips. Its best to pick the haws after an early frost to intensify the sugars in the fruit…but you have to beat the birds.  375 g haws  
200 g honey
250g water
250 g cider vinegar
Salt and Pepper
Wash haws in cold water and remove stalks.   Cook with vinegar and water for 45 minutes until soft.   Sieve, pushing through as much of the softened material as possible.   Measure liquid – to every 100ml of liquid add 100 g of honey.  Put back in cleaned pot and season.      Cook 5-10 minutes to produce the consistency you want.    Pour into sterilised bottles and seal.  You could add other spices if you liked but I will try it first with these simple ingredients.

 Hedgerow to Kitchen – Hawthorn.   This link to the UK Herb Society will introduce you to other Hawthorn recipes including making your own Hawthorn flower tincture with vodka. 

I am in Auckland visiting my daughter Tansy and grandson Beau.  Lucky Beau has a daily pick of strawberries growing in the garden.  

Tansy’s strawberries on a bed of pine needles to keep the fruit dry.


In Dunedin my strawberries are just forming fruits

 As the Hawthorn is considered to be an emblem of hope I am hoping that the blooming Hawthorn will be announcing the start of summer in the South and my strawberries will ripen.

An Unusual Vegetable Pie Turns Carnivore

Friends were coming for dinner on Saturday and the weather forecast said a southerly would hit that evening.    I had a bottle of opened Emerson’s Southern Clam stout in the fridge that I was determined not to waste.   I was curious whether an unusual pastry recipe starring the under rated parsnip would work.  What would happen if I used it with a meat filling instead of the tried and true vegetarian version?

The weather, the stout and the parsnip pastry culminated in the creation of the Beef, Stout and Parsnip Crust Pie for dinner.   I cooked and presented the pie on my pizza stone – its golden glaze, its free form shape with no confinement of a pie dish, its rich stout flavoured meat filling and its sweet nutty flavoured shortcrust pastry made the pie a great hit on Saturday night.  

The pie was served with a side of mashed veggies (that I would normally have put inside the pie) and a spring salad. But wait there was more… to make the meal complete, our friend Kate generously provided us with the first of the season’s asparagus from grower Rod Philip from Palmerston – so delicious!

Instead of wine, we decided to accompany this meal with a selection of fine beers from our local brewery Emersons, and other small brewers 3 Boys from Canterbury, and Tuatara from Kapiti Coast. The beer perfectly with the stout flavoured pie.

Parsnip Pastry

This pastry has a lovely consistency with the subtle sweet flavour of parsnip.
2 1/2 cups flour
2 tsp baking powder
1 tsp salt
90 gms butter cut into dice
250 gms parsnips, cooked, mashed and cooled
Sift flour and baking powder into a bowl.  Add salt and rub butter into flour with fingertips until it resembles breadcrumbs.   (I do this the cheating way with a food processor).  Stir in mashed parsnips until it forms a dough.  (I also did this in the food processor just using the pulse button to avoid over mixing it).
Cover with gladwrap and refrigerate for at least an hour.

Beef, Stout & Parsnip Crust Pie 

Serves 6
Parsnip pastry recipe as above
600 gms stewing or casserole steak
1 onion diced
1 can or bottle of stout or any dark beer
1/2 to 1 cup of chicken stock (or beef stock)
4 tomatoes or 1 can of tomatoes crushed (I used 4 frozen tomatoes from the freezer, let them thaw enough to peel off skin, and crush) 
boutique garni: 2 fresh bay leaves or 1 dried, rosemary sprig, 3 or 4 sprigs of fresh thyme, and parsley all tied together
1 dessert spoon of jam jelly or quince paste
Salt and pepper
Dice the meat into bite sized pieces, put into a plastic bag that has about 1/4 cup of seasoned flour.   Make sure there is plenty of air in the bag, close the top and shake – and hey presto your meat is quickly covered in flour.  
Heat a heavy pan with ghee* or oil and quickly brown the meat off in two batches.   Set meat aside, lower heat and saute onions add any remaining flour with a dash of water to make a liquid.  Add this sauce and the meat to a casserole dish or slow cooker.  The flour thickens the sauce as you don’t want the filling to be too runny. 
Add the tomatoes, herbs and stout or beer and fruit jelly to taste.  The stout can be quite bitter that is why I added some of my rose hip jelly to the meat but any leftover fruit jam, jelly or paste works well.   My son Gus swears by quince paste as an added flavour dimension to dishes.
If you need some more liquid either now or through the cooking process add some stock (I only had chicken stock but you could use beef or vegetable).
Cook at 160C for 1 1/2- 2  hours or until tender.  Stir every now and then and check if you need to add some more liquid.  This can also be cooked long and slow in a slow cooker but you will need most of the day for this process.
Once cooked cool before putting on the pastry.
Roll pastry out into two discs, one bigger than the other (one around 3cm larger for the top).  Place smaller disc onto an oven tray.   Add filling leaving 2-3 cm edge. Brush the edges with a little egg yolk and place the larger disc of pastry over the top. Crimp edges to seal and prick the top all over with a fork.  Glaze with egg yolk and put in the fridge for 30 minutes to rest the pastry before cooking.
Cook at 180C for about 30 minutes.
*I prefer to use ghee these days over polyunsaturated cooking oils like sunflower, safflower, soy or canola because of the high levels of omega 6 in these oils and the chemicals used in their extraction. For more information on this I recommend reading 
or find a copy of“Nourishing Traditions – The Cookbook that Challenges Politically Correct Nutrition and the Diet Dictocrats” by Sally Fallon with Mary G Enig  

Nursery Pie

The parsnip pastry recipe originated from a magazine and was designed as a comforting Nursery Pie  – a pastry casing shaped like a dome and inside a selection of mashed root veggies with feta.    

As the name suggests it is sure to be a popular dish with children. 

Nursery Vegetable Pie
from North & South Magazine
Parsnip pastry (as above)
4 cups cooked, lightly mashed vegetables
1 tsp fresh thyme leaves
1-1 1/2 cups crumbled feta (or would be equally good with the soft and stretchy curd cheese available from Evansdale cheese)
1 egg yolk to glaze pastry
Roll parsnip pastry above out into two discs, one bigger than the other (one around 6 cm larger for the top layer)    Place smaller disc onto an oven tray.   Shape the filling into a dome on the pastry, brush the edges with a little egg yolk, place larger disc of pastry over the top, crimp edges to seal and lightly slash pastry from top to bottom to create texture to pastry.   Chill in the fridge for 30 minutes to let pastry rest, and bake at 180 C for about 30 minutes.   Cool slightly before eating.  Ideally served with hot greens or a salad.

Veggie Mash

This is the mash I served with the pie.   You can use any combination for this but I prefer a ratio of 1/3 potato and 2/3 other vegetables including celeriac, pumpkin, parsnip and carrot.  You could also use kumara.   I simply drain and mash them with a good knob butter as my mother would have done.   The addition of a good oil or butter is important for the vegetables in the mash that contain beta carotene as a greater quantity of the vitamin A can be digested.   On top I put some coriander and hazelnut pesto with strewn calendula petals, and yes you can eat the petals.

Roast Asparagus

I prepared the asparagus as chef Alison Lambert did at her spring cooking class. Put the snapped asparagus into a long dish sprinkled with oil, salt and pepper (I used my favourite avocado oil as it can take heat).   Quickly tip the prepared asparagus onto a preheated to hot oven dish in a 200C oven and cook until just tender.  This only takes about 5 minutes.  Serve with a squeeze of lemon juice and if you like a light grating of Parmesan cheese.

The Word on Parsnips

The parsnip used to be the top root vegetable in medieval times as it was a good source of starch over the cold winters and even thought to have aphrodisiac properties.   Parsnip wine is still one of the most popular country wines made in England. The carrot took over this pale sweet root as the most popular in the 19th century and only recently is making a come back.  
As a Southlander I know that the parsnip (and the swede) is at its sweetest after a good frost so when I run out of parsnips I prefer to buy my parsnips from Wairuna Organics from South Otago at the Dunedin farmers market.   Time in the ground and the frost converts the starches to sugars.

  •  Parsnips are high in soluble fibre which helps to lower cholesterol and regulates blood sugar
  • Parsnips have half the calories of potatoes, but also half the protein and vitamin C of potatoes
  • A good source of folic acid that is a vital B vitamin for healthy childbirth, reducing heart disease, may prevent dementia and osteoporosis bone fractures
  • Contains manganese, calcium, magnesium and iron
  • Contains potassium which is a good aid to blood pressure
  • Its recommended as food for those who want to lose weight as the fibre makes you feel full and the sweetness will help alleviate hunger pangs. Discovery Health Weight Loss Foods – Parsnip

Growing Hints

Parsnips are easy to grow although germination can be tricky.  Use fresh seed, sown thickly. To assist in good germination pour boiling water over the row once sown.
As they take a long growing period you should have them planted by the second week of November.  
As the roots grow long they do require deep friable soil to avoid forking and stunted growth.
If you get a good strike you can thin the parsnips as they grow and the thinnings are good raw in salads.

A Special Stout from Emersons

My brother Don has convinced our excellent local brewery to revive Cowie’s Bulls Head Troopers Stout that was once drunk by the thirsty Otago Mounted Rifles during World War One.   This special edition of stout has been brewed to celebrate the opening of the new military exhibition at Toitu Otago Settlers Museums on December the 8th.   And I love the label – well done Emersons!
Don (Dr Don Mackay) discovered the story of this beer while researching his book The Troopers’ Tale: The History of the Otago Mounted Rifles.  It’s a history of the campaigns, war horses and troopers of the Otago Mounted Rifles.  The history really suits readers who love war history, and the many break out stories gives the non-historian the human story behind the Otago Mounted Rifles. Don gathered a lot of these break out stories from families of the troopers and spent many, many hours interviewing people.   
We are so proud of our brother Don for producing such a wonderful record of Otago and Southland history through the stories of men who were tough, brave and great horsemen – you could say they were the true southern men.     
If you want to know more about the book go to: The Troopers Tale
The stout will be available from Emersons and selected outlets – contact Emersons to find out more details – Emersons Brewery, Dunedin
There won’t be any opened unfinished bottles of the Troopers Stout allowed in the Mackay family fridges…but if there is  –  well I am sure the Troops would appreciate this very good pie.   
Brewer Alec Cowie, an officer in the Otago Mounted 
Rifles, supplied his regiment’s camps with beer including the troops massed at Tahuna 

Park in 1914 waiting to embark overseas during the First World War. 

Roasted Cauliflower Salad and Shepherd’s Purse

Mark Twain once said of the cauliflower, “a cabbage with a college education”.   He was right about the cabbage connection because both come from the same vegetable family (Cruciferae) as does broccoli, rocket, brussel sprouts, bok choy, mustard greens, radishes, kale and even the swede.

Today it seems to me that the cauli has been overlooked for its green cousin broccoli.  This could be due to the way cauliflowers were served up to us as kids.  How many of you think of cauliflower cheese when a cauliflower comes in view?   Because it’s not green we somehow think the white curd of cauliflower doesn’t share the same good food properties as broccoli.  How wrong we are!

Roasted cauliflower, red onion and toasted almonds on a bed of rocket

While there are still some cauliflowers about I would like to share with you a winning recipe from “Pipi the cookbook”.   I have served this frequently as a warm salad option to much acclaim as it brings out the true nutty flavour of cauliflower.   It can be served cool but I wouldn’t serve it chilled because it will lose flavour.   It’s a good salad to have when the weather is still not that warm.  The secret is roasting the cauliflower and onions and letting the orange and olive oil dressing soak in while still hot.

Cauliflower and Almond Salad with Orange Dressing

A recipe from Alexandra Tylee of Pipi restaurant in Havelock North with my suggested variations (serves 4)
Preheat oven to 170 C
For the Salad
2 red onion (or white onion) peeled and cut into wedges
1 particularly splendid cauliflower, cut into 2cm wide florets
½ cup toasted almonds
small bunch parley
1 Tbsp red peppercorns (I didn’t have these so I used sliced semi-dried tomatoes) 
For the dressing:
100 ml olive oil
juice of 2 oranges
1 dessertspoon Dijon mustard
½ tsp sugar
Salt and pepper

Heat a large oven tray, oil the onion before placing on the hot oven tray and cook until soft and starting to brown (about 30-40 minutes)
The cauliflower is dressed with oil as per the onions and place on the second half of the hot tray 20 minutes into cooking the onion.  It takes 20 minutes for them to be soft all the way through but not mushy (stir frequently).
While this is cooking prepare the dressing.
Once vegetables are cooked put them into a bowl and pour dressing over immediately
I usually lay a bed of green leaves on a platter and then the salad.  I find rocket a good peppery addition.  The greens will soak in the plentiful dressing. Cover with almonds. parsley and red peppercorns  (or any other colour addition to the dish like calendula petals, or finely sliced red peppers when in season).   I have often replaced the parsley for chervil because of its delicate leaf and aniseed flavour.   
I like to serve this salad on a long glass platter
I made this salad over the weekend for friends and as I could only find one small cauli at the market, I did 50/50 broccoli/cauli and it still worked well.  I cook the cauli a little longer than the broccoli.   You could use all broccoli if you prefer.  I ran out of almonds and used freshly shelled and roasted walnuts instead and it was just as delicious – you could also use hazelnuts. 

If you have a small cauli you need to halve this recipe.  There is plenty of dressing in the recipe and I usually have some leftover to toss through a green salad as well.  Otherwise, the dressing will keep for a week in the fridge.

The Cruciferous Group

Named Cruciferous because of its flowers.   They have four equal-sized petals that form  a crucifix or cross-like shape.   Any of you growing rocket will notice as weather warms they quickly bolt to flower and their white flowers have this distinctive cross shape. (By the way I use the rocket flowers in salads).  But the name “cruciferous” is undergoing change.   Scientists are now starting to favour the term “brassica vegetables” instead, and that makes sense if you are a gardener.

Left Italian Kale flowers, centre Rocket flowers, right wild roadside brassica flowers

This family of vegetables come out on top of the nutrient charts.   Scientists have been studying them for their cancer prevention qualities.   It’s suggested you eat vegetables from this group at least 3 times a week, preferably five times, and have a serving size of a cup and a half.  Like carrots they are better cooked with oil or butter to get the most of the beta-carotene and minerals.

Alison Lambert, the Otago Farmers Market chef, has a really good quick recipe for sauteed cauliflower.  I witnessed her turning around previous haters of cauliflower with this method of cooking.
Simply Cooked Cauliflower – Alison Lambert

If you want to know more about the cauliflower and cruciferous vegetables with research references then I recommend plunging into this site…
WHFoods: Cauliflower

For selecting and storage of cauliflowers

Cauliflower will keep in the refrigerator for a week but it should be stored with the stalk down so that air can circulate and no moisture gets into the curd (head).

Always pick a cauliflower with a white firm curd – not starting to separate.
Cauliflower will keep much longer if it still has its green protection leaves in place.
Cauliflower will turn yellow in alkaline water, to keep white add a little milk or some lemon juice to the water.

The curd or head of the cauliflower will become discoloured and bitter tasting if exposed to too much sunlight.   So once the curd reaches the size of a tennis ball, pull up 3 or 4 of the outer leaves and tie them loosely around the curd – this is called blanching.  It is usually ready to pick within a week or two after blanching.   
Plant them early spring and in late summer.   They require rich soil that retains moisture – and a fortunate run of weather because they will bolt if too cold or too hot and dry.
I have to admit I haven’t had a lot of success with cauliflowers and usually opt to buy them from the market.  They are a bargain when I think how difficult it is to grow them.   I thought this year I would have another try with the 6 purple caulis seedlings I planted a few weeks ago. 

The pouches of the Shepherd’s Purse


Shepherds Purse was the first plant I remember learning about in primary school – I was fascinated by its name and the heart shaped pouches.   
It was named because the fruit resembles the shape of the purses carried by the shepherds of Bethlehem. Through the centuries it has also been called Witches’ Pouches, Poverty Weed, Mother’s Heart, Poor Mans Pharmacy and many more. 
I had no idea that this little “weed” was actually related to the cauliflower until I discovered it on the Cruciferous family list.

You can eat all of this plant – the little seed pouches are peppery and can be added to soups for an added zing and the dried roots have been used as a substitute for ginger – no less! Its used as a food in Japan, China and Korea.   
It’s had a history of use as a medicinal herb and is supposed to stop bleeding. In China it’s used to reduce fertility and is traditionally used in childbirth because of its uterine-contracting properties. 

Usually found on waste or roadside land as a pioneering plant, its a weed that appears on poor or recently disturbed soil.  If it’s growing in abundance in your garden then it’s an indication that your soil needs some help. Rather than pulling it up immediately why not let it do some of the work for you by absorbing excess salts and turning them into organic compounds.   

For more information on this super little weed take a look at this link
Shepherd’s Purse Herbal History

Shepherd’s Purse growing along Portobello Road

Shepherd’s Purse is in its full fruiting glory on the Otago Peninsula.   It’s going to seed just like its cousins rocket and kale – indicating to me that it is warming up here in the south…..a little. 


The Incredible Edible Egg and Sorrel Tart

One of Kerry’s biddy Faverolle hens – added artwork by Kerry

One of Kerry’s biddy Faverolle hens – added artwork and photo by Kerry   

I have learnt that not all eggs are equal.  A well grown egg is a complete food. 

“Eggs provide protein of the highest quality plus all known vitamins and minerals (except vitamin C)” David W Rowland Health Naturally.   
I buy free range eggs on animal welfare grounds and I believe that a healthy happy hen must produce a better tasting egg, but I had no idea that a battery-hen egg didn’t have the same nutritional value as a true free range egg.   I am so lucky I get access to home grown eggs from my neighbours Rob and Claire and my sister Kerry.    I think Kerry’s hens are the luckiest hens I have ever met.   They roam amongst her orchard and live in a dream hen house with a view of the city and harbour. 

Sorrel Pie can be made in this long tin or a round pie dish, recipe from “Riverford Farm Cook Book”

Sorrel has lemony sharp flavour that heralds the fresh flavours of spring.   The tartness of sorrel goes perfectly with creamy eggs so I just had to share this spring time favourite with you all – Sorrel and Onion Tart.

Sorrel and Onion Tart

(serves 6-8)
First make the shortcrust pastry:
175g plain flour*
1 tsp caster sugar
pinch of salt
125g cold unsalted butter (I also have used ordinary butter) cut into small cubes
About 3 Tbsp cold water
Roll out the pastry immediately to line a 24cm loose-bottom tart tin, put in the fridge for 30 minutes while oven heats up to 180C and you begin to prepare the filling.   
Line top of tart with baking paper and cover with beans or rice to blind bake for 15-20 minutes until golden brown, removing the paper and beans for the last 5 minutes.  Remove from the oven to cool before adding topping.   
(Blind baking will avoid the pastry becoming too soggy and is also necessary if the filling is quickly cooked to ensure that the pastry does get cooked.) 


* for short pastry use cake or plain flour because it usually contains less gluten protein. For a good short pastry you need to keep the flour protein strands shortened and you do this by coating the flour molecules with butter.   For bread making you stretch and extend the protein strands by kneading so that the dough is a strong and stretchy texture while short pastry needs to be a crumb texture to give lightness and crunch.


For more info on making pastry go to Radio New Zealand replay to This Way Up


For the tart:
50g butter
1 large red onion (I have used brown onion successfully)
150-200g sorrel
3 eggs
250ml creme fraiche (I have also used sour cream or cream with some lemon juice added)
50ml milk
1 Tbsp grated Parmesan cheese
Salt and Black pepper

Melt the butter, add the onion and cook gently for 15 minutes until soft. (Be careful with red onions not to brown them or they will become bitter).   Cut off the stems (I was shown a trick to remove stems from all sorts of greens by chef Alison Lambert by folding the leaf in half, hold with one hand while pulling the stem in a downward action with the other hand – this is quicker than using a knife).

Slice the leaves roughly – add them to the onion and cook for about 2 minutes.  Don’t despair when the volume will quickly decreases to about 1/3rd  and it changes from a brilliant green to a khaki colour.   You can also add in a few leaves of comfrey to add extra nutrients to your meal.

Whisk the eggs, creme fraiche and milk with half the cheese and season well.   Stir in onion and sorrel mix and pour into cooled blind baked pastry case and sprinkle with remaining cheese.
Place in pre-heated oven to 150C and bake 35-40 minutes, until the filling is set and slight brown on top.   


The pan was full of leaves to begin with, then reduces turning
khaki – not the comfrey leaves they stay green.  I also
used brown onions but red onions look more decorative.

Serve warm with a fresh salad adding a touch of sweetness and colour to contrast with the tart Sorrel Tart.   This is the salad I served – greens of rocket, miners lettuce and chervil (but any combination of greens or lettuce would be fine), cooked beetroot with dressing of honey, balsamic vinegar and olive or avocado oil, and slices of oranges (mine  had been in a jug of cranberry juice which makes them look like blood oranges – I don’t like to waste anything), sprinkled with calendula petals.  Top with a drizzle of avocado or olive oil.


Sorrel (Rumex acetosa)


Sorrel is a garden perennial herb/vegetable easily grown – and I have increased my one patch to many plants around the garden including one in the greenhouse for winter supply.  

Sorrel is high in vitamin A and contains some calcium, phosphorus, potassium, magnesium and vitamin C. 

It’s easily grow from root division and what an asset to have a vegetable that you don’t have to plant every year.   

Sorrel is in the buckwheat family and it’s cousin is the dock.   It looks similar to a dock but the leaves are a beautiful soft green and shaped like arrows.     French sorrel has smaller milder leaves.

Try and collect the smaller younger leaves for the kitchen because they wont be quite so tart.

Keep harvesting it and cut off flower heads to have a continuous supply.  It will want to go to flower when the heat of summer arrives. 

Warning:  the tartness in sorrel is oxalic acid so you must not eat too much of it, especially raw, or you could end up poisoning yourself.   

It has been used in the kitchens of Europe for centuries and has many uses – a finely chopped leaf to a salad or coleslaw to add a zing of freshness, the main ingredient in a traditional sorrel soup, a delicious green sauce that goes well with fish, or added to other cooked greens like spinach, kale or silver beet.

Who better to rave about sorrel than Hugh Fearnley-Whittingstall of River Cottage fame.   I have the link to his article in The Guardian on my Jeannies.Kitchen facebook page – along with other food related links I have found inspiring while researching for this blog and would like to share. 
Hugh’s Guardian article on Sorrel now on Jeannie’s Kitchen facebook

The Incredible Edible Egg – “most complete” protein source in a single food,  so much so that they use eggs for judging the quality of protein in other foods.
Good quality eggs are an excellent source of vitamin A, B1 and one of the few viable sources of vitamin D.
Eggs are high in minerals; an outstanding source of an absorbable form of iron, calcium, phosphorus and trace minerals.
Severe burn patients are fed huge quantities of whole eggs and egg concentrates as a source of protein to rebuild large areas of lost skin.
Free range eggs contain a better fatty acid profile (omega3-omega 6 ratio is almost equal which is ideal) compared to total grain fed chickens where the omega 6 can be as much as 19 times greater than the unsaturated omega 3.

All the information on eggs I have obtained from  “Nourishing Traditions – The Cookbook that Challenges Politically Correct Nutrition and the Diet Dictocrats” written by authors Sally Fallon and Mary G Enig.    Sally has a background in nutrition with training in French and Mediterranean cooking.   Mary has a PhD and is an expert of international renown in the field of lipid chemistry.   She has headed a number of studies on the content and effects of trans fatty acids in America and has successfully challenged government assertions that dietary animal fat causes cancer and heart disease.   Sally’s message is to trust what our grandmothers used to cook and to question low fat diets and polyunsaturated oils.   I am keen to know more about the science of food and I will be using this as one of my key references – so if you question what I have written about eggs or want to know more this book is a good start.


Eggs are a Brain Food

Eggs are an excellent source of long chain fatty acids, that play a vital role in the development of the nervous system of infants and the maintenance of mental acuity for adults.   From Nourishing Traditions by Sally Fallon and Mary G. Enig.

Beau eating his Soggy Soldiers

 That childhood favourite Soggy Soldiers is a fun way of getting kids to eat eggs and I fed my children eggs this way because I was taught by my Mum that eggs are a good infant food.   

Now my grandson Beau loves his Soggy Soldiers….buttered toast slices in finger length strips ready to dip into a softly boiled egg in an egg cup.  

Not many mum’s will know about long chain fatty acids.   Thankfully the knowledge that eggs are a valuable brain food has been passed down from our ancestors – and science is proving this wisdom.


A selection of Kerry’s eggs

The Dominican nuns knew eggs were a brain food.   When sitting school certificate at boarding school we were given a boiled egg and toast for breakfast.   I loved eggs so this was a treat for me.   Ironically my sister Kerry hated eating eggs and here she is now producing some of the best eggs around.  It’s the hens she loves and I am the lucky one who gets the high value free range eggs. 


Now that’s a Chook House!

Kerry’s newly renovated hen house with a veranda so that the nest boxes remain dry and makes collecting eggs a real pleasure.   She was inspired by Pamela Brown (who wallpapered the outside of her house as part of her Master of Arts project) to use wallpapers to decorate the nesting boxes.  She is waiting to see what pattern the hens prefer.
Pamela now runs a gallery out of the Lees Street house and you can follow her on http://www.facebook.com/wallpaperdunedin

Gooseberry Shortcake and Sweet Cicely

Gooseberry Shortcake was my Mum’s signature cake and a firm family favourite.  I think of the gooseberry as a signature fruit of the South around Christmas.  It’s something we can grow really well in this climate and it has so many delicious uses, both sweet and savoury.

Gooseberry Shortcake – a winning combination of sweet cake
and tart fruit in the mouth

I presented this family treat to book club and everyone loved it, so I am sharing the recipe with my book club friends and anyone lucky enough to have gooseberries.    This was made using last year’s gooseberries – they freeze really well.   You can spend time head and tailing them before freezing but I usually do this when I use them out of the freezer, because who has time to do this around Christmas time?  They should be picked green for cooking.  The red gooseberries are good left to ripen and be eaten raw.

Gooseberry Shortcake

175g butter
175g sugar
2 eggs
dash of vanilla
200g flour
3 Tbsp cornflour
1 heaped tsp of Baking Powder

Put oven on at 150 C.
Beat butter and sugar until pale and creamy (best to use a mixer and keep it going for at least 5 minutes at this stage because if you can get the butter and sugar really pale and light it will make for a lighter texture of cake)
Beat in eggs one at a time and a dash of vanilla.
Gently mix in the shifted dry ingredients to make a dough.   You might have to add more flour, or if it is too stiff then add a little milk.   It is a very soft light dough so rolling out can be tricky until you get used to it.
Divide the dough into two pieces – put down some baking paper on a tray, sprinkle with flour as the dough will be quite sticky and roll out into a circle about the size of a large dinner plate – place the still frozen (or fresh) gooseberries onto the dough as below.

Two parts of the shortcake – gooseberry tails are
 those black specks on the left side
Next roll out the top of the shortcake on another piece of floured baking paper making the top slightly larger than the bottom.  Now comes the tricky part….You have to with confidence flip over the top to place on top of the gooseberries, then gently peel off the paper.  Next crimp the two layers together around the edges and with a fork finish the edge with the lines of the fork.   Prick over the top of the shortcake with a fork and place in the oven to cook long and slow – about 40 minutes at 150 C.   When the cake top is no longer shiny it usually means it’s done.
You can use any other fruit – the key is to avoid putting sugar onto the fruit as this makes the cake soggy.
To serve sieve icing sugar over the top – cut into squares or wedges like a pizza.
This can be an afternoon tea treat or served as a dessert with whipped cream and it successfully fed a crowd of 12 at book club.   It has to be eaten that day because the gooseberries make the cake soggy eventually…unless you like it soggy.
Variation: You can replace a little of the flour with some ground hazelnuts or almonds to add to the texture.


Gooseberries are easy to grow and they tend to be quite expensive to buy.    Perhaps it is because their nasty prickles make picking a chore.   My sister Kerry has come up with a great idea of easy picking with espaliered gooseberry plants.

Top: the gooseberry attractively espaliered, and
below: the tiny new fruits – how easy they will be to pick!

Herb:   Sweet Cicely (Myrrhis odorata)

Sweet Cicely belongs to the parsley and carrot family-
Umbelliferae….so does hemlock.

What a sweet herb this is – you can use sweet cicely when cooking fruit to halve the amount of sugar used and is excellent with tart fruit such as rhubarb and gooseberries.   Chop up the leaves to sweeten up a salad – especially good in a salad with its cousin, the carrot.  But you have to be careful!  It looks similar to its poisonous cousin, hemlock.    Hemlock is a darker green with sometimes blotches of purple on the stems, not a soft green like sweet cicely.  When you crush the leaves of hemlock it smells pungent and unpleasant, whereas sweet cicely has an aromatic aniseed odour.    Once you know it is sweet cicely chew on a flower stem – its like eating those old fashioned aniseed balls.  All parts of the plant including the carrot-like root dug up in autumn are edible.

The soft green leaf of Sweet Cicely
Sweet Cicely is a useful herb for the kitchen and a pretty plant to have as a spring-summer feature in the flower garden. It prefers a semi-shade position with free draining soil.  Here’s a good suggestion…. plant it inbetween rhubarb plants – making it convenient to harvest at the same time as rhubarb for use in the kitchen.  It can grow up to 1 metre high and dies down in winter.  

Herbalist Culpepper says, the roots or the leaves of Sweet Cicely can be made into a herbal tea. It has the reputation of aiding digestion, dealing with flatulence, easing stomach upsets, and may help with menstrual pains. It was used as a protection against the plague.
The seeds can also be chewed to help digestion.  It was one of the herbs used by Benedictine monks to make Chartreuse.
Dried sweet cicely seeds can be used as you would use caraway seeds sprinkled on baking or try in apple pie instead of cloves. For more info Herbs-Treat and Taste


Herbs inspired me to garden.   I started using them for cooking and was rewarded with the flavour improvement in my food.  I wanted to learn how to grow them.  Then I discovered the folklore, the uses our ancestors had for curing themselves of all sorts of ills, and the stories of how people for centuries used these plants.   

For my friend Cecylia, I just had to include in my posting that sweet cicely is associated with St Cecylia and was strewn on church floors to add fragrance.  Cecylia, you will now want to grow this plant not only for its sweet uses but for its name.   I will leave you with a beautiful image of St Cecilia.

A stained glass window in the church at St Gerards Monastery, Wellington – Saint Cecilia, patron saint of music

Marmalade…starring grapefruit

Old fashioned primula I got from my mum’s garden..
don’t know its name but its a spring flower favourite

Spring is a busy time in my garden for weeding and mulching with seaweed, but it’s also a time when there is plenty of citrus available.

I have taken a break from the weeding to make a batch of my much appreciated grapefruit marmalade.

The recipe originated from an old Aunt Daisy cookbook and is called “Johnny’s New Zealand Grapefruit Marmalade”. I’ve changed it a little by reducing the sugar and adding coriander seed but the method remains.  It takes a few days to process but this makes the consistency of the marmalade excellent.

It’s a bitter-sweet marmalade and if you like it sweeter increase the sugar or cut back on the amount of peel used. Remember it’s the peel that has the most pectin to assist the setting.

Grapefruit Marmalade infused with Coriander
Marmalade is really a citrus jam and can be made from any combination of citrus.   The name originated in Portugal (Marmelos) and is a quince paste-like jam not citrus.   A Scottish grocer, James Keiller, of Dundee in late 18th century purchased a cargo of oranges on the cheap.   He thought they would bring him a sweet profit but discovered he had bought bitter Seville oranges.   His canny wife wasn’t going to let his error go to waste and created marmalade. Unfortunately as far as I know we don’t get Seville oranges here so we can’t make the original bitter orange marmalade.   Now that could be interesting… to try a combination of quince and citrus.   

Johnny’s NZ Grapefruit Marmalade

For every pound of fruit add 3 pints of water (500 g of fruit to 1500 ml of water).
I first cut the fruit into 4 and cut out the pips (keeping them aside).  I use the slicer fitting on my food processor to slice the fruit finely.  It can be sliced by hand but this could take quite a while. Put fruit into a large glass or ceramic bowl.  I take out any large pieces of peel and set aside.   I then put in the chopper blade on my processor and finely chop up the large pieces of peel and add to the bowl.
Tie up the pips into a piece of muslin and add to the bowl.   
Cover and sit in a cool place for 36 hours to soften the fruit.
This is the fruit soaking not yet cooked

Next in a large stock pot bring to the boil and simmer gently for an hour to 1.5 hrs until the fruit softens.  If you like add a muslin bag of coriander seed ( I use a tbsp of seeds slightly crushed for 3 lbs of fruit) for a flavour infusion.

Coriander tied in a muslin bag cooked with the fruit

The coriander gives “that extra something” to the flavour and if you wanted your marmalade more spicy you could try adding star anise.  Sometimes I use brusied cardamon pods instead of coriander – you can experiment!   Put the pulp back in the glass or ceramic bowl to sit for another 12 hours.

The fruit pulp after simmering with the coriander

The final step is measuring the pulp cup by cup into the stock pot and heat.    Measure the equivalent of 3/4 cup of sugar to every cup of pulp, and add an extra 1/2 cup of sugar for about 10 cups of pulp.   You are best to cook no more than 10 cups of pulp at a time – I usually divide the marmalade into two.   At this point you can also opt to freeze the second portion if you haven’t the time to cook both.
Put a saucer into the freezer and the oven on around 150  to heat and sterilise the jam jars.

Add sugar to hot pulp and stir until all the sugar has dissolved.  Bring to a rolling boil.  It takes  longer than jam to set.  Check for setting after 20 minutes. As it gets to a good setting point the pulp is thickening.  If you are cooking less than 10 cups the setting will happen more quickly.
To test drop some of the marmalade onto the cold saucer and see if it sets. When you push it with your finger and it wrinkles on top your marmalade is done.
Juice of a lemon assists in the setting at this point and the foam disperses if you add a tsp of butter.
Put your hot jars on a wooden surface and with a small jug carefully fill the jars with the hot liquid.  Once they are filled you then cover with cellophane jam tops by dipping them to make them wet one side only into a saucer of water and carefully stretch over the top of the jars.  Secure with a rubber band. If using jars with preserving seals, wipe away any spillage with a damp paper towel to ensure the seal works properly.  I tend to save up and re-use jars rather than buying new ones.   The advantage with the seals is that there will be no evaporation of the jam so it will keep well for over a year… my marmalade never lasts that long.

Making marmalade does take time but it is a lovely gift to give to friends and family.   If you haven’t made it before I would suggest you start with a small quantity and experiment with what flavour or level of sweet and bitter you prefer for your “signature marmalade”.
You can also mix and match with all sorts of citrus.

If you want to compare bought marmalades you can go to this link from Target:
Season 13, Ep 22 – Marmalade – Product Check – Target – Shows – TV3

Grapefruit

Half a grapefruit is a great way to start your day.   It’s tart and tangy taste with an underlying sweetness gives you over 70% of your daily value of vitamin C and 20% of vitamin A.  
 If you want to know more about the health benefits of grapefruit go to this link:
You can make an interesting salsa with grapefruit, adding coriander leaves and chilli.  It’s good as an easy dessert  – made special by coating the cut side of a grapefruit half with honey or dark cane sugar and put under the griller for a couple of minutes to caramelise. 
I have discovered from Judith Cullen’s “Cooking Classes” recipe book a recipe I am keen to try.  

 Grapefruit Relish (great served with fish)

2 red onions thinly sliced, 2 tsp olive oil, 2 fresh small red chillies, 2 Tbsp brown sugar, 1 Tbsp red wine vinegar, 1 large grapefruit peeled and chopped.
In a saucepan heat the oil and saute onions and chilli for about 15 mins until golden and caramelised. Add the grapefruit, sugar and vinegar to the onion mix and simmer gently until the mixture has a jam-like consistency (about 8-10 mins).

This is actually a hedge line – photo taken
in the Larnach Castle gardens.

A chemical in Grapefruit may mess with some medications making the drugs too effective, e.g. if taking pills for high blood pressure eating grapefruit may cause your blood pressure to drop too low.  
Pink or ruby grapefruit has lycopene and the benefits increase if you consume with green tea – so consider replacing the good old British cup of tea for green tea with your toast and marmalade.  
Regular consumption of lycopene-rich fruits such as tomatoes, apricots, pink grapefruit, watermelon, papaya and guava may greatly reduce a man’s risk of developing prostate cancer – Asia Pacific Journal of Clinical Nutrition (Jian L, Lee AH, et al.)  

I liked the way the gardeners have allowed this
 stray daffodil to stay in the garden at Larnach Castle 


I would like to share with you my visit to Larnach Castle gardens on the Otago Peninsula.  It took my friend Jane from Christchurch to get me to visit the gardens.   We both had heard head gardener Fiona Eadie talking on National Radio about the gardens and passing on her knowledge on what plants need.  The key is good soil made by mulching and leaving alone as much as possible.   

I must say I was totally impressed by the design and variety of the gardens.  Everything was mulched and looking so healthy and I think I will buy a garden pass for $20 so that I can see it again in summer.   Nine to Noon Mon 10 Sept Fiona Eadie

If you want to know more about Larnach Castle go to www.larnachcastle.co.nz